The latest version of EHCP force has some bugs is the email system when installing on Ubuntu 24.04, so this version has those bugs fixed.
If and when EHCP force get fixed, we will resort back to the official version.
If you inadvertently installed the latest official version of EHCP force, click HERE to find out how to fix it.
EHCP force is the main software that we are going to install on your server, it controls almost everything to do with websites and email.
The EHCP force installer automatically installs several packages that we need, so we don’t have to mess about installing them manually.
So, lets get right to it.
Logon to your server using your PC and putty.
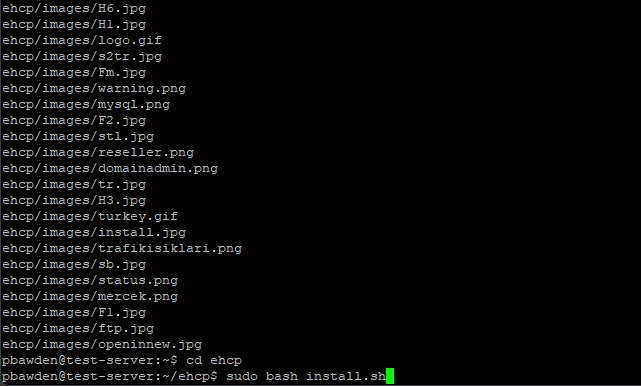
Copy this script.
Code: Select all
wget -O "ehcpforce_stable_snapshot.tar.gz" -N https://downloads.ghostnetwork.co.uk/fixes/ehcpforce/2404/may25/ehcpforce_stable_snapshot.tar.gz
tar -zxvf "ehcpforce_stable_snapshot.tar.gz"
cd ehcp
sudo bash install.sh
cd ..
Right click on the flashing cursor in Putty to paste it in. (not need to select paste, just right click to paste)
Press enter.
The installer should start to run…
You may need to press enter to run the last command in the script…… (sudo bash install.sh)
As always you may need to re-type your password.
The installer will continue…

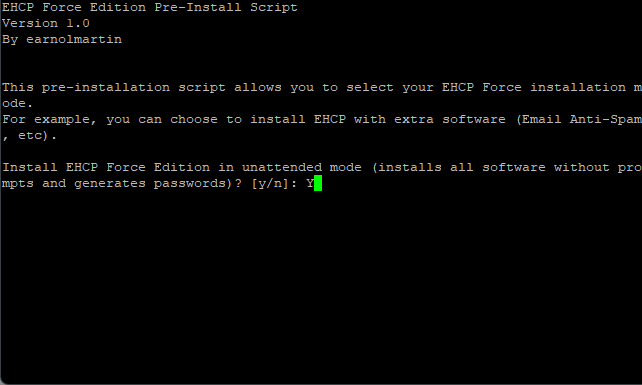
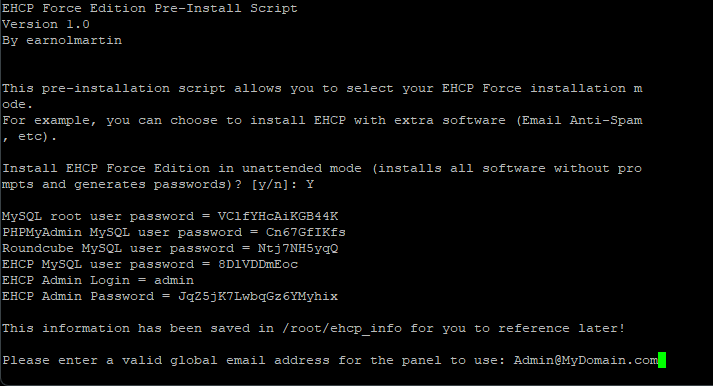
First you be asked “Install EHCP Force Edition in unattended mode”
It is very important to say YES to this, so type Y and press enter.
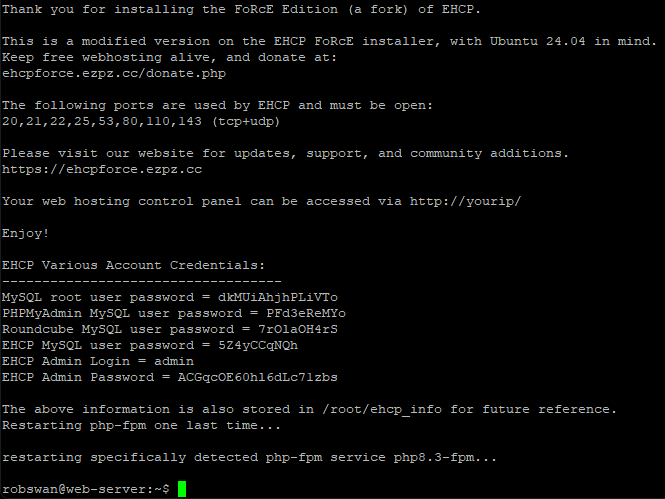
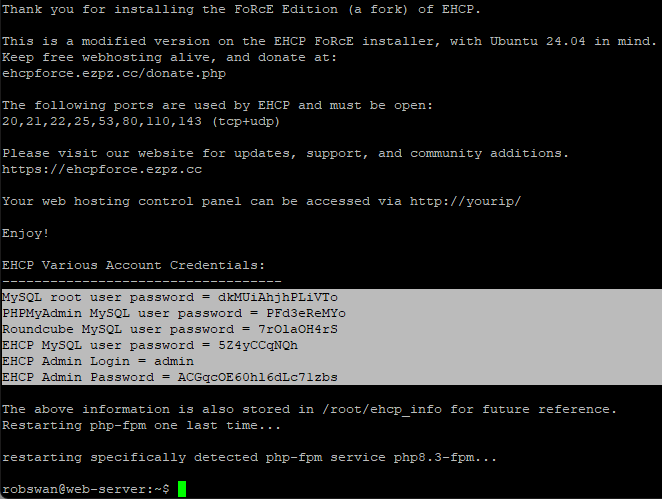
On screen you will be given some user names and passwords, you don’t need to make a note of these yet!
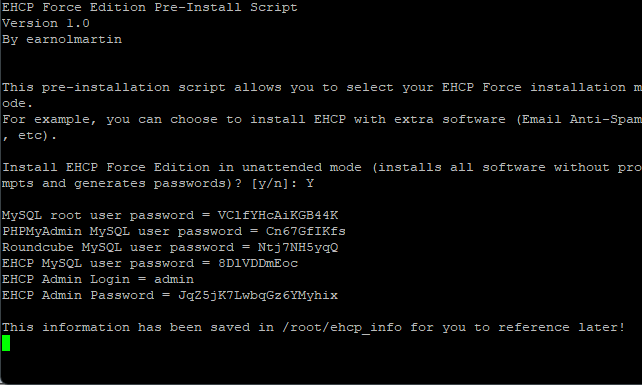
Please note, the credential in the above screen shot are not mine, nor will they be the same as yours, they are just an example.
Next you be asked to enter a global email address for the panel.
For this a strongly recommend you use Admin@YourDomain.com (replace YourDomain.com with your actual domain name that you purchased for your server)
Type the email address and then press enter.
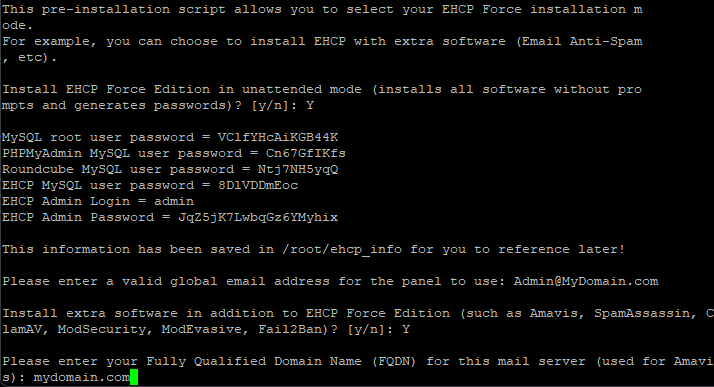
Next you will be asked “Install extra software in addition to EHCP Force Edition”
Again, it is very important that you say YES to this, so type Y and press enter.

Next you will be asked for your “Fully Qualified Domain Name” or FQDM. This is the domain name that you purchased for your server (without WWW etc) for example MyDomain.com.
So, enter your domain name and then press enter.
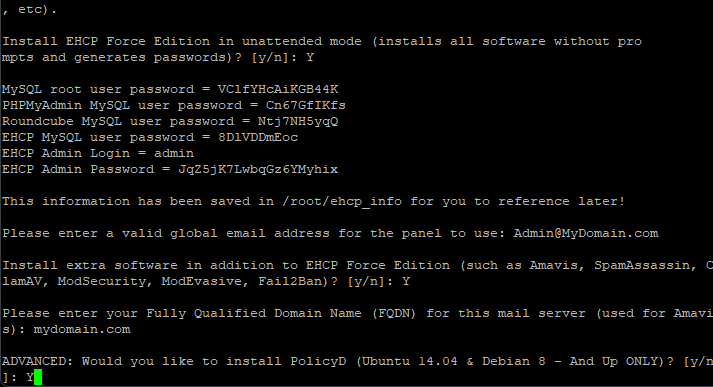
You will now be asked “Would you like to install PolicyD” , say YES to this also (type y and then press enter)
You will now be asked about your servers time zone.

The chances are, you will need to change the time zone, so answer no to this (press n then press enter).
The system will now tell you what your time zone shoud be based on your IP address.
So, assuming this is correct answer yes (press y then press enter).

Next, you be asked about the “Default web server software to install”, for this type apache and then press enter.

The installation will now continue, which will take a while.
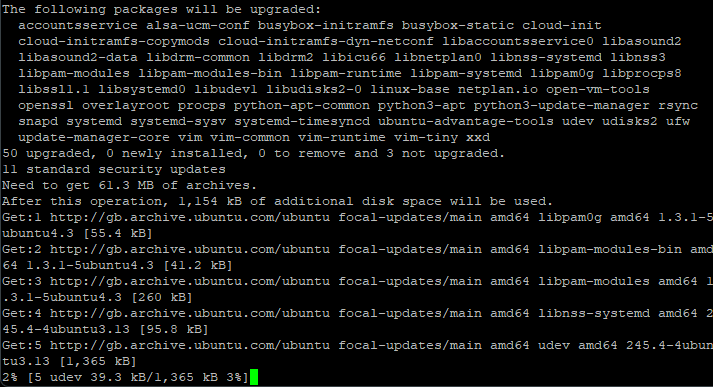
If you notice any error messages scrolling past during the install, just ignore them, most of them are just due to EHCP force working on more that one Linux distribution, and therefore not significant to us.
When the installer, completes you will be shown all the user names and password again.
Open notepad on you PC, next with the mouse highlight the user credentials within PuTTY (this will copy them, no need to select copy or press any keys)
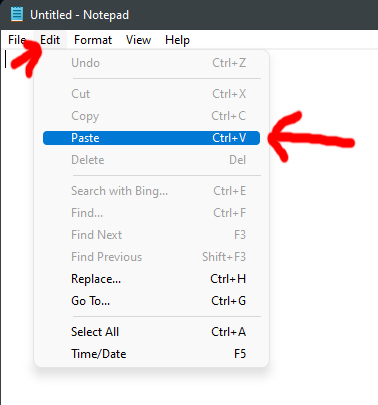
Within Notepad, click on the Edit Menu, and then Paste.

Then using the file menu in Notepad save then user credential somewhere safe on you PC.
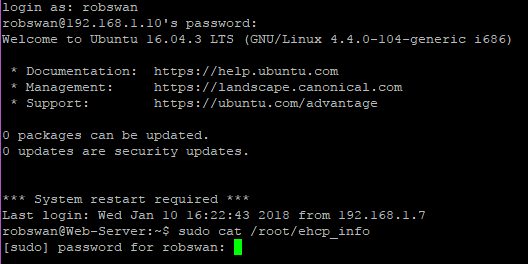
If you need to retrieve these details at any point in the future you can do so by logging into your server on your PC using PuTTY and typing the following command.
sudo cat /root/ehcp_info (press enter)
You may as always need to re-enter your password. This will display them on screen.
IMPORTANT:
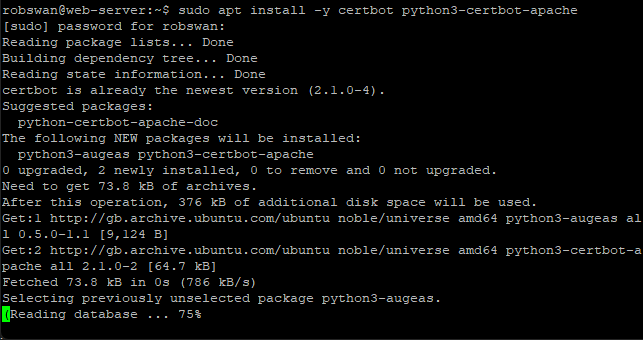
Before we are done, there is another package we need to install called Certbot-apache.
Certbot-apache, used to get installed with EHCP force, but for some reason that I personally don’t understand it does not anymore.
So, issue this command (in PuTTY).
sudo apt install -y certbot python3-certbot-apache

As always you may need to retype your password.
Press, y (enter) to install it when asked.
Ok, EHCP force has been installed on your server, so for now at least you can log out of PuTTY by typing exit and then pressing enter.
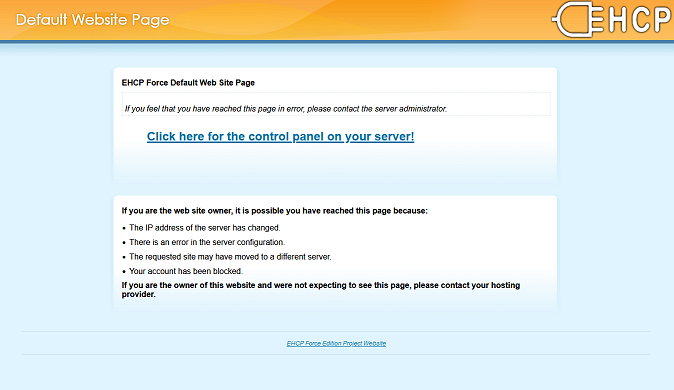
To test EHCP force open your web browser, and type your server local IP address into the address bar (press enter).

If all went ok you will see the EHCP force default page.
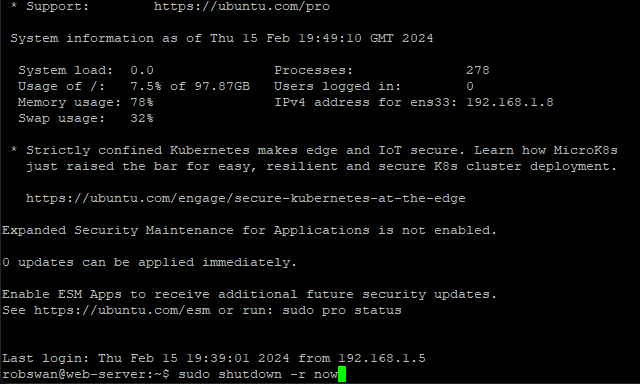
If you don’t see then default screen, you could try a server re-boot, to do this simply log back into your server using PuTTY and issue this command.
sudo shutdown -r now (press enter)
As always you may need to enter your password again.
Once the server starts the shutdown process, PuTTY will give you an error message to tell you that it has lost the connection.
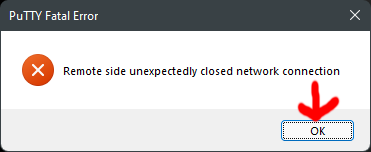
You should click ok, and then close PuTTY using the cross in the top left corner (Windows close icon).
Give your server at least 5 minutes in order to fully complete the re-boot, then open your web browser and try again.
If it still does not work and you are 100% sure you typed the correct IP address into your browser, you should consider that your server’s hardware may have a fault or is not compatible. Also, it could be that you did something wrong, so it is worth checking through all the steps again.
If all else fails, then try again using a different old PC or Laptop as your server.
Important:
When updating EHCP force, you MUST use the update script from this site, otherwise you installation may stop working.
That it, we are all done here.