Installing PuTTY
Putty is a very simple windows application that it used to access your servers command prompt (sometimes called root or console). This is the best way to access your server as it makes life easier especially due to its copy and paste function.
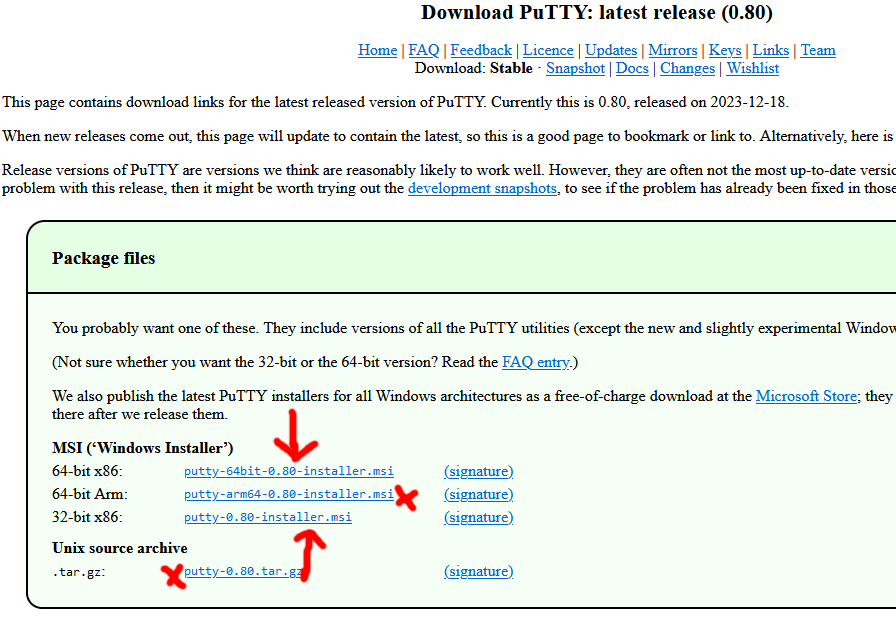
There are two versions of PuTTY, one is a 64 bit version and the other is 32 bit.
Most modern PC’s have 64 bit processors, so most people should download the 64 bit version, however if you are not sure, or you have a very old PC then you should download the 32 bit version.
The easiest way to download PuTTY is to use these direct download links.
64 Bit Version.
https://the.earth.li/~sgtatham/putty/latest/w64/putty-64bit-0.83-installer.msi
32 Bit Vesion.
https://the.earth.li/~sgtatham/putty/latest/w32/putty-0.83-installer.msi
If you prefer to download it by visiting the PuTTY website here is the link.
https://www.chiark.greenend.org.uk/~sgtatham/putty/latest.html
On the PuTTY download page click on the download link for the version you need.
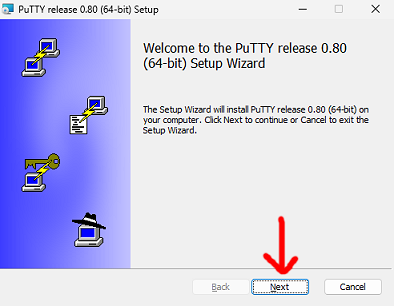
When you have PuTTY downloaded, double click the file to start the installer.
Ok, so on the first screen of the installer just click Next.
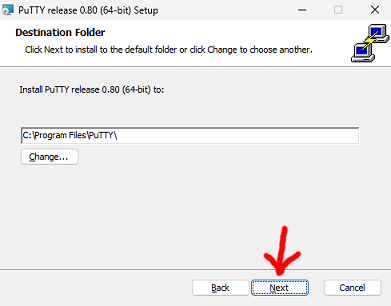
Then its Next again.
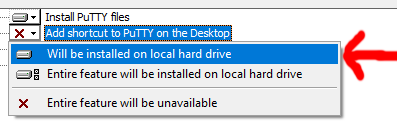
On the next screen click on the option “Add shortcut to PuTTY on the desktop”.
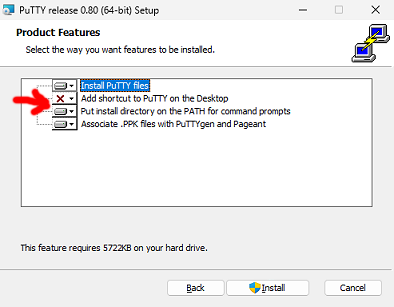
Then click “Will be installed on local hard drive”
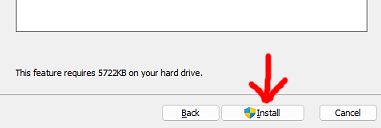
Now, click install.
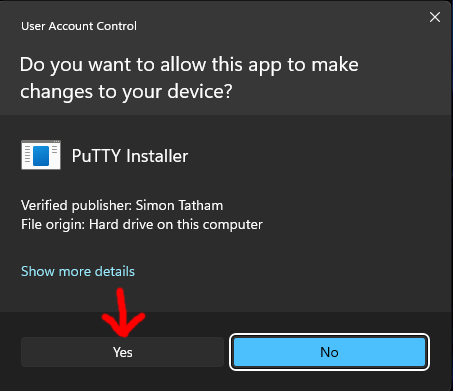
Say yes to the Windows User Acount Control question.
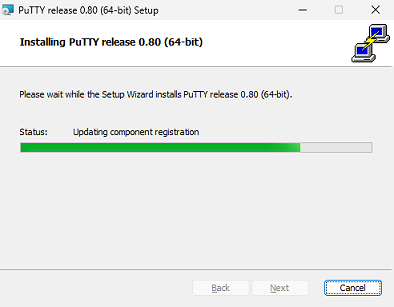
Wait for PuTTY to install.
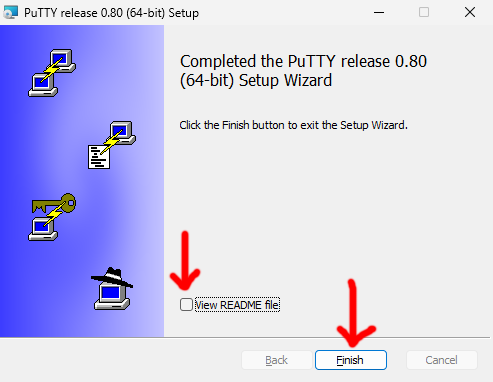
Uncheck “View README file” (click to remove tick from the box), then click Finish.
PuTTY should now be installed.
How to use PuTTY
Open PuTTY.
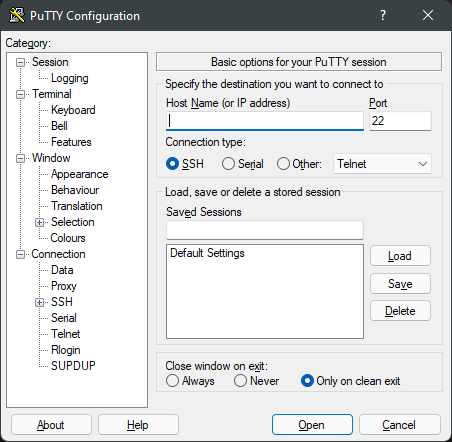
You don’t need to do any configuration, the only thing is to make sure the connection type is SSH.
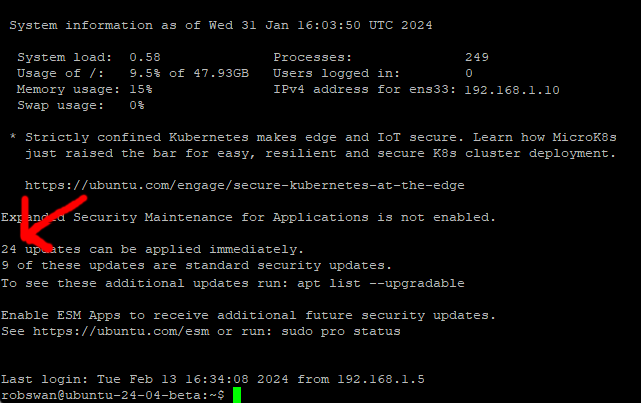
In the Host Name (or IP address) box, type your servers LOCAL ip address (if you don’t remember it, then you can log into your router to check) in my case this is 192.168.1.10
Next, just press enter.
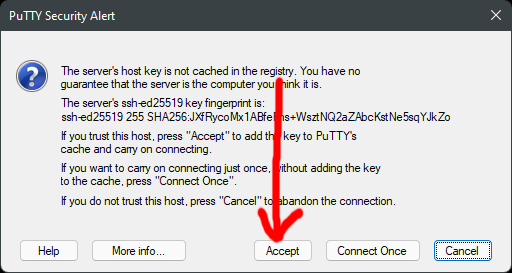
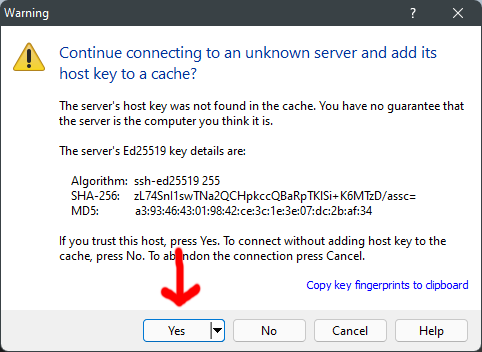
The first time to connect to your server you may get a Security Alert message, just click Accept as we trust our own server.
You will then (all being well) get your servers logon screen.
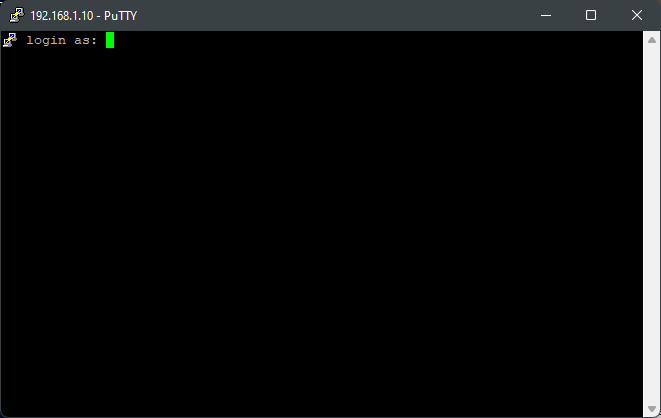
Just log on, in exactly the same way you would if you were physically using your server.
Don’t worry if you server is saying it needs some updates, as this will be done when we install EHCP force.
At this point I would suggest you practice copy and paste as PuTTY does this bit differently to normal windows.
To copy something simply highlight it, no need to press anything or select copy, to paste something simply right click on the green cursor (again no need to press or select anything) maybe open word and practice this with few bits of text. The copy and paste function in windows is the same as always.
Copy and paste is something we will be doing a lot, it is a good idea to get to grips with this.
When you have finished playing (if you have any text pasted just press enter to go onto a new line, your server may respond with something like command not found) you can just type exit and press enter to close Putty and log out.
Installing Win SCP
WinSCP is a piece of software that you can use for file management of your server, it provides a graphical user interface (GUI) of the file structure of your server much like the Windows explorer.
There is no longer a direct download link (that I can find) for WinSCP.
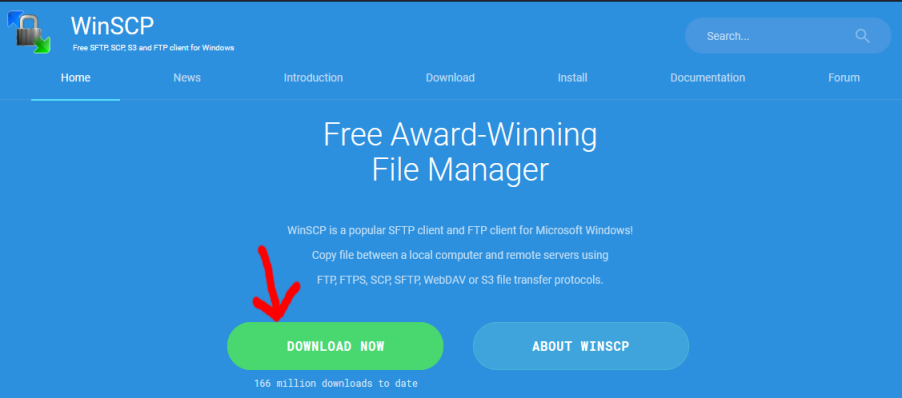
Please download it from the WinSCP website, here is the link.
https://winscp.net/eng/index.php
Click on “DOWNLOAD NOW”.
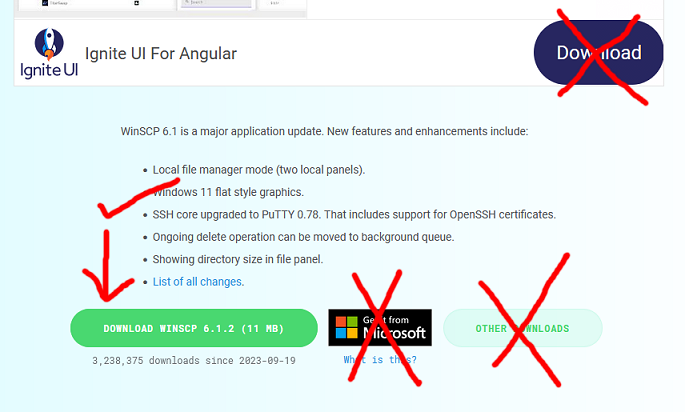
On the next screen, scroll down and click the green "DOWNLOAD WINSCP" button. Be careful not to click on any download links in any of the adverts.
Run the file you just downloaded to start the installation of WinSCP.
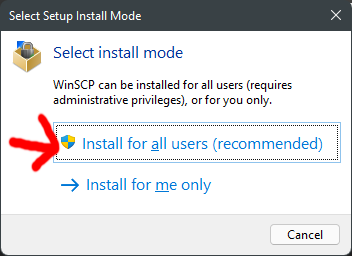
On the first install screen, click “Install for all users”
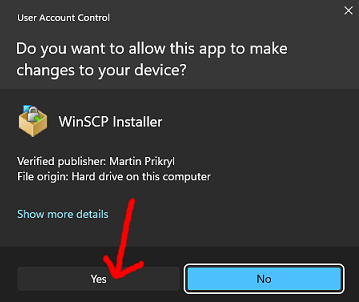
Say yes to the Windows User Acount Control question.
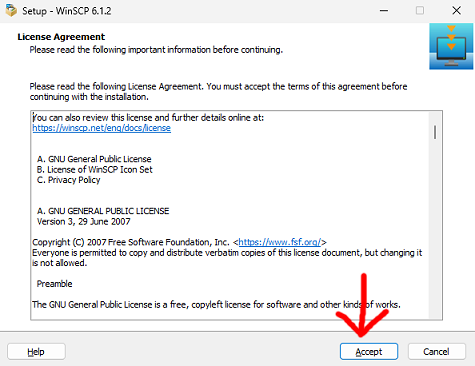
On the next screen, accept the licence agreement.
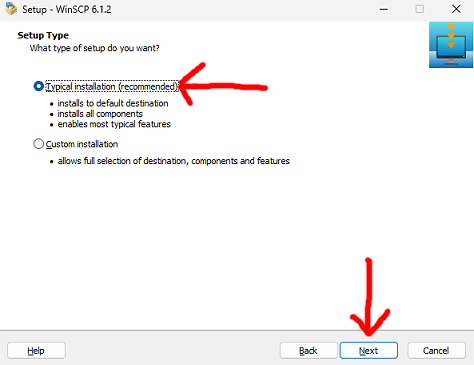
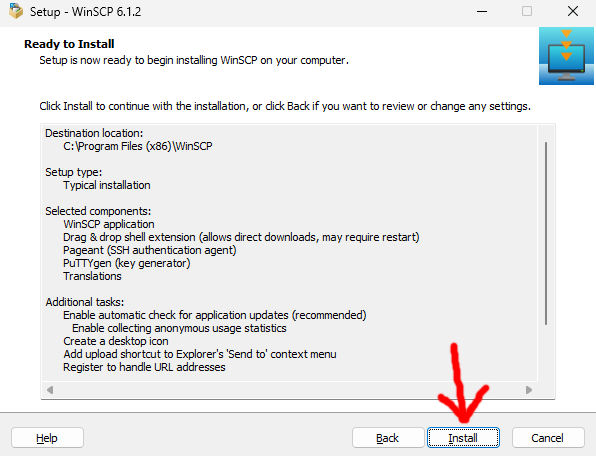
On the next screen, make sure “Typical installation” is selected and then click Next.
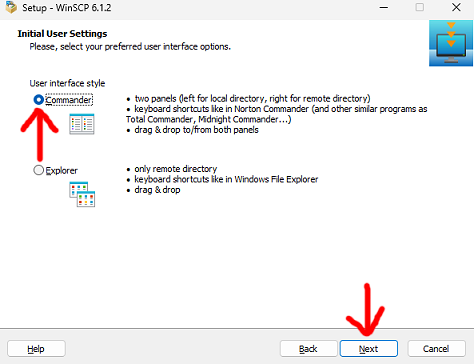
On the next screen, make sure “Commander” is selected and then click Next.
Next click Install.
On the next screen, uncheck both “Launch WinSCP” and “Open Getting started page” (click on box to uncheck), then click Finish.

WinSCP should not be installed and you should have a desktop shortcut.
The Basics of using WinSCP
OK, when you are ready launch WinSCP.
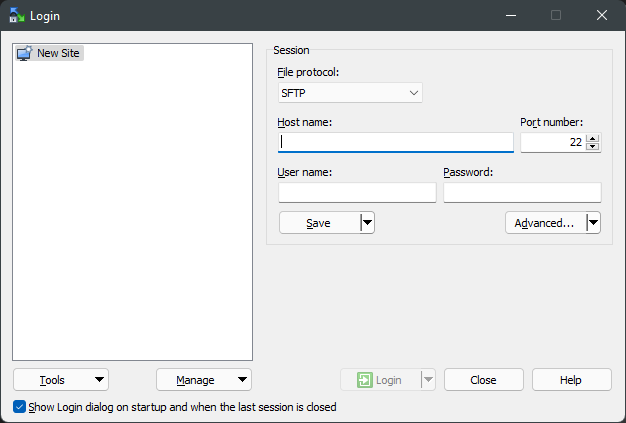
Use the dropdown box “File protocol:” and select SCP.
In the Host Name box, type your servers LOCAL ip address (if you don’t remember it, then you can log into your router to check) in my case this is 192.168.1.10
In the “User name:” box type the same user name that you use to log into your server from PuTTY or direct, and then type your password into the password box.
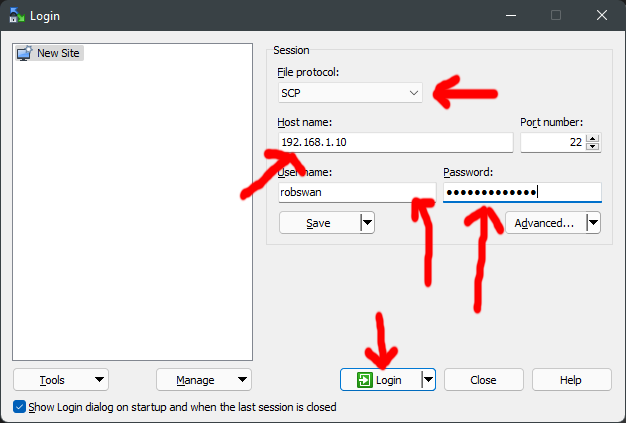
Next click Login.
Just like in PuTTY, the first time you login to your server with WinSCP, you will have to click “Yes” on security warning page.
Wait for WinSCP to login to your server.
Ok, the right hand pane is your server and the left hand pain is your local PC.
As you know, we have not yet installed any software on your server, so they won’t be much to look at.
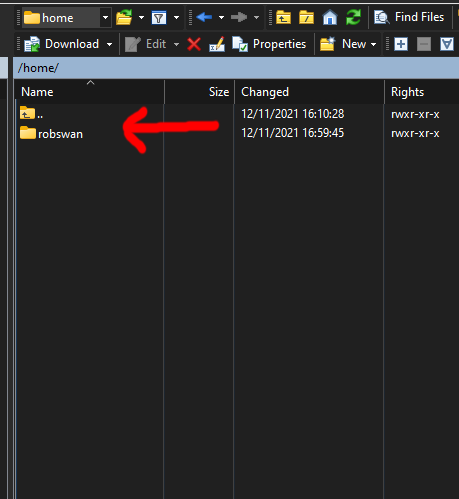
Just for practice, in the server pane (right hand) click the up arrow folder icon.
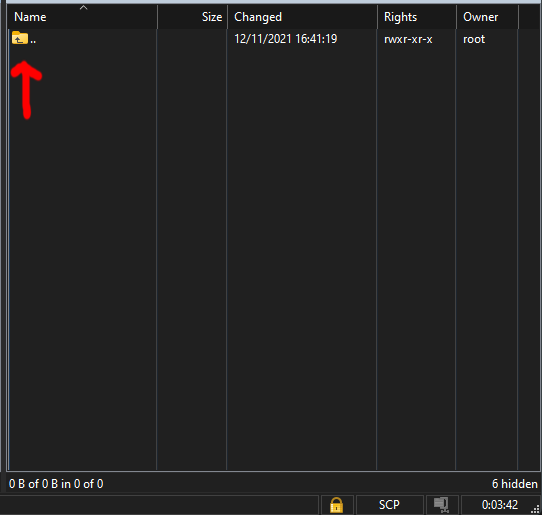
You should see a folder the same as your user name, and another up arrow folder.
Now, we are not here for any particular reason, so we are not going to change anything, so be careful not to do so.
The folder with your user name is called your home folder, and the up arrow will take you to your server root or base directory.
Maybe spend some time to have a look around and get used to the navigation.
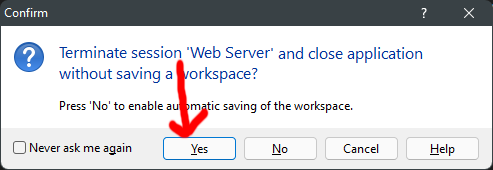
When you are done just close WinSCP with the cross as you would any windows application, then click Yes to Terminate session.
That’s it we are finished with WinSCP for the time being.
FileZilla
As an optional extra piece of software you could download and install FileZilla, its really not necessary though.
FileZilla is and FTP client which you would use for uploading website files to your server.
For the most part though you can use WinSCP for this, but some people do prefer FileZilla for this job.
I stopped using FileZilla a while ago, in my opinion it has become way to buggy, I always use WinSCP for FTP these days.
Personally, I would not bother, but it is up to you, it certainly won’t do any harm.
If you do decide to use it then it can be found at this website.
https://filezilla-project.org/
It’s the FileZilla client you want and not the server.
I am not going to give you a step by step for this, as I don’t recommend FileZilla.