Each time a device connects to your router, it is a assigned a local IP address which can be different each time, the router uses something called DHCP to do this (Dynamic Host Configuration Protocol).
Local IP addresses tend to start with 192.168.1, it’s the last number that DHCP can change, so a device may be assigned 192.168.1.174 for example.
It is essential that your server has the same local IP address forever, we can set this from within your router (browser based) control panel.
It is also important that your good Windows PC has a static local IP address also, this is mainly for security as you will be controlling your server from it.
We also have to set something up on your router called Port Forwarding, all this means is that certain types of incoming connections will be passed directly to you server to be dealt with.
For example, if someone opens a web browser and tries to visit your website, they will be passed though your router directly to your server, which in turn would then serve your website to their browser.
Now each router is slightly different, I have included how to set these things up on a Technicolor (yes that is the correct spelling) and a Netgear router.
I cannot cover all the router makes, as this post would be way to long, however most routers are similar so I hope you can work it out.
We will, from now on refer to you good Windows PC just as your PC!
Before we start make sure your server is turned on and connected to your network (you don’t need to be logged in).
How to configure a Technicolor router.
Please note, the screen shots may differ due to software versions, however the options should remain almost the same.
Using your PC, open your browser, and type 192.168.1.1 into the address bar.
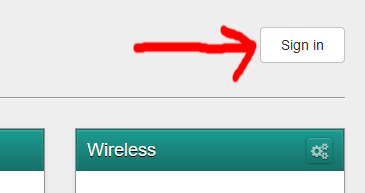
You should be greeted by the Technicolor Splash screen.
Click, the sign in button (top right).
If you have not logged into your router before the username will be admin and the password should be admin also, or the password could be the access key printed on the router, the wireless key or even the serial number, however the default login can vary depending on the model. If you find you cannot log in consult the router manual.
If you have previously changed the password, then use your password.
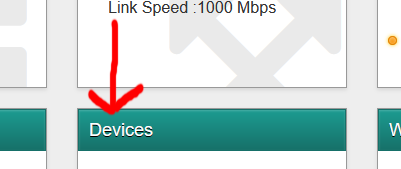
Once logged in click on Devices.
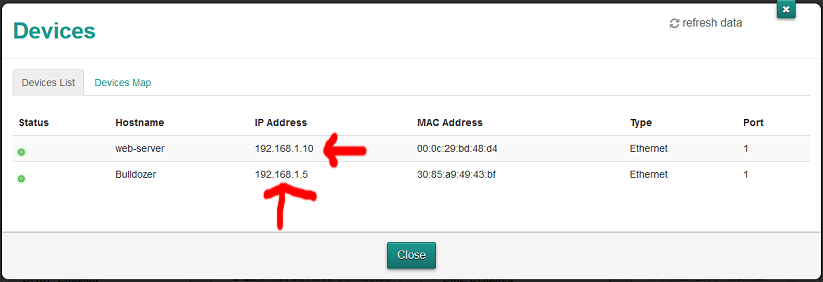
We should now see a list of devices connected to your router.
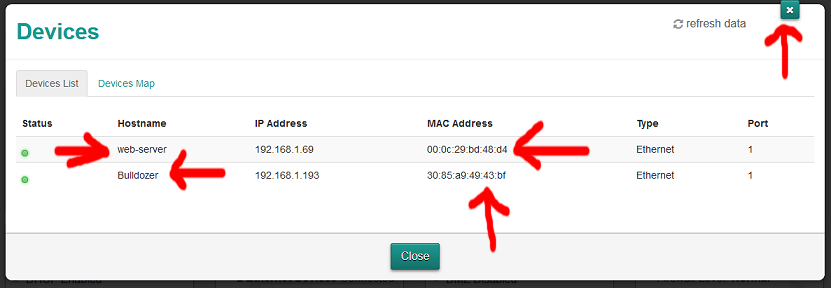
I have kept it simple for the example, so as you can see, I only have 2 devices connected.
The first device is our webserver and second device (Bulldozer) is the PC.
You need to make a note of the Hostname and MAC address for both your PC and your webserver.
Ok, close this screen with the cross in the corner (or the close button).
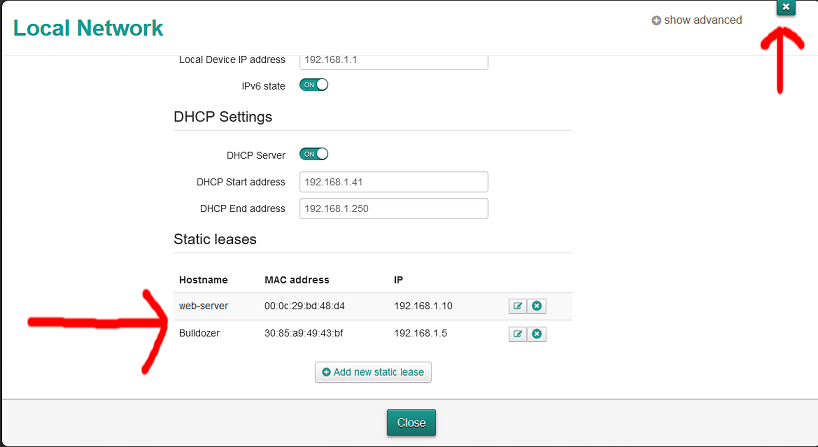
Next click on Local Network.
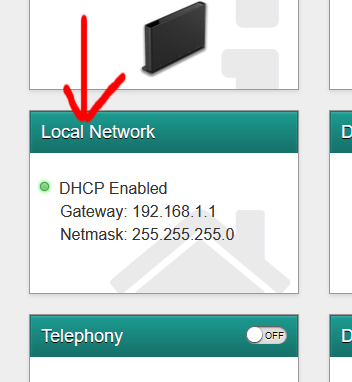
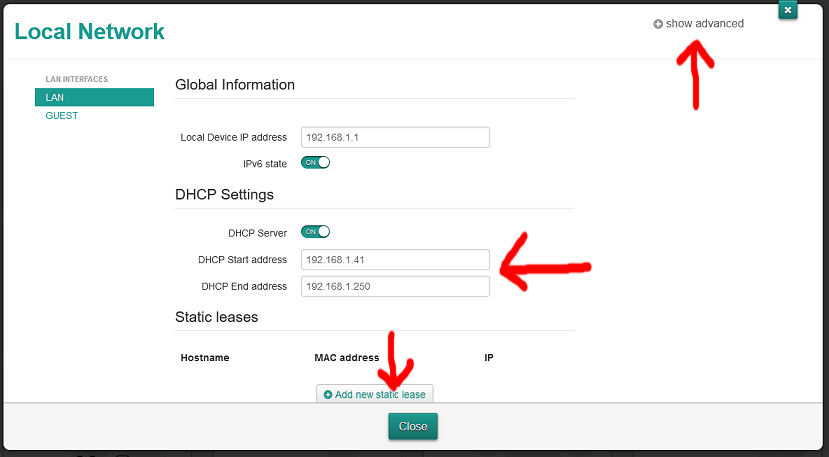
As you can see the range for DHCP is 192.168.1.41 to 192.168.1.250 (on some versions you may have to click show advanced to see the range).
We need to use static IP addresses that are not in the range of DHCP otherwise they may be ignored by the router software.
I am going to use 192.168.1.10 for the webserver and 192.168.1.5 for the PC, I suggest you do the same.
Next, click Add new static lease.
In the Hostname box, type the Hostname from the list of devices (web-server) for your server, in the MAC address box use the drop down and select the correct one for your server and in the IP box type 192.168.1.10.
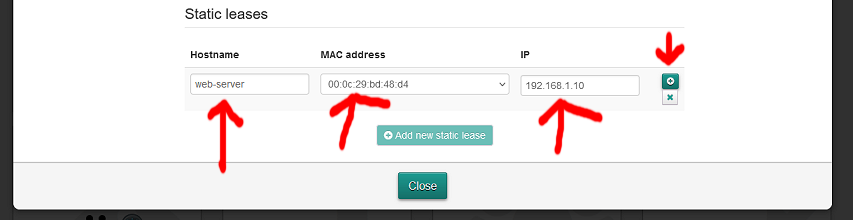
Check you have not made any mistakes then click the + button.
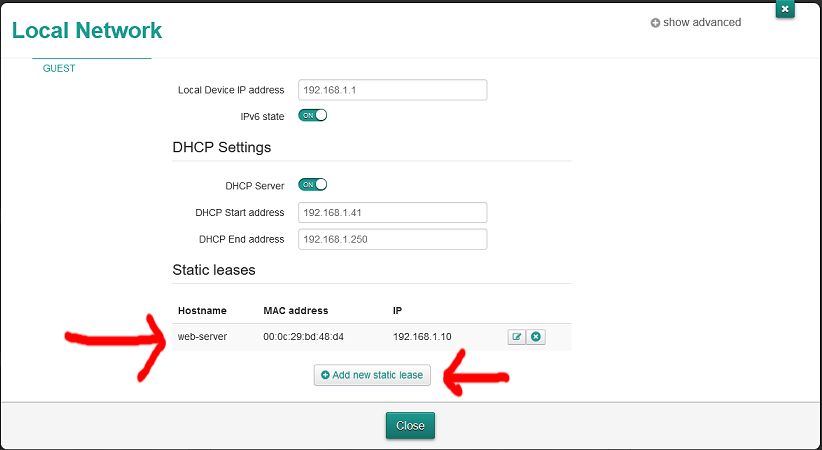
Next click Add new static lease again.
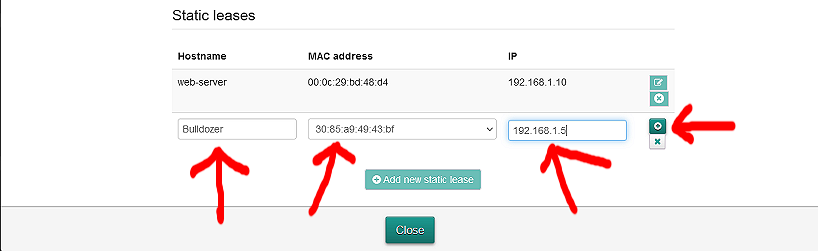
Do the same as the above for your PC, but this time type 192.168.1.5 in the IP box.
Ok, close this screen with the cross in the corner (or the close button).
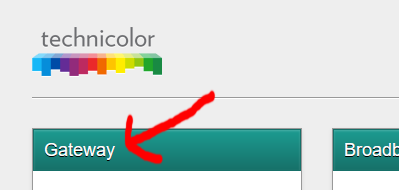
Next, from the main router screen click Gateway.
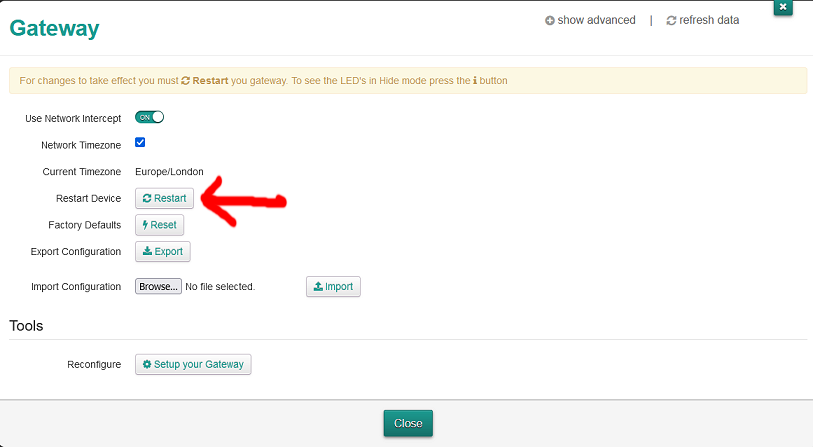
Scroll down slightly and the click Restart (DO NOT CLICK RESET).
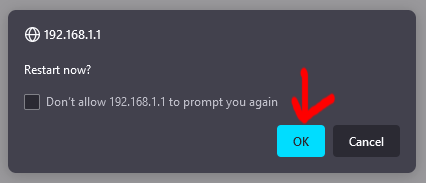
You may need to click OK.
Now, please wait for your router to reboot.
When your router has fully restarted, please log back in.
Next, click on devices again.
The IP addresses for the attached devices should now have changed to what we set them too.
Ok, close this screen with the cross in the corner (or the close button).
So, that is the static local IP’s set up, next we need to do the port forwarding.
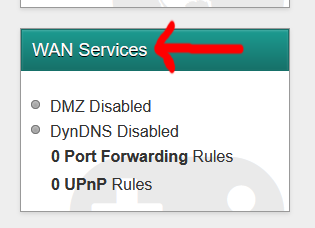
Please click on, Wan Services.
Next, click on Add new port mapping.
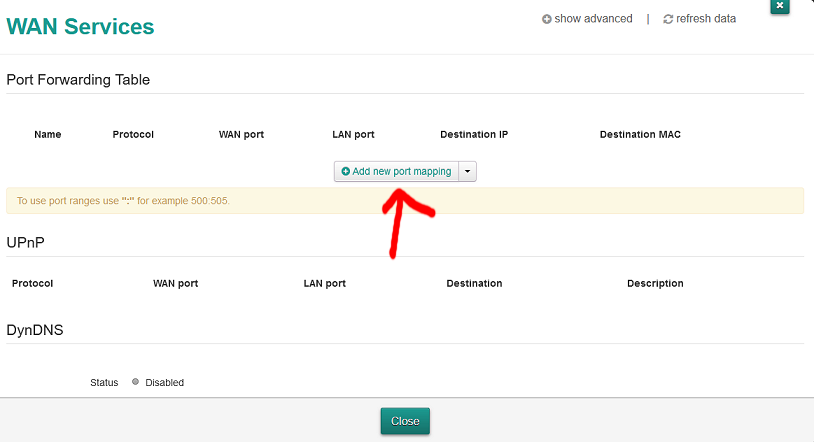
In the name box please type HTTP, for Protocol select TCP/UDP, For WAN port its 80, for LAN port its 80, and for destination IP its your server local IP address.
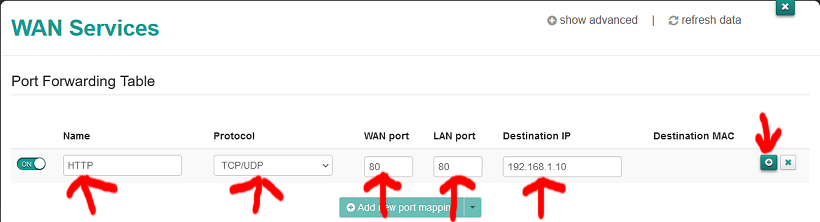
When you are sure it is correct click the + Button.

Next, using the method above add each of these.
Name: DNS, Protocol TCP/UDP, Wan / Lan Port 53, Destination IP (Your servers Local IP Address)
Name: HTTPS, Protocol TCP/UDP, Wan / Lan Port 443, Destination IP (Your servers Local IP Address)
Name: POP3, Protocol TCP/UDP, Wan / Lan Port 110, Destination IP (Your servers Local IP Address)
Name: IMAP, Protocol TCP/UDP, Wan / Lan Port 143, Destination IP (Your servers Local IP Address)
Name: MYSQL, Protocol TCP/UDP, Wan / Lan Port 3306, Destination IP (Your servers Local IP Address)
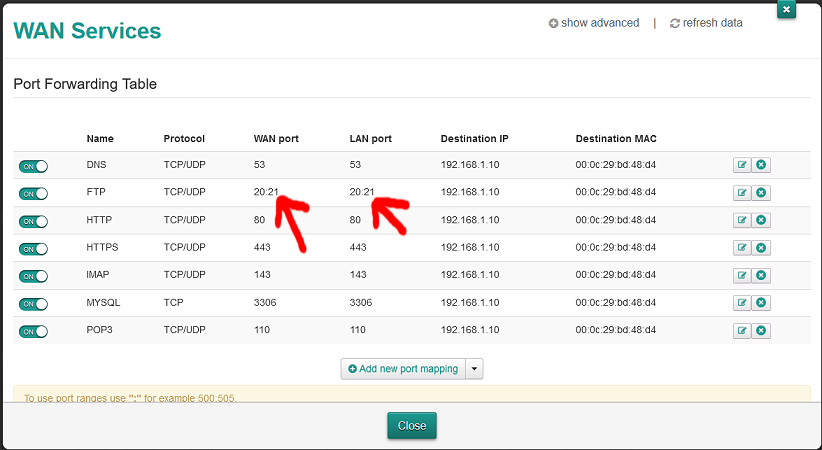
The next on is slightly different as it should have 20:21 in the both the Wan port and also the Lan port.
Name: FTP, Protocol TCP/UDP, Wan / Lan Port 20:21, Destination IP (Your servers Local IP Address)
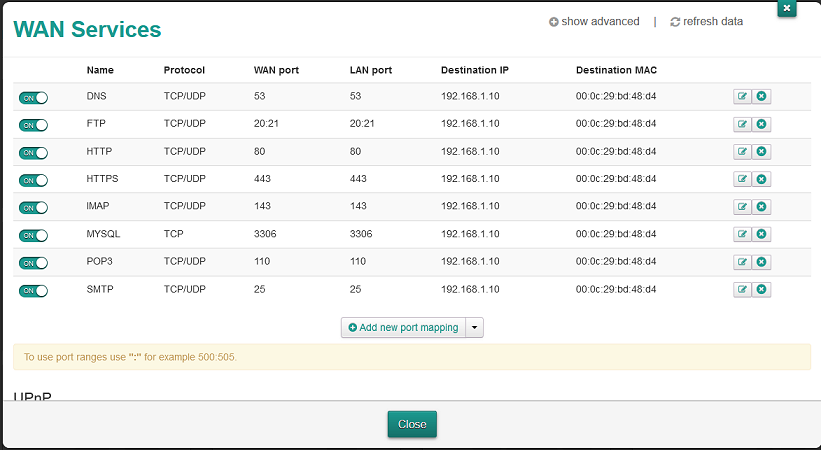
Then add this one.
Name: SMTP, Protocol TCP/UDP, Wan / Lan Port 25, Destination IP (Your servers Local IP Address)
WARNING ABOUT PORT 22 SSH.
This port represents a security risk.
Maybe it is not such a good idea to leave this port open all of the time, if you intend to do most of your server command line (and file structure) work from home (on the same local network as your server) I would maybe not actually set up port forwarding for port 22.
It is not essential, if you are not connecting to your server’s command line when you are away from home.
I will in the FAQ section of the guide, show you how to change this port number for better security.
YOU HAVE BEEN WARNED!
I have included SSH, but that is your call.
Name: SSH, Protocol TCP/UDP Wan / Lan Port 22, Destination IP (Your servers Local IP Address)
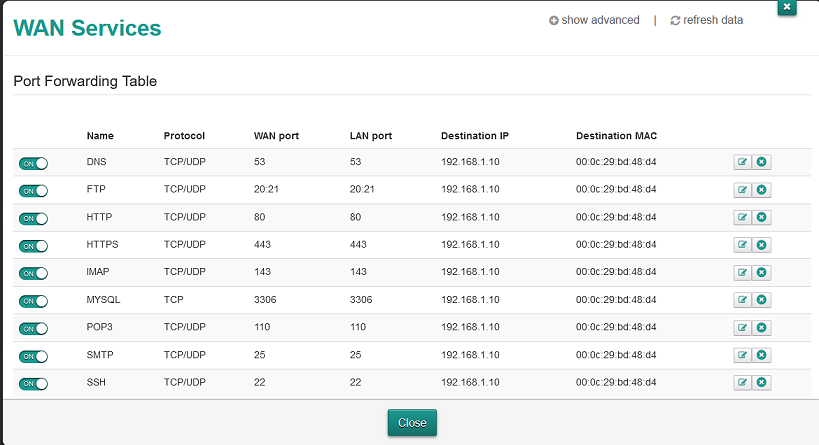
Ok, close this screen with the cross in the corner (or the close button).
Believe it or not we are almost done, we just need one last reboot.
So, as before from the main router screen click Gateway.
Scroll down slightly and the click Restart (DO NOT CLICK RESET).
You may need to click OK.
Now, please wait for your router to reboot.
Once the router has rebooted, you can close your browser window as we are done!
How to configure a Netgear router.
Please note, the screen shots may differ due to software versions, however the options should remain almost the same.
Using your PC, open your browser, and type 192.168.1.1 into the address bar.
You, should be asked to log into your Netgear router.
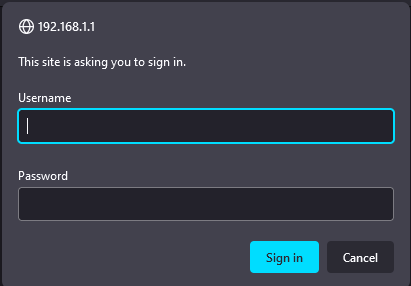
If you have not logged into your router before the username will be admin and the password should be password, however when you first set up your router you may have set your own password.
If you have previously changed the password, then use your password.
If you find you cannot log in consult the router manual.
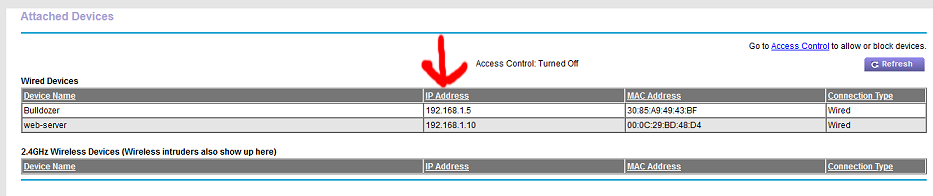
Once logged in, from the navigation at the left, please click Attached Devices.
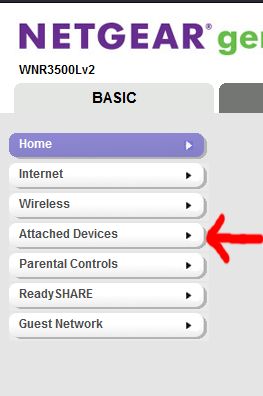
We should now see a list of devices connected to your router.
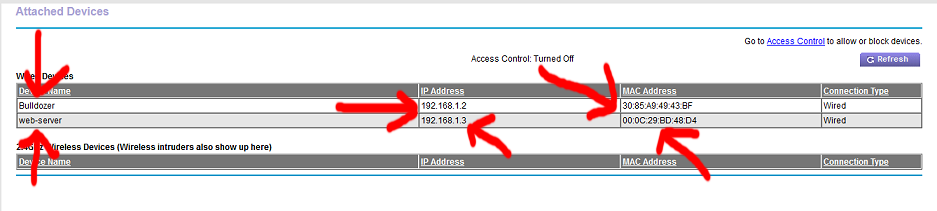
I have kept it simple for the example, so as you can see, I only have 2 devices connected.
The first device is our PC (Bulldozer) and second device is our Webserver.
Please make a note off the device names, the current local IP addresses and the MAC addresses of our webserver and our main PC.
Please ignore any other devices you may have connected.
I am going to use 192.168.1.10 for the webserver and 192.168.1.5 for the PC, I suggest you do the same.
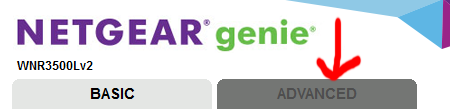
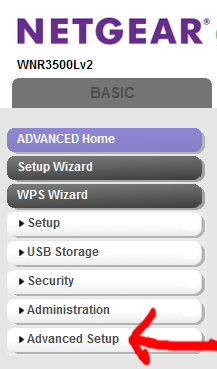
Next, click the ADVANCED tab near the top.
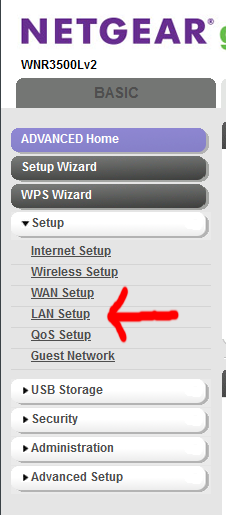
Next, from the left hand menu click on Setup.
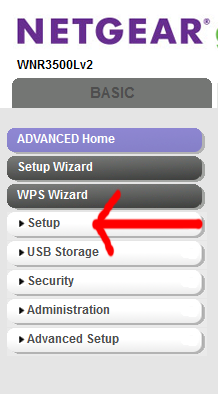
Clicking Setup, should have opened a sub menu, from that please click LAN Setup.
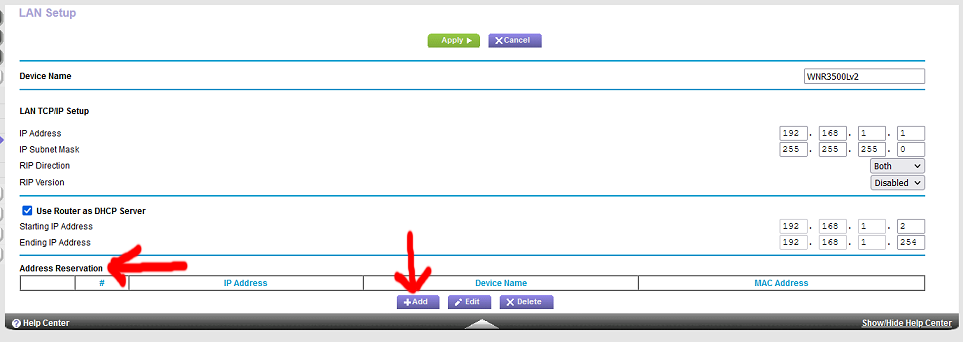
Next, at the bottom under Address Reservation, please click +Add.
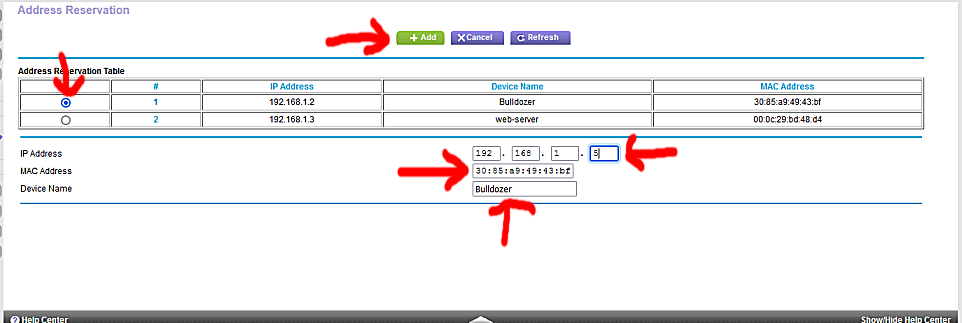
In the first column of the table click to select your PC, then change the last number of the IP Address to 5.
Make sure both the MAC address and Device name are correct for the PC, then click +Add.

You should notice, under Address Reservation your PC has been added.
Next, click +Add, again.
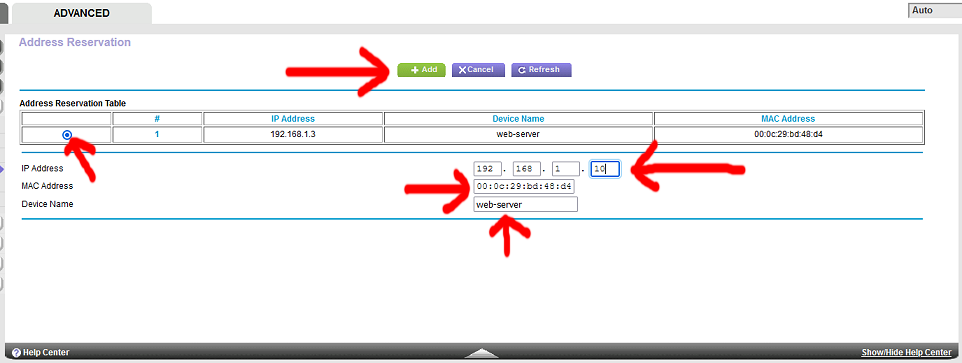
In the first column of the table click to select your webserver, then change the last number of the IP Address to 10.
Make sure both the MAC address and Device name are correct for the webserver, then click +Add.
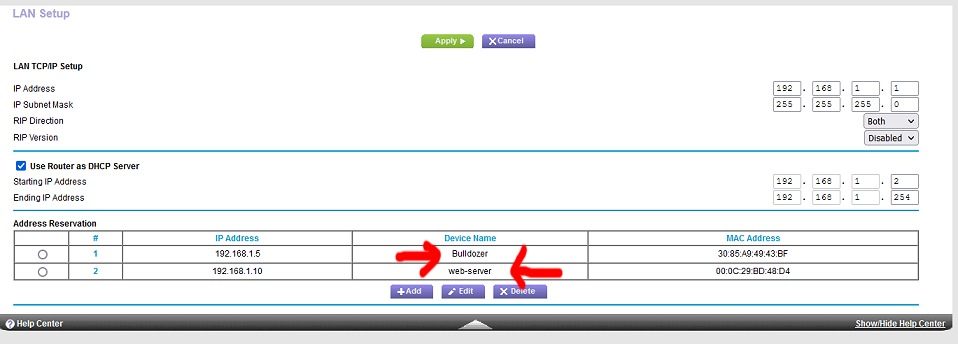
Both our PC and our webserver, should have now been added to the Address Reservation table.
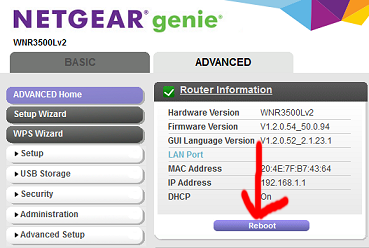
Next from the top, please click BASIC.

Next, click the ADVANCED tab near the top again.
Then click REBOOT.
Then, click OK to confirm you wish to reboot.
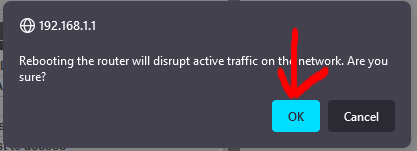
Please now wait for your router to fully reboot.

When the router has rebooted, please log back in.
If you see this message, please click Yes.

Once logged in, from the navigation at the left, please click Attached Devices again.
We should now see a list of devices connected to your router, with your PC and webserver using their new Local IP Addresses.
So, that is the static local IP’s set up, next we need to do the port forwarding.
Next, click the ADVANCED tab near the top, yet again.
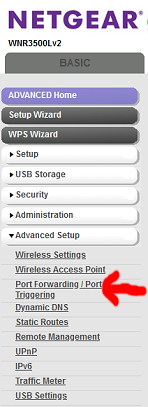
From the left hand menu, click Advance Setup.
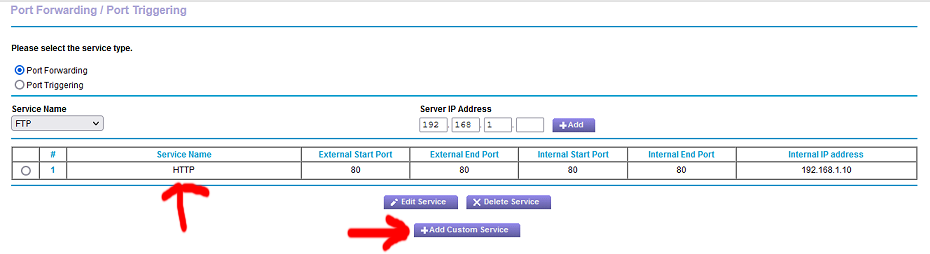
A sub menu will open underneath, from that menu click Port Forwarding / Port Triggering.
Next, click +Add custom service.
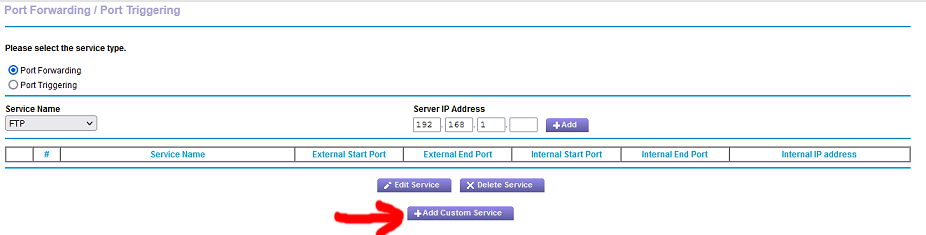
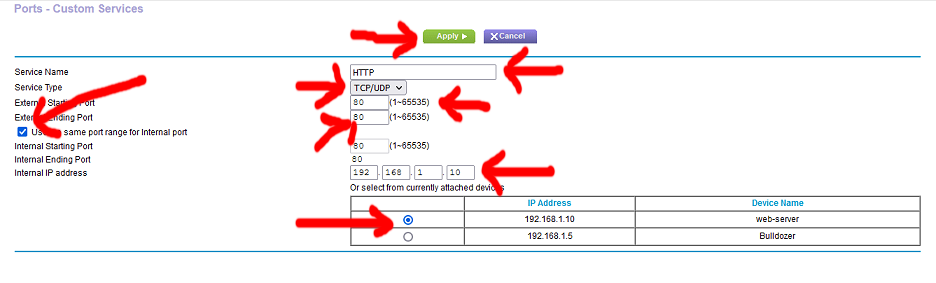
In the service name type HTTP.
For service type select TCP/ UDP.
For External Starting Port type 80.
For External Ending Port type 80.
Make sure that "Use the same port range for Internal port" is ticked.
Next select your webserver from the list, the IP address should be added above.
Then, when you have checked it is all correct click Apply,
This HTTP service port forwarding, should now have been added.
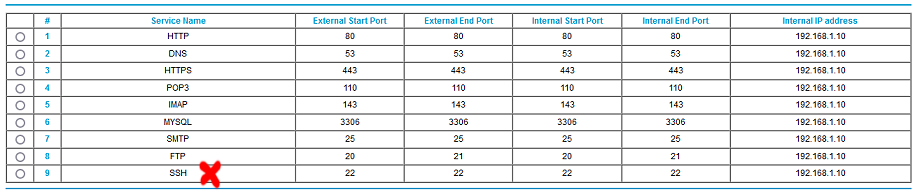
Next, using exactly the same method, add each of these port forwarding services.
Service name: DNS, service type TCP/UDP, All port numbers 53.
Service name: HTTPS, service type TCP/UDP, All port numbers 443.
Service name: POP3, service type TCP/UDP, All port numbers 110.
Service name: IMAP, service type TCP/UDP, All port numbers 143.
Service name: MYSQL, service type TCP/UDP, All port numbers 3306.
Service name: SMTP, service type TCP/UDP, All port numbers 25.
Ok, the next one is slightly different.
Service name: FTP, service type TCP/UDP, External Starting Port 20, External Ending Port 21.
WARNING ABOUT PORT 22 SSH.
This port represents a security risk.
Maybe it is not such a good idea to leave this port open all of the time, if you intend to do most of your server command line (and file structure) work from home (on the same local network as your server) I would maybe not actually set up port forwarding for port 22.
It is not essential, if you are not connecting to your server’s command line when you are away from home.
I will in the FAQ section of the guide, show you how to change this port number for better security.
YOU HAVE BEEN WARNED!
I have included SSH, but that is your call.
Service name: SSH, service type TCP/UDP, All port numbers 22.
Keeping in mind, yours should probably not have SSH in the list, Check it all carefully against this picture. A mistake here could potentially stop your server from working.
Finally, we need to reboot the router one last time.
So as before, click Basic from the top.
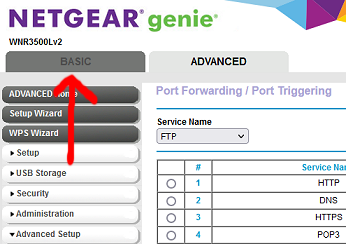
Next, click the ADVANCED tab near the top again.
Then click REBOOT.
Then, click OK to confirm you wish to reboot.
Please now wait for your router to fully reboot.
Once the router has rebooted, you can close your browser windows as we are done!