Don’t panic (much) as I promise it’s all quite easy once you get used to it, and to be fair it’s much easier to use than the server command line. Occasional you may notice the control panel asks you to log in again, this is normal as it’s a security feature.
Unfortunately we will have to edit your free Letsencrypt SSL certificate via the command line for best results.
By the way we are doing all this on your PC. Not physically on your server anyway.
Before we go any further I want to talk about web browsers, now you can use any browser you want.
My browser of choice is Firefox and I am going to tell you how to do certain things using Firefox, so if you’re using a different browser then you may have to do some research.
Ok, these are the things we need to do.
For my Ubuntu 26.04 version of EHCP force, you no longer need to update your IP address in the CP, as this is now done by the installer automtically.
1. Add some personal settings to your CP (control panel).
2. Put the server in SSL only mode (HTTPS, Browser padlock Icon)
3. Update the global Apache template.
4. Add your FTP (file transfer protocol, for uploading your sites) settings.
5. Add your new domain name to your CP, and set it for SSL using Letsencrypt.
6. Add the EHCP force built in sub domains to your Letsencrypt SSL Certificate.
7. Add your email account(s)
8. Configure your email account(s) using Round Cube webmail.
Ok then let’s get started.
Now the first time we log into you CP (control panel) we are going to use your local IP address, this is the one and only time we are going to access your CP in this way so once it is set up fully DO NOT access your CP this way (more on this later).
Open Firefox (or your browser of choice) and type your servers local IP address into the address bar mine is 192.168.1.10. Firefox will add the http to this automatically.
You should be presented with this page.

Click the link (Click here for the control panel on your server!) to access your CP.
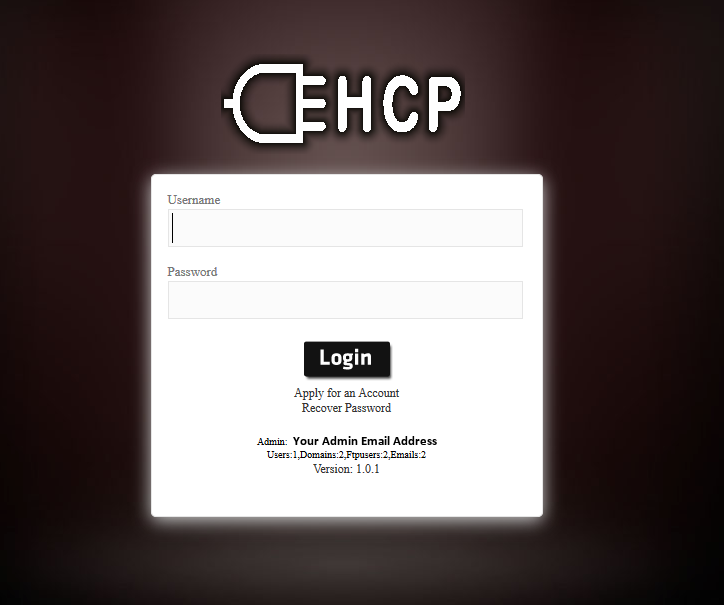
Now log in, your user name is admin and your password is the admin password EHCP force gave you when you first installed it (EHCP Admin Password).
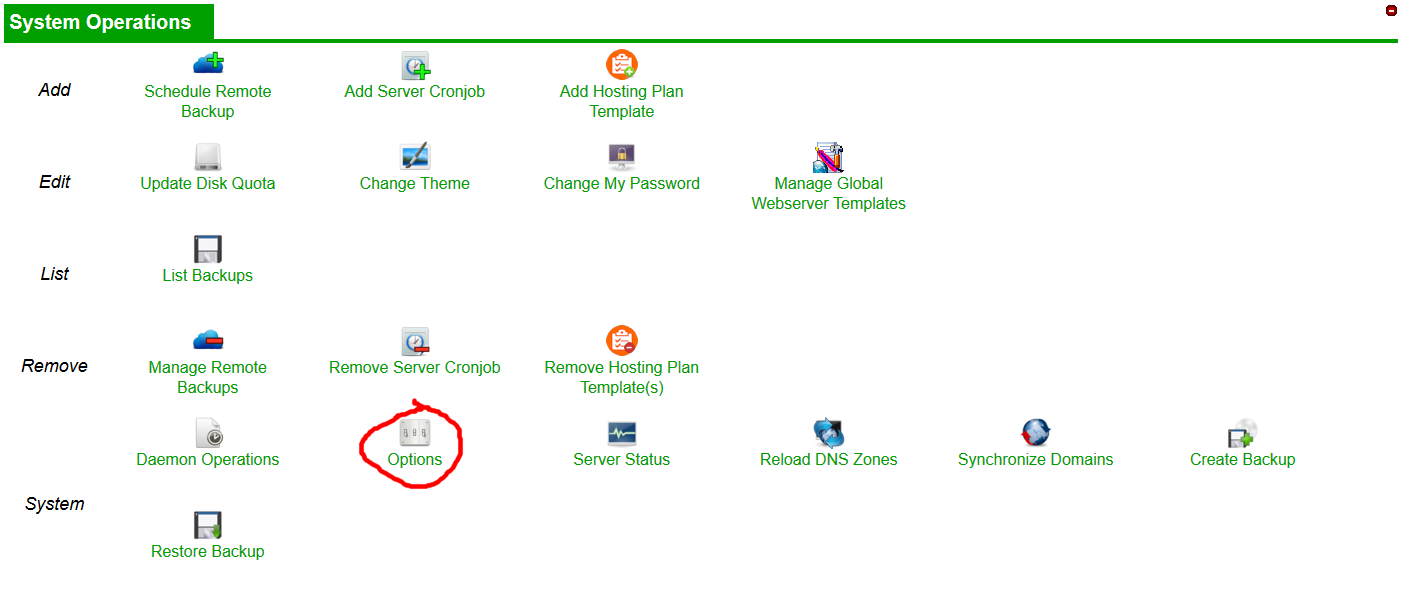
Scroll down to the System Operations section and click on Options.
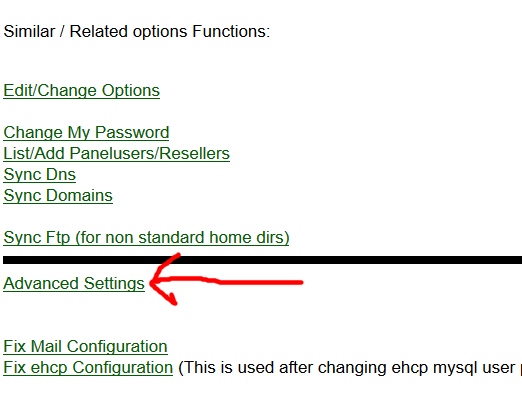
This bit can be a bit tricky, I am assuming you are using the Firefox browser so these instructions are for Firefox, for other browsers you may have to ask google.
Scroll down and click on Advanced Settings.
Ok next to Webserermode, check the sslonly box.

Now before we go any further once we apply this settings change, things may start to get a little weird.
When we click Submit Query you are going to get a browser error, possibly straight away, but if not very soon.
This error is because we are going to switch over to https mode and you don’t have a SSL certificate for your IP address, this by the way is only a temporary issue as we wont need to use your IP address to access the CP in future.
Don’t panic if you don’t understand as like always I am going to walk you through it.
Ok click Submit Query.
Ok this is the error screen in Firefox (if you don’t see it now, continue on until you do).
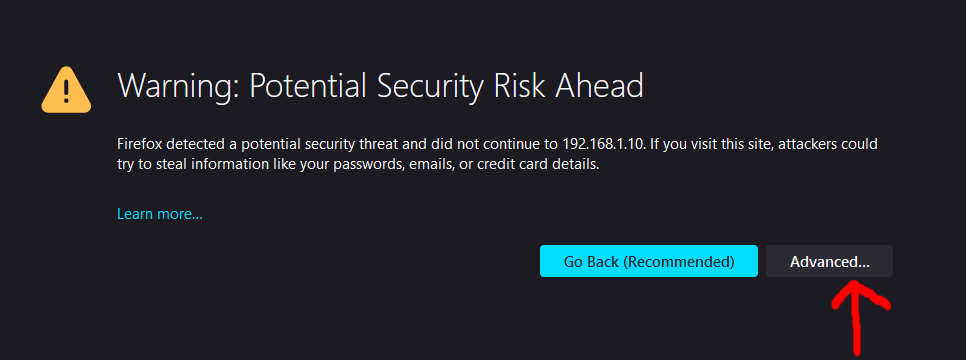
Click Advanced (Firefox Browser).
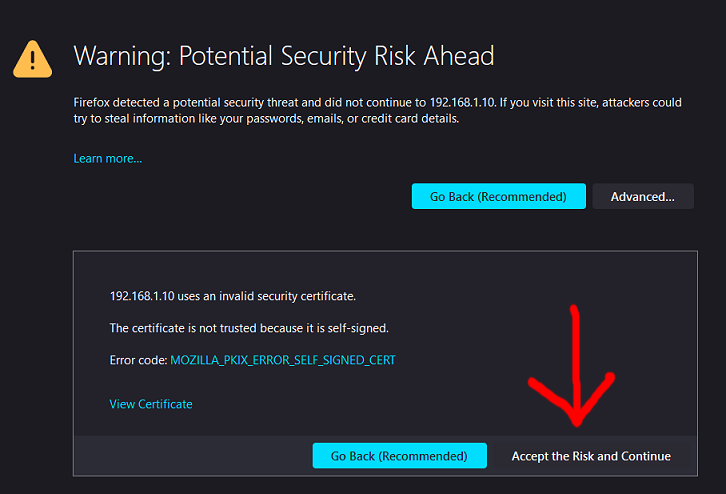
Scroll down slightly and click “Proceed to 192.168.1.10 (Risky)” (Firefox Browser). Your local IP adress may not be the same as mine.
You should now be returned to your control panel!!
Oh by the way don’t worry if you don’t get the above error.
BEFORE we can add any of our website details, we need to update the global Apache template.
It is ESSENTIAL, this is done now, as if you try and do this later, your server MAY CRASH.
Changing the global apache template is dangerous. But unfortunately in this case also essential.
Exercise extreme caution when performing this operation, check and double check everything.
If the template ends up wrong, you will not be able to access anything on your server via a web browser, where it is possible to recover from this (in most, but not all cases) it is better to get it right the first time.
I have created THIS FAQ, which walks you through recovering from a corrupted Apache global template.
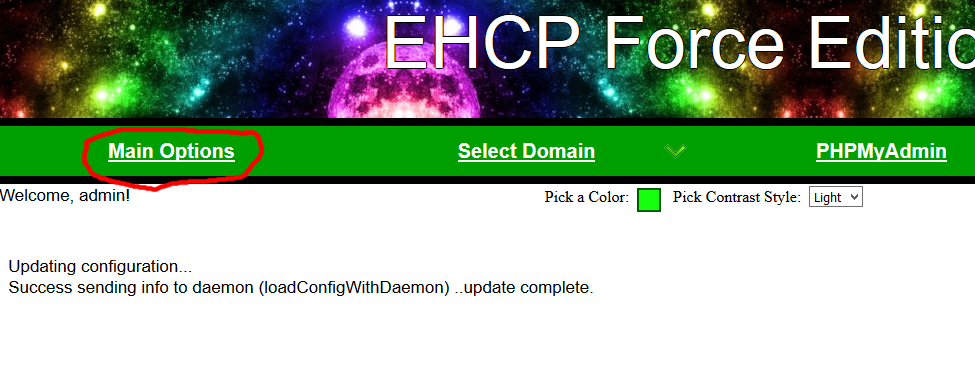
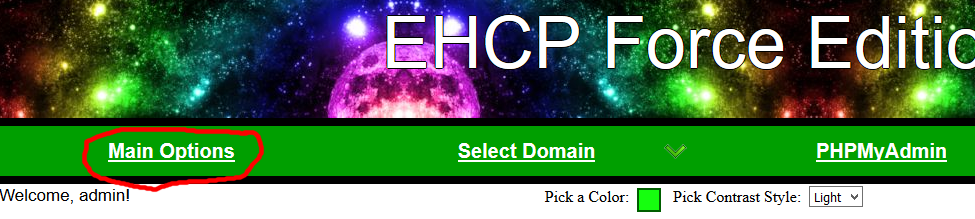
Click on Main Options Again.
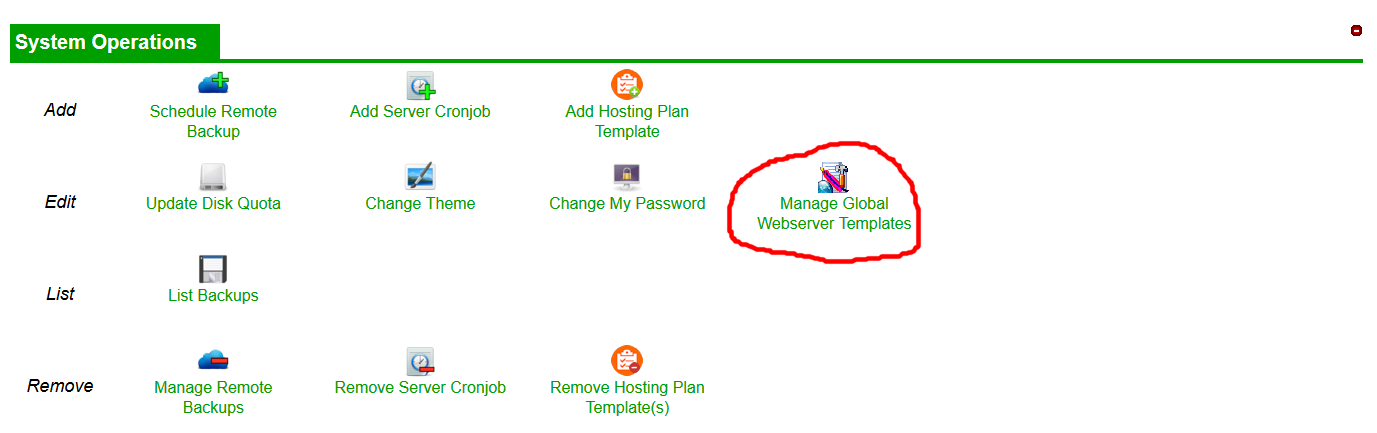
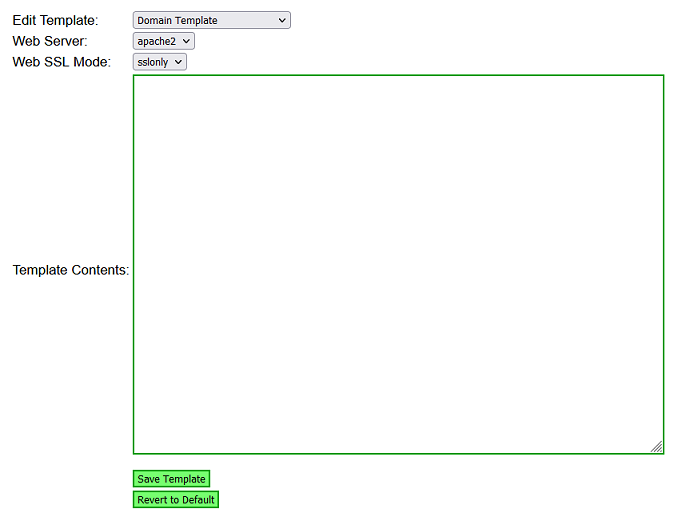
Under System Operation, click on Manage Global Webserver Templates.
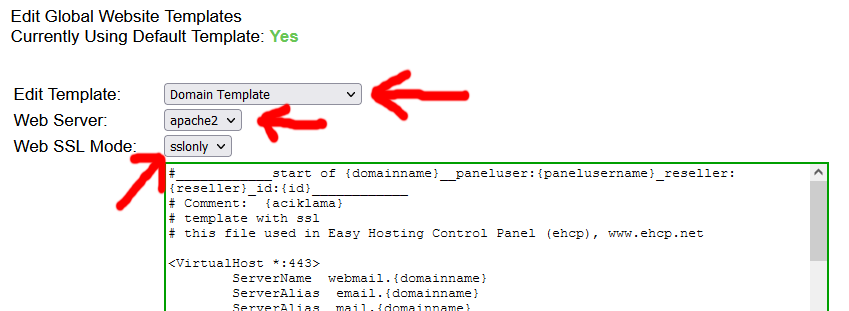
Make sure that “Domain Template” is selected in the Edit Template box, that “apache2” is selected in the Web Server box, and finally that “sslonly” is selected in the Web SSL Mode box.
If the above are not selected by default, continuing is pointless at this stage, as you have done something wrong, most likely you don’t have your server in SSLOnly mode as described above.
Ok, highlight the entire content of the template and delete it (so you are have a completely empty box).
Now paste this one in (the entire thing).
Code: Select all
#____________start of {domainname}__paneluser:{panelusername}_reseller:{reseller}_id:{id}____________
# Comment:  {aciklama}
# Template with ssl
# this file used in Easy Hosting Control Panel (ehcp), www.ehcp.net
# Modified by Rob Swan (WA) (www.ghostnetwork.co.uk) Mod V.1.75

<VirtualHost *:443>
	ServerName  webmail.{domainname}
	ServerAlias  email.{domainname}
	ServerAlias  mail.{domainname}

	DocumentRoot {ehcpdir}/webmail

	LogFormat "%h %l %u %t \"%r\" %>s %b \"%{Referer}i\" \"%{User-Agent}i\"" combined
	LogFormat "%v:%h %l %u %t \"%r\" %>s %b \"%{Referer}i\" \"%{User-Agent}i\"" vhost_combined
	LogFormat "%v:%p %h %l %u %t \"%{Host}i\" \"%r\" %>s %O \"%{Referer}i\" \"%{User-Agent}i\"" vhost_combined_host
	CustomLog  {homedir}/logs/access_log combined
	CustomLog  /var/log/apache2/access_log_multi.log vhost_combined_host

	ProxyPassMatch ^(.*\.php)$ fcgi://127.0.0.1:9001{ehcpdir}/webmail/$1
	ProxyFCGISetEnvIf "true" PHP_ADMIN_VALUE "open_basedir={ehcpdir}/webmail:/tmp:/var/www/php_sessions:/usr/share:/etc/roundcube:/var/lib/roundcube:/var/log/roundcube; \n upload_tmp_dir=/tmp; \n session.save_path=/var/www/php_sessions; \n opcache.enable=0;"

	SSLEngine on
	SSLCertificateFile {ssl_cert_path}
	SSLCertificateKeyFile {ssl_cert_key_path}
	{ssl_cert_chain_setting_with_path}

</VirtualHost>


<VirtualHost *:443>
	ServerName  webmail2.{domainname}
	ServerAlias  email2.{domainname}
	ServerAlias  mail2.{domainname}

	DocumentRoot {ehcpdir}/webmail2

	LogFormat "%h %l %u %t \"%r\" %>s %b \"%{Referer}i\" \"%{User-Agent}i\"" combined
	LogFormat "%v:%h %l %u %t \"%r\" %>s %b \"%{Referer}i\" \"%{User-Agent}i\"" vhost_combined
	LogFormat "%v:%p %h %l %u %t \"%{Host}i\" \"%r\" %>s %O \"%{Referer}i\" \"%{User-Agent}i\"" vhost_combined_host
	CustomLog  {homedir}/logs/access_log combined
	CustomLog  /var/log/apache2/access_log_multi.log vhost_combined_host

	ProxyPassMatch ^(.*\.php)$ fcgi://127.0.0.1:9001{ehcpdir}/webmail2/$1
	ProxyFCGISetEnvIf "true" PHP_ADMIN_VALUE "open_basedir={ehcpdir}/webmail2:/var/log; \n upload_tmp_dir={ehcpdir}/webmail2/data; \n session.save_path={ehcpdir}/webmail2/data;"

	SSLEngine on
	SSLCertificateFile {ssl_cert_path}
	SSLCertificateKeyFile {ssl_cert_key_path}
	{ssl_cert_chain_setting_with_path}

</VirtualHost>

<VirtualHost *:443>
	ServerName  cpanel.{domainname}
	ServerAlias  panel.{domainname}
	ServerAlias  ehcp.{domainname}
	ServerAlias  cp.{domainname}

	DocumentRoot {ehcpdir}

        # PHPMyAdmin
        ProxyPassMatch ^/phpmyadmin/(.*\.php)$ fcgi://127.0.0.1:9000/usr/share/phpmyadmin/$1
        ProxyPassMatch ^/phpmyadmin(.*/)$ fcgi://127.0.0.1:9000/usr/share/phpmyadmin$1index.php


	LogFormat "%v:%h %l %u %t \"%r\" %>s %b \"%{Referer}i\" \"%{User-Agent}i\"" vhost_combined
	LogFormat "%v:%p %h %l %u %t \"%{Host}i\" \"%r\" %>s %O \"%{Referer}i\" \"%{User-Agent}i\"" vhost_combined_host
	CustomLog  /var/log/apache2/access_log_multi.log vhost_combined_host

	ProxyPassMatch ^(.*\.php)$ fcgi://127.0.0.1:9001{ehcpdir}/$1
	ProxyFCGISetEnvIf "true" PHP_ADMIN_VALUE "open_basedir={ehcpdir}:/usr/share/php:/home/vmail:/usr/share/pear:/usr/share/phpmyadmin:/etc/phpmyadmin:/var/www/vhosts:/var/lib/phpmyadmin:{ehcpdir}/webmail::/tmp:/var/www/php_sessions:/usr/share:/etc/roundcube:/var/lib/roundcube:/var/log/roundcube; \n upload_tmp_dir=/tmp; \n session.save_path=/var/www/php_sessions;"

	<Files  ~ "\.conf$">
		Order allow,deny
		Deny from all
	</Files>

	<Files  ~ "\.txt$">
		Order allow,deny
		Deny from all
	</Files>

	<Files  ~ "\.log$">
		Order allow,deny
		Deny from all
	</Files>

	<Files  ~ "\.sh$">
		Order allow,deny
		Deny from all
	</Files>

	SSLEngine on
	SSLCertificateFile {ssl_cert_path}
	SSLCertificateKeyFile {ssl_cert_key_path}
	{ssl_cert_chain_setting_with_path}
</VirtualHost>

<VirtualHost *:443>

	ServerName   {domainname}
	ServerAlias  www.{domainname} {wildcarddomain} # this is changed to *.{domainname} within classapp.php
	# buraya aliaslar yazilacak..
	{aliases}

	UseCanonicalName Off
	DocumentRoot {homedir}/httpdocs
	DirectoryIndex index.htm index.html index.php

	# Symfony fix
        <FilesMatch \.php$>
            SetHandler proxy:fcgi://127.0.0.1:9000
        </FilesMatch>

        # PHPMyAdmin
        ProxyPassMatch ^/phpmyadmin/(.*\.php)$ fcgi://127.0.0.1:9000/usr/share/phpmyadmin/$1
        ProxyPassMatch ^/phpmyadmin(.*/)$ fcgi://127.0.0.1:9000/usr/share/phpmyadmin$1index.php

	# this combined log format is understandable by webalizer... some other formats are not recognised by webalizer.. thats why, specified here explicitly..
	LogFormat "%h %l %u %t \"%r\" %>s %b \"%{Referer}i\" \"%{User-Agent}i\"" combined
	LogFormat "%v:%h %l %u %t \"%r\" %>s %b \"%{Referer}i\" \"%{User-Agent}i\"" vhost_combined
	LogFormat "%v:%p %h %l %u %t \"%{Host}i\" \"%r\" %>s %O \"%{Referer}i\" \"%{User-Agent}i\"" vhost_combined_host
	CustomLog  {homedir}/logs/access_log combined
	CustomLog  /var/log/apache2/access_log_multi.log vhost_combined_host

	ProxyPassMatch ^(.*\.php)$ fcgi://127.0.0.1:9000{homedir}/httpdocs/$1
	ProxyFCGISetEnvIf "true" PHP_ADMIN_VALUE "open_basedir={homedir}:/usr/share/php:/usr/share/pear:/usr/share/phpmyadmin:/etc/phpmyadmin:/var/lib/phpmyadmin; \n upload_tmp_dir={homedir}/phptmpdir; \n session.save_path={homedir}/phptmpdir; \n sys_temp_dir={homedir}/phptmpdir; \n opcache.enable=0;"

	AccessFileName .htaccess
	SSLEngine on
	SSLCertificateFile {ssl_cert_path}
	SSLCertificateKeyFile {ssl_cert_key_path}
	{ssl_cert_chain_setting_with_path}

	{customhttp}
	{root_password_protected_dirs}
	{password_protected_dirs}
	{webstats_password_protection}

</VirtualHost>

#____________end of {domainname}__paneluser:{panelusername}_reseller:{reseller}_id:{id}____________
# end template with ssl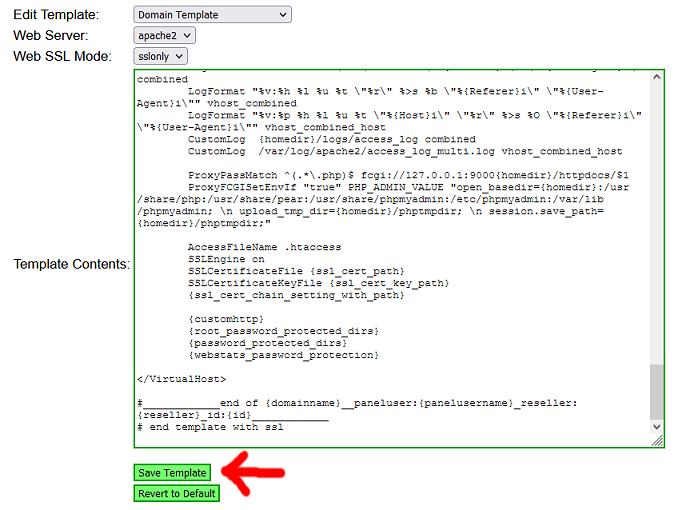
You, should NEVER change this or any other template file again, as you MAY CRASH YOUR SERVER!
Click on Main Options Again.
Under Domain Operations Click Add Domain to My Account.

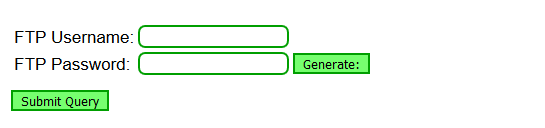
Now before it will let us continue, as we have not yet created an FTP account for our admin user, you will be prompted to set on up.
FTP is the system we use for uploading websites to your server (File Transfer Protocol) and without an account you could not upload a website.
So for the FTP Username: I suggest you put admin, and for the password you can make one up (make sure you make a note of the FTP credentials you have set up). Then click Submit Query.
Ok next you will be asked for your new domain name without the www bit for example FredBlogs.co.uk.
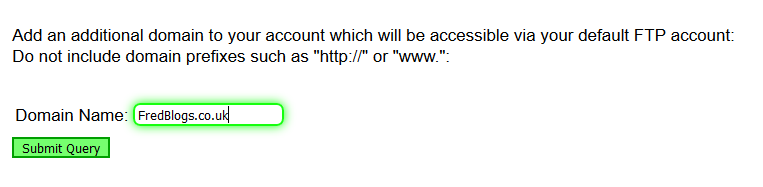
Yours should not be FredBlogs.co.uk It should be your actual domain name!
When you have done this click Submit Query.
Next click on Manage YourNewDomainName.co.uk.

Yours of course will not say Manage fredblogs.co.uk!
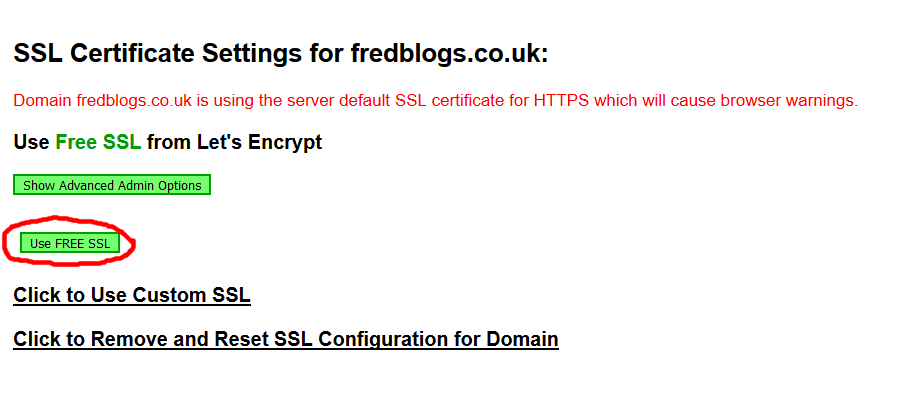
Ok next under Domain Operations click Add SSL Certificate.

Ok, next click on Use FREE SSL.

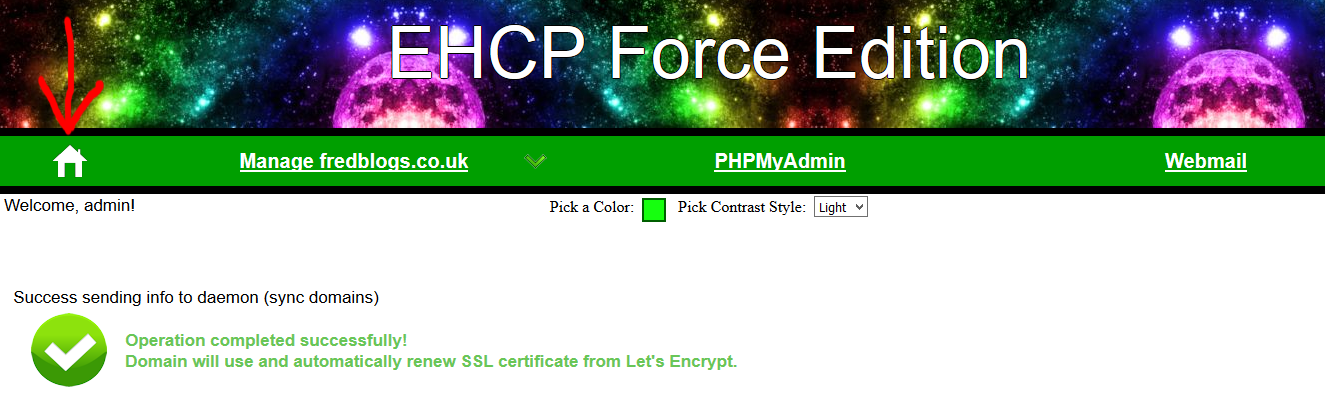
At this point, I would wait maybe 3 or 4 minutes for the Daemon to catch up.
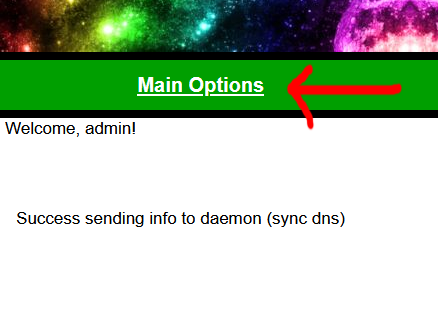
Next, click the home icon, at the top (or Main Options).
Scroll down to System Operations, then click Reload DNS Zones.
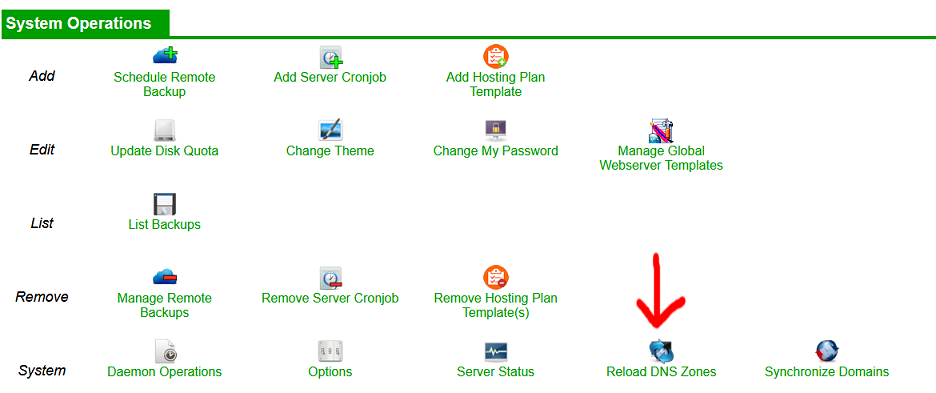
Now wait a minute or two to give the Daemon time to catch up.
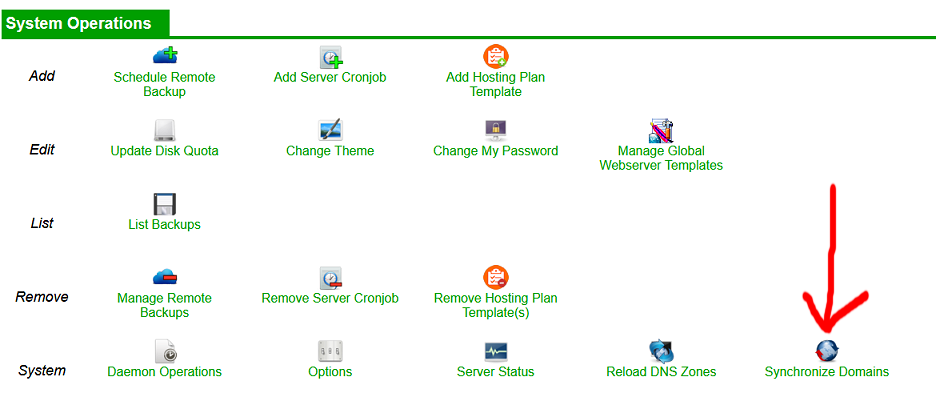
Next, its Main Options again.
Then scroll down again to System Operations, then click Synchronize Domains.
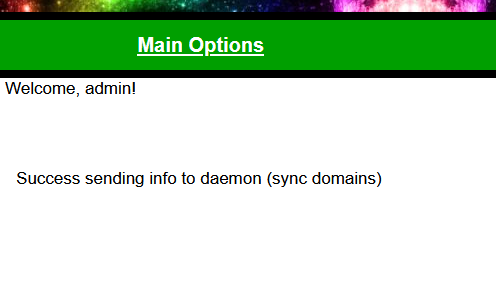
Leave your control panel open for the time being (just minimised).
For whatever reason EHCP force does not include the built in sub domains when deploying the Letsencrypt SSL certificates.
Sometimes is does not even include www.
A sub domain is a website or page that is in the address before the actual domain name and can replace the www.
For example if your website was www.FredBloggs.co.uk, a sub domain for that would be mail.FredBloggs.co.uk, or say Shoes.FredBloggs.co.uk, You get the idea.
EHCP Force has several built in sub domains, so in our example of your domain being www.FredBloggs.co.uk, this is a list of the built in sub domains that you may require being included in the SSL certificate.
cpanel.FredBloggs.co.uk
panel.FredBloggs.co.uk
ehcp.FredBloggs.co.uk
cp.FredBloggs.co.uk
webmail.FredBloggs.co.uk
email.FredBloggs.co.uk
mail.FredBloggs.co.uk
webmail2.FredBloggs.co.uk
email2.FredBloggs.co.uk
mail2.FredBloggs.co.uk
All the above sub domains have to be added to your Letsencrypt SSL certificate for your domain name manually.
To achieve this, I have created a script file.
Ok, first you need to download my script, so connect to your server using your PC and PuTTY.
Issue this command to download the script.
wget https://downloads.ghostnetwork.co.uk/scripts/ehcpforce/certbotfix.sh -O certbotfix.sh

Next give the script permission to execute by entering this command (you may have to re-enter your password).
sudo chmod +x certbotfix.sh
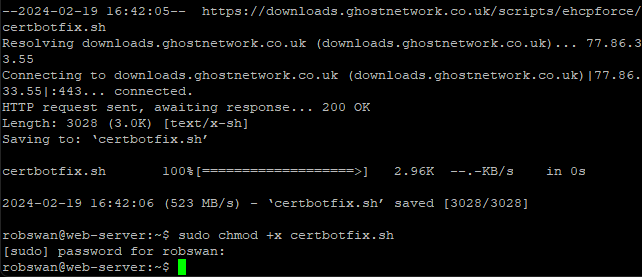
Ok, once you have downloaded the script and given it permission to execute as above, the script will be on your server ready for when you need it. You only need to download it once.
Next we need to run the script for the domain you just added to your server, so issue this command.
sudo bash certbotfix.sh
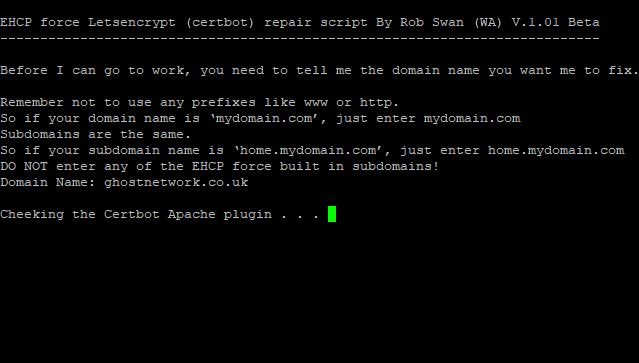
When prompted to do so, enter YOUR domain name (without www or http etc).
NOTE: Never type any of the built in subdomains like cp.mydomain.com or mail.mydomain.com into the script as this WILL CAUSE MAJOR ISSUES
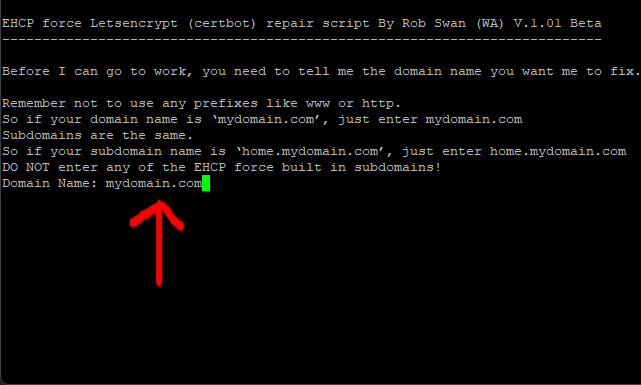
Yours won’t say mydomain.com of course!
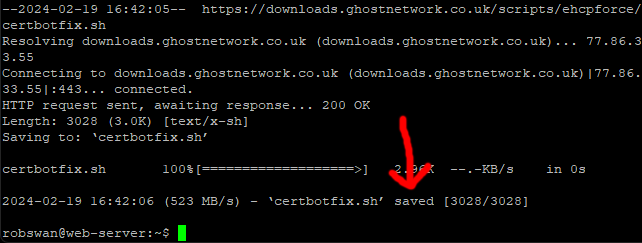
Now, please wait….
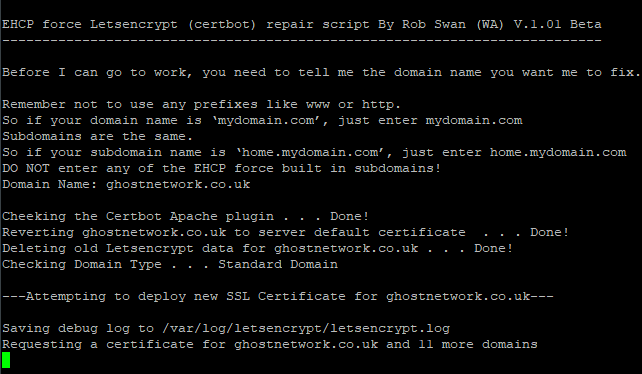
Eventually, all being well you should see a confirmation that looks a bit like this
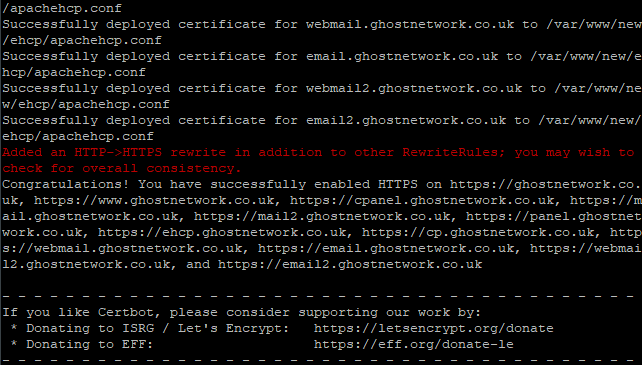
If you got a confirmation as above, finally go back to your control panel and Synchronize Domains one last time (Main Options >> System Operations >> Synchronize Domains).
Now close your browser (control panel).
In PuTTY issue this command to close.
exit
NOTE: You will have to run the script to fix any domain you add in the future that uses Letsencrypt. If you create any of your own subdomains within the control panel EHCP force should not have a problem creating a Letsencrypt certificate automatically for your subdomain.
Notes on Certbot Errors.
In the unlikely event, that Letsencrypt (certbot) gave an error message rather than a confirmation. You should be aware there are multiple reason for a failure. Its not possible for me to list them all here.
Some common reasons for a failure are: -
The DNS for your domain has not had time to propagate (update). So, you need to wait a couple of days and try again (Reload DNS Zones and Synchronize Domains in your CP before retrying).
You have made too many attempts (Wait 7 days and try again).
Your router port forwarding settings are incorrect (Fix your settings and try again).
Certbot should tell you why it failed on screen.
Here is an example of a certbot error I got once.
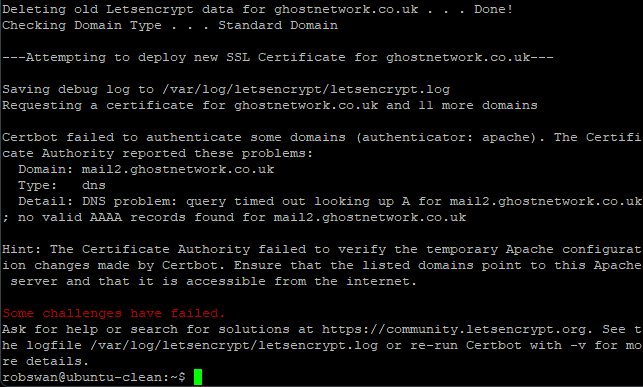
To fix this one (in my case) I just needed to Reload DNS Zones in the CP.
Remember in the event of an unexpected error google is king.
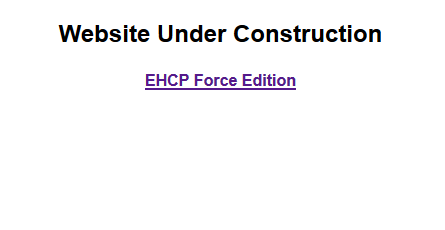
Ok now for the Big Test, assuming you have done everything correctly you should now see a Server Holding page if you try to visit your website using you browser.
If the test does not work it could be that the DNS has not had time to sort itself out (as we discussed earlier in the guide) so if that is the case stop at this point and try again in a couple of days.
If it still does not work go over your router port forwarding settings again.
So open your browser and try to Visit.
https://www.YourNewDomain.co.uk (Replace YourNewDomain.co.uk with you actual domain name)
You should not need to type the https:// bit, so you could try it without first.
If this is the case WELL DONE YOU, you have done really well indeed!!!
Ok assuming we are all OK there is something important you need to know.
From now on NEVER EVER log into you control panel using your IP address. (even if the system sent you an email with an IP address in the link, don’t use it)
To access your CP from now on you should use
https://cpanel.YourNewDomain.co.uk (Replace YourNewDomain.co.uk with you actual domain name)
Ok so open your browser again and type the above address, then log back into your Control panel.
As you should be getting use to your CP by now I am going to speed through the next bit.
Ok Click on Select Domain, Then click on your domain name, Scroll down to Email Operations and click Add Email Account.
Cast your mind back to when you installed EHCP force, you gave the installer two email addresses, the postmaster email and the admin email.
When the postmaster email account is set up you may see emails from an application called Fail2ban, this is normal, as we have not yet configured Fail2ban.
You need to create and email account within the EHCP force control panel for both of these email accounts. You may of course also set up any other email account you want, at this point.
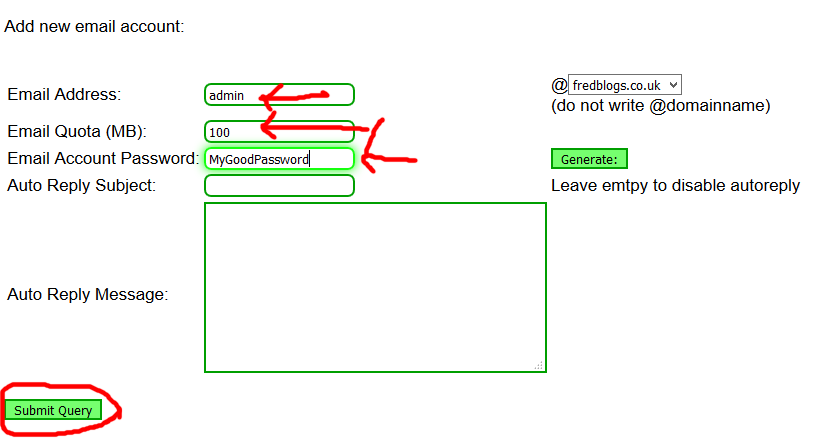
In the example I have set the mailbox size to 100mb, this is quite small, so maybe you should consider increasing this, but that is for you to choose, not me.
In my example we used admin@YouNewDoMain.co.uk. So now we are going to create that Mailbox (email account).
Remember the chances are your mailbox will not be called admin.
So in the Email Address put admin change the Email Quota to about 100, and add a good password as this is what you will use when you check your email. Then click submit Query.
For your other email accounts mentioned above, you can create them by repeating this step.
When you get the Tick to say it is done sign out of your CP.
Your server has two web-based email applications the first being Roundcube Webmail (the one you should use) and the other is Squirrel mail.
Squirrel mail is a very old and outdated system, and should only be used if there is a problem with Roundcube Webmail in my opinion.
The Roundcube Webmail screenshots in this post may look different to yours.
Next go to (in your browser) https://mail.YourNewDomain.co.uk (Replace YourNewDomain.co.uk with your actual domain name)
This is what you would go to when you want to check for email.
Ok, if you did not run the script from THIS POST, and set the default skin in Roundcube to Larry, the screen shots will look different.
When you ran the script it was important that you turned on automatic default folder creation.
Login with your new email address and password.
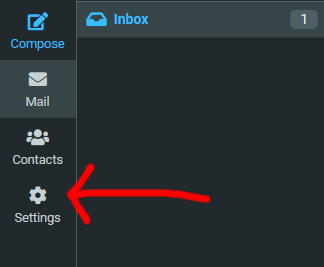
In the top right hand corner, please click on Settings.
Please click on Identities and then your email address from the next column.
Put a name in the Display Name box, for example for the postmaster email account you could use MyDomain Postmaster, or if this is a personal email account you could use your name. This is always down to your personal preference.
And make sure your email address is in both the Email and Reply-To boxes.
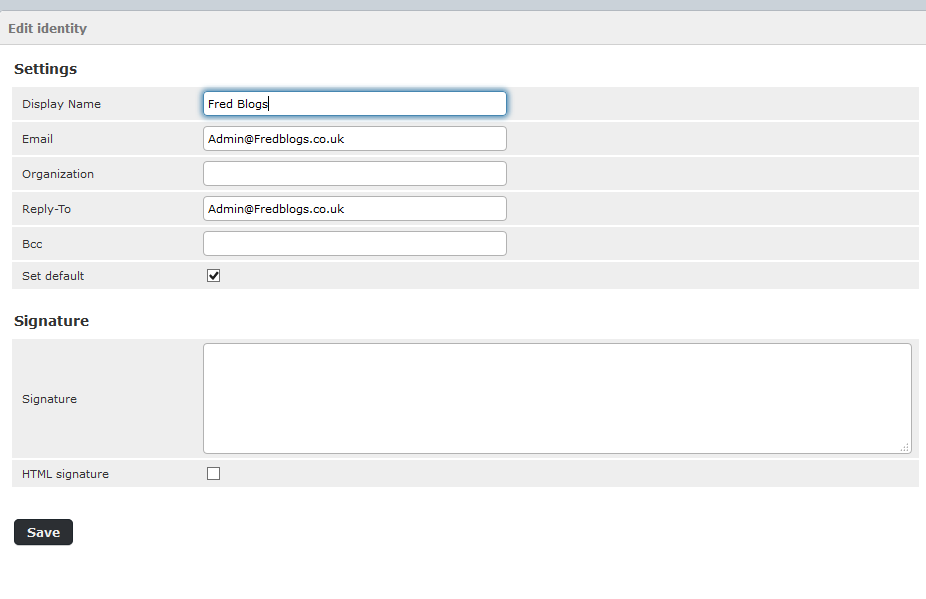
Obviously yours won’t be Fred Blogs or Admin@Fredblogs.co.uk.
Then click save. (to go back to your mailbox just click Mail at the top left)
You should do this for all your email accounts.
After that I will leave you to have a play with your new email.
Maybe try sending an email (I am not giving you a lesson on how to send and Receive Email), try sending yourself an email from some separate email account you may have.
Now one final point, all should be working, but if you have any email problems, first off make sure you have logged in and out and given the email time to work.
Also, you may want to check this FAQ.
Most of the emails that I send bounce back. How can I fix this?
Unfortunately, if it still does not work (especially for incoming mail), providing you have done everything correct your ISP may be blocking port 25, which is required for email to work.
If that turns out to be the case (port 25 blocked) I don’t know how to fix it, as I did not have that problem so try asking google about how to re-root your incoming email.
Even if port 25 is blocked you can still use your server for websites so all is not totally lost.
You will still get system internal emails.
Just make sure you clean it out from time to time (email box), ignore any emails that mention Fail2ban for now.
You will also get report emails informing you about the nightly upgrade script that you tuned on during your EHCP force install, more on this a bit later.