Personally I have never had to restore my server from a backup, as I keep all my Data on my PC, so in the event of a crash I would tend to do a full reinstall and then copy everything back in (after working out why it crashed in the first place).
Despite my method not being conventional, it works for me, but I feel I need to share with you the proper way to do it.
There are 3 backup and restore tools at your disposal.
1. The built in Backup and Restore in EHCP Force.
2. Import and Export functions in PHPMyAdmin.
3. Backup and Restore command built into Ubuntu Server.
In addition to those tools (when you have a website or two) you should always keep a second copy of your website data / pages / apps on your PC and possibly on a Memory stick also.
The built in Backup and Restore tool in EHCP Force is (in my opinion) the most important.
Ok so let’s take a backup using EHCP Force.
Log on to the EHCP Force Control Panel in the normal way via your PC browser using this address.
https://cpanel.YourNewDomain.co.uk (Replace YourNewDomain.co.uk with you actual domain name)
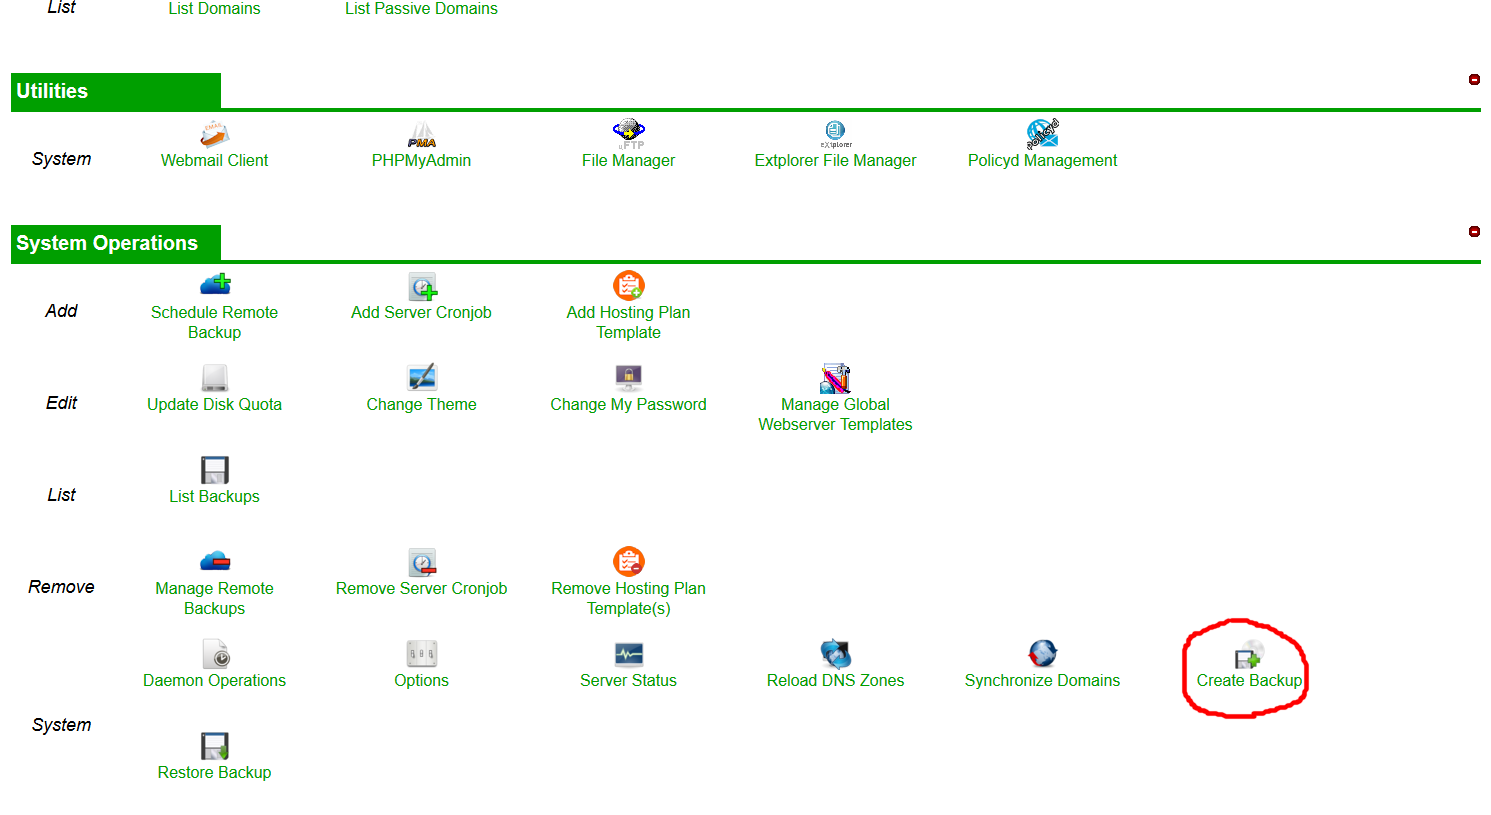
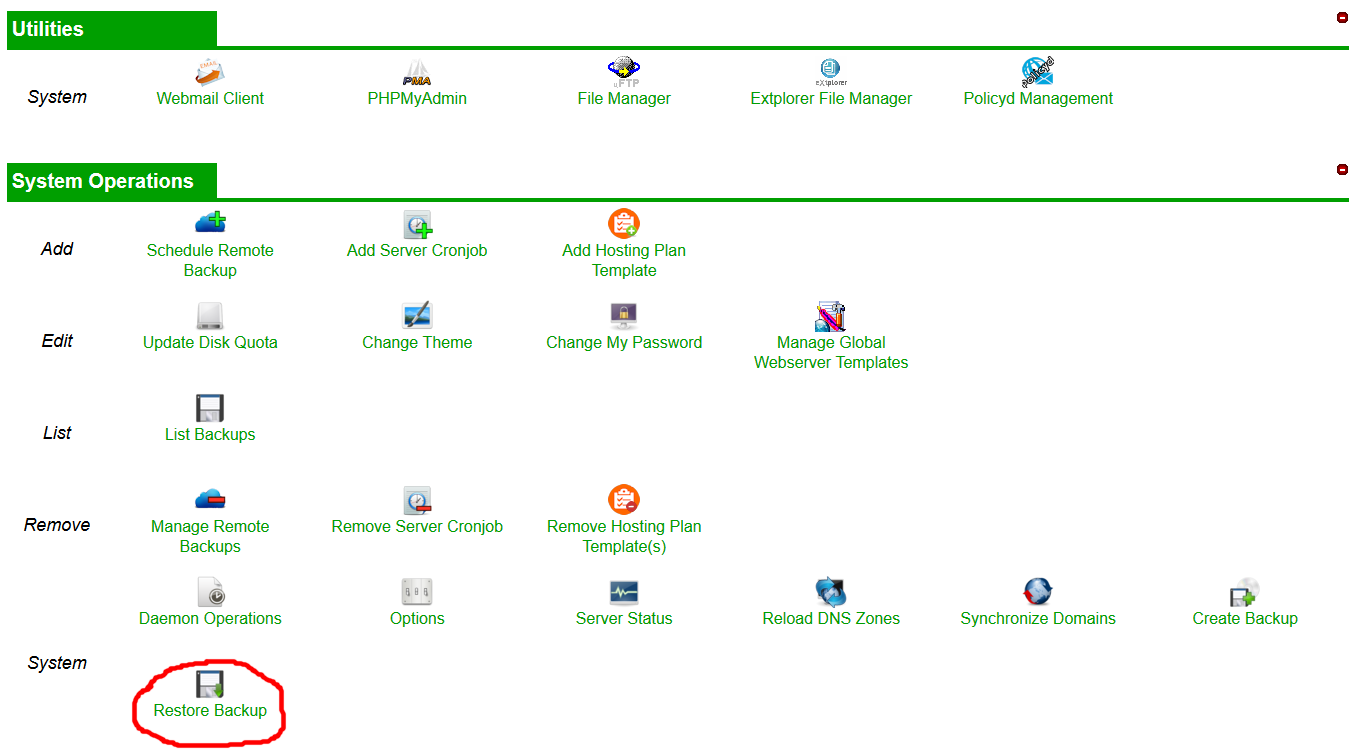
Under System Operation go to Create Backup.
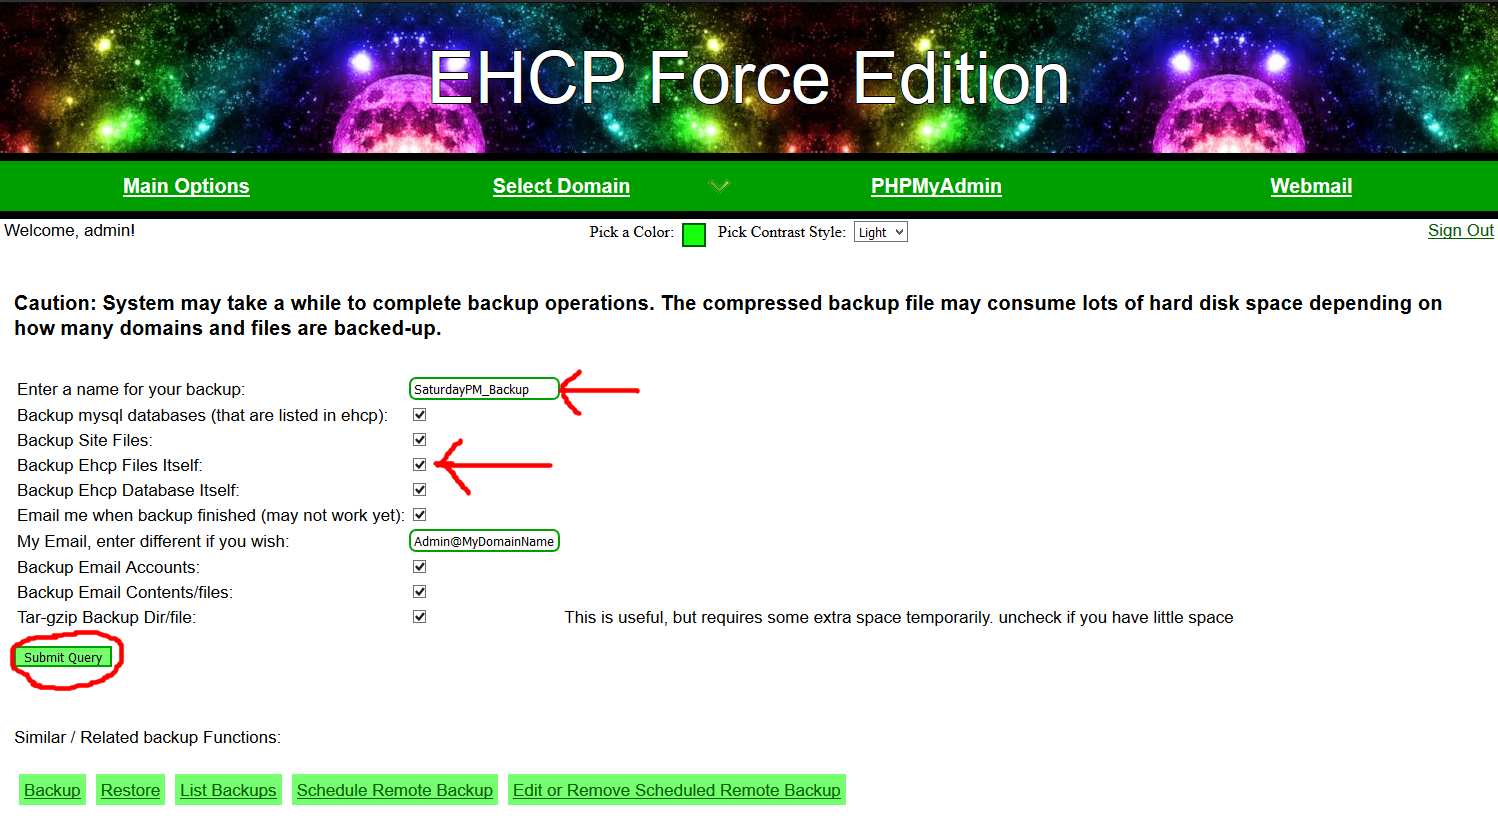
On the next screen give your backup a meaningful name.
Make sure all the options are ticked, by default Backup Ehcp Files Itself won’t be ticked so please tick it.
Then click Submit Query.
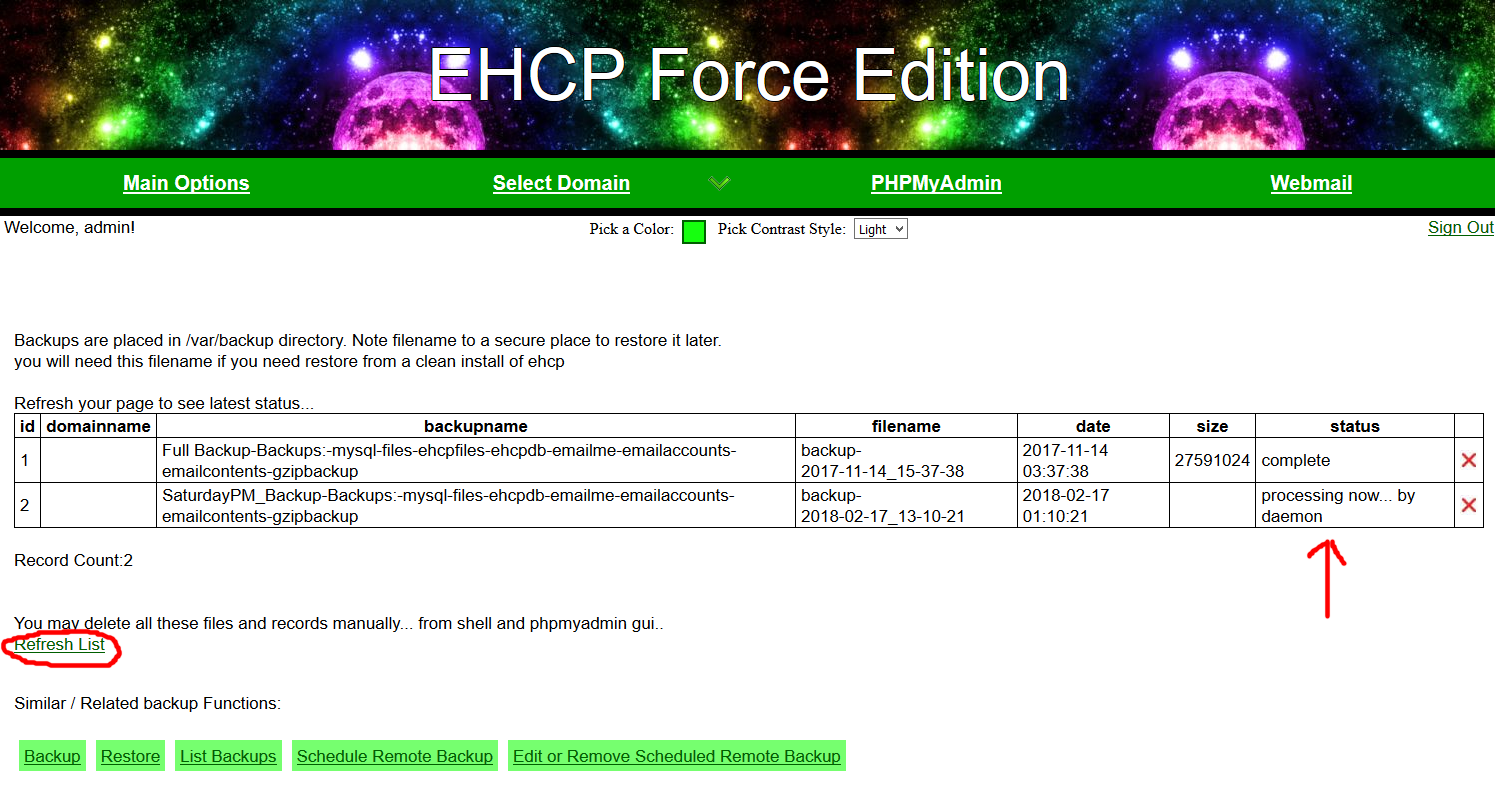
When you see the confirmation screen click on the link to the backup list and status.
Backups are not instant so on the next screen, next to the backup you may see processing now… by daemon.
Click Refresh List a few times until you see status complete.
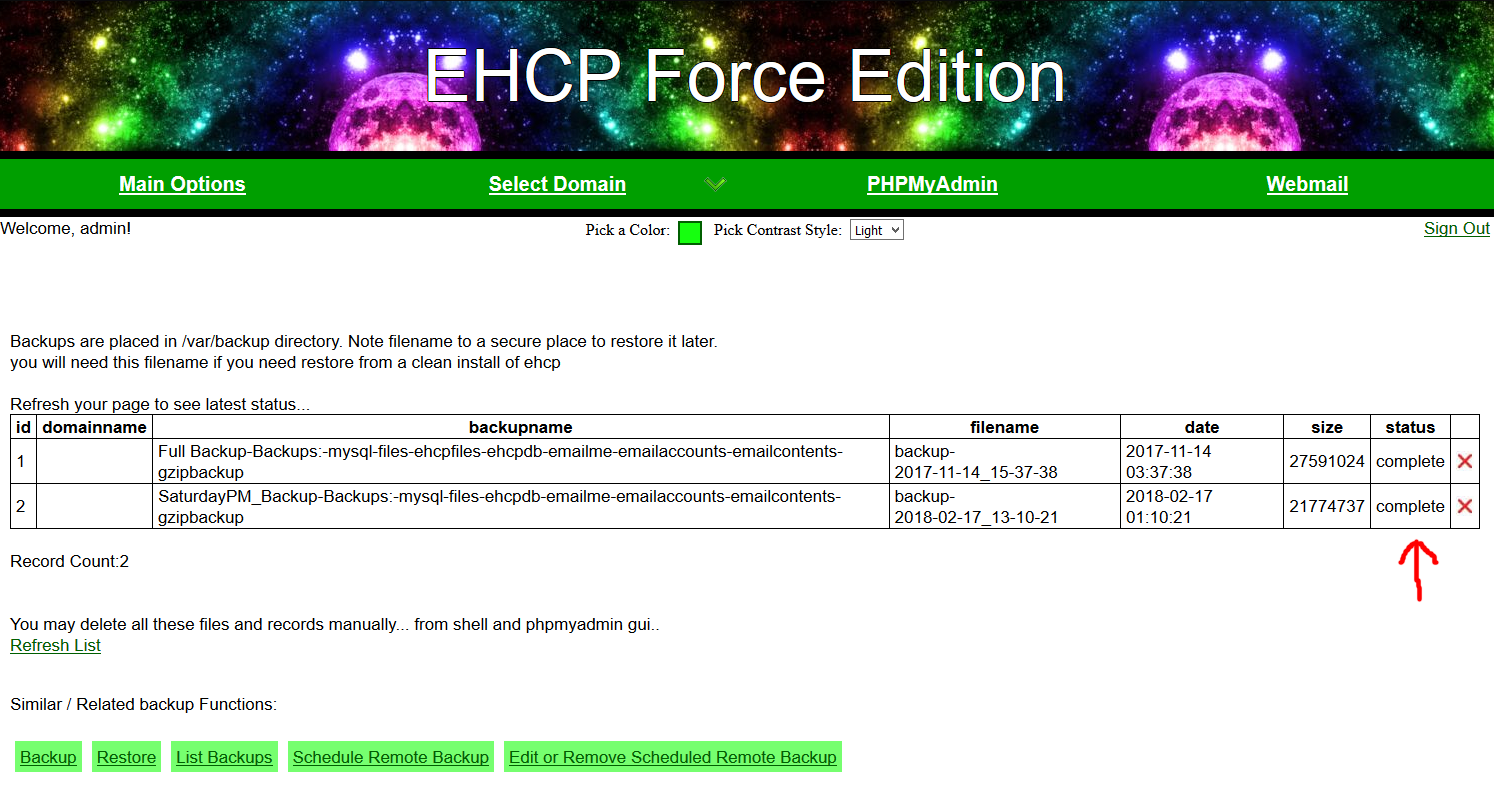
At this point you can log out of your control panel.
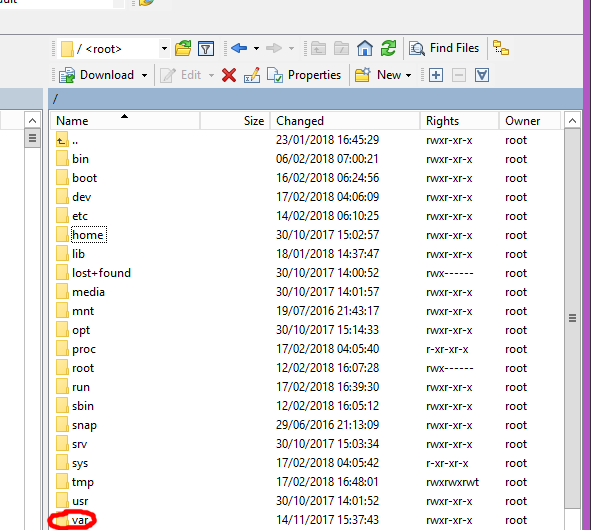
Log into your server using WinSCP and Navigate to the server root directory.
From the servers root directory.
Double click the var folder.
Next be a little careful we need to double click the backup folder not the backups folder.
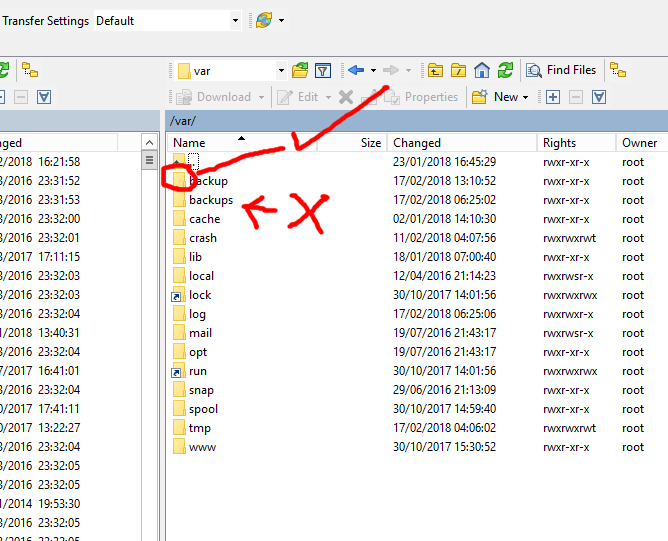
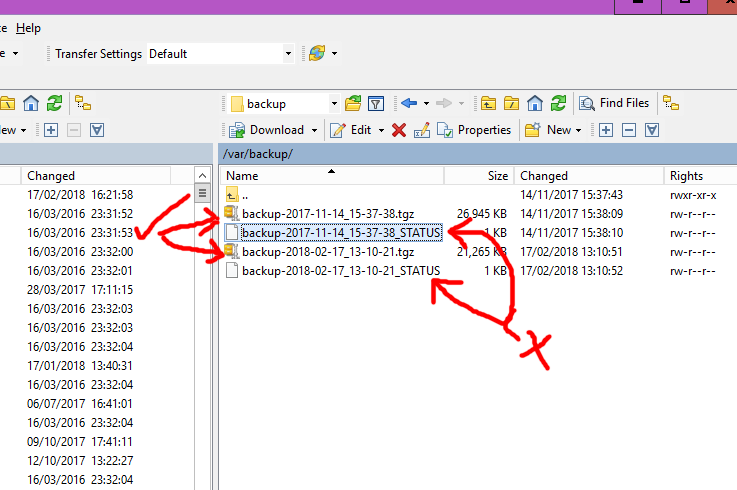
In this folder you should be able to spot all the backups you may have taken using the control panel.
The tgz files are the backup files not the status files.
Now create a folder on you PC where you are going to keep your backups, then navigate to it in the left hand (local) pane.
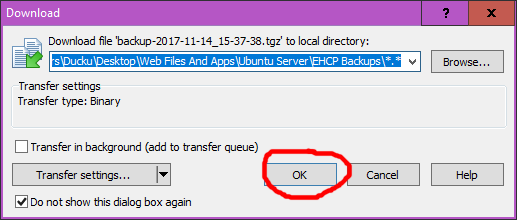
Then simply drag and drop the file from the Server (right pane) to you PC (left pain) you just need the .tgz file for the correct date of the backup you made.
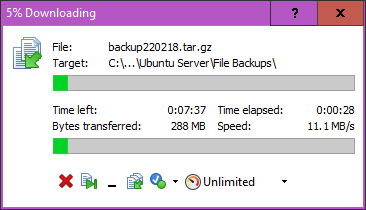
Click OK on the download popup window.
Now wait for the file to download.
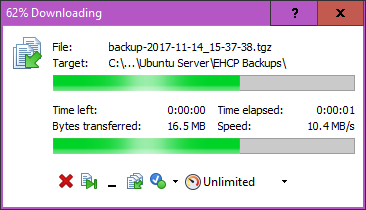
When the download is done, we are done.

In my case I downloaded 2 backup file to my local PC.
You should do this for all the backup files you make now and in the future.
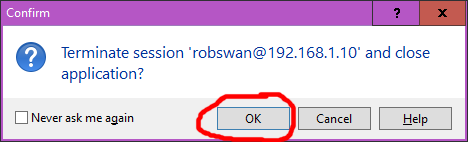
Ok you can now close WinSCP job done!
On closing you may have to click ok to terminate the current session.
There are several reasons that you might want to restore from a backup.
A couple that I can think of is you may want to go back to a previous date to fix something that has happened, or after a server crash you have reinstalled the entire server and want to put all your stuff back on quickly.
Before performing a restore you need to keep in mind everything on the server that was done after the date of the restore file will be permanently deleted, when I say everything I mean everything so exercise extreme caution before performing an EHCP Force restore.
Restoring from a backup should always be considered the last resort, but it can also be a life saver in an emergency.
One thing you should be aware of is that it is very tricky and not worth the bother to restore from an EHCP Force backup if you can no longer access your control panel, so if your CP is down you would need to fix it before you can restore from a backup (It may have been a full re-install job to fix it)
If the backup file exists on your server then we can do it straight from the control panel, if it does not then connect to your server using your PC and WinSCP.
Before we can upload a file to the backup folder, we need to make the folder writable by WinSCP.
Logon to your server using PuTTY and enter this command.
sudo chmod -R 777 /var/backup
The folder will permissions should be reset the next time the server re-boots, so we don’t need to undo this.
Navigate to the backup folder in WinSCP of your server and the local folder on your PC where you keep your backup files as described above, then instead of dragging the file from your server to you PC, drag the file from your PC to your server to copy the file over.
Then close WinSCP.
Make sure you know the exact filename of the backup if you have dragged it in.
One final note on copying a backup file over to your server is what to do if the backup folder does not exist on you server.
If the folder does not exist, connect to your server using Putty and issue these commands to create it.
sudo mkdir -p /var/backup
sudo chmod -R 777 /var/backup
Ok so at this point we assuming the file you want to restore from is in the backup folder on your server.
If you have dragged it in using WinSCP it won’t be in the backup list on your control panel, hence why you need to know the exact filename.
The filename will always end in .tgz.
Ok are you still with me?
Don’t worry the next bit is very straight forward.
So to restore from an EHCP Force backup file log into your control panel on your PC browser.
Click on Restore Backup.
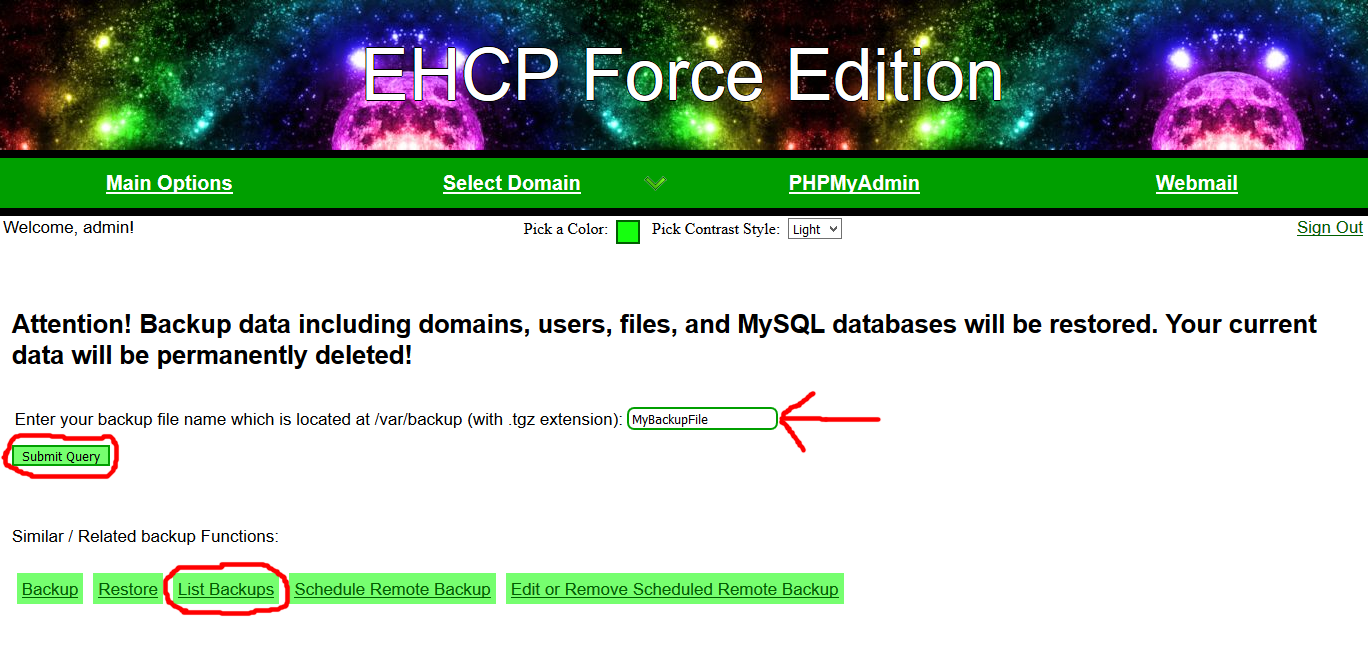
Now if you know the exact filename already then type it into the box without the .tgz bit and click Submit query.
Assuming you have not copied the backup file is manually using WinSCP, you can list the backup files by clicking on List Backups.
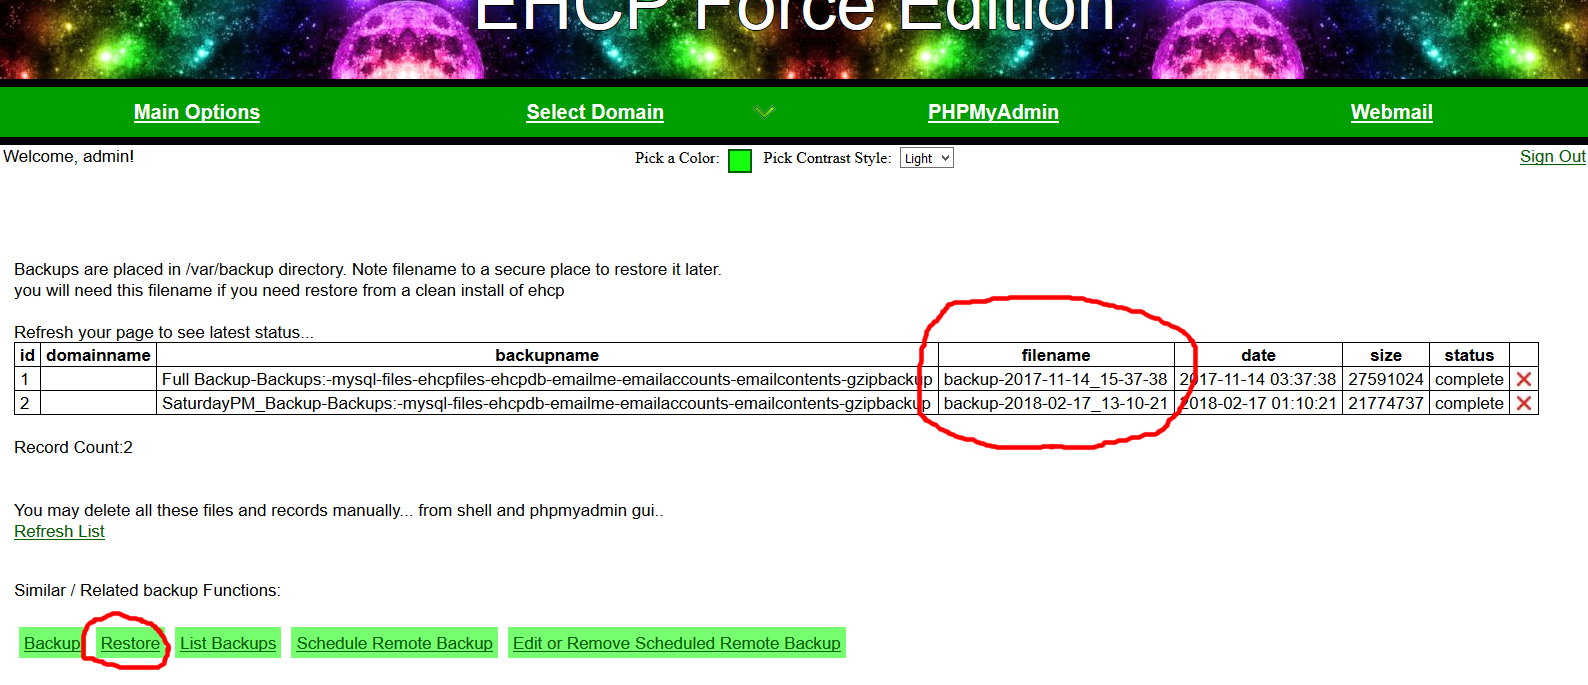
So if the filename in the list is backup-2018-02-17_13-10-21, then you would have to type backup-2018-02-17_13-10-21 into the restore filename box.
You can click on the restore link to go back to the restore dialogue from this page.
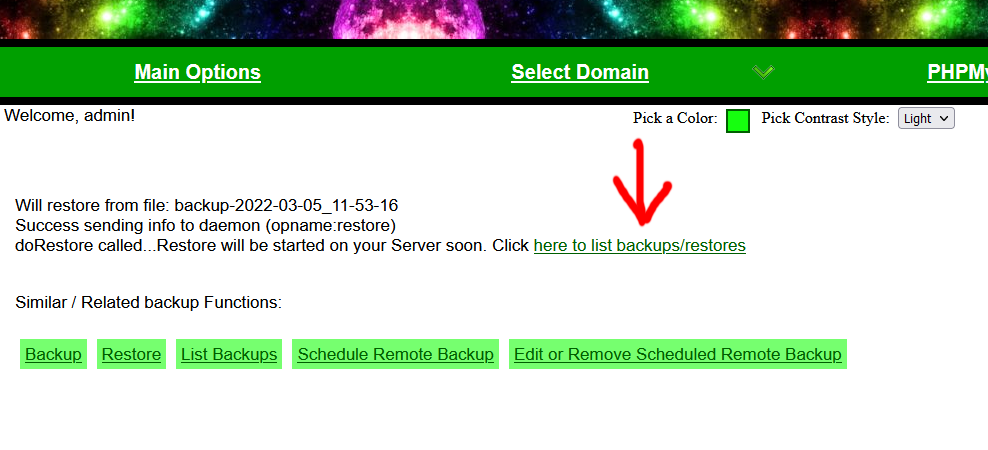
Now just like the backup the restore will not be completed instantly, so click on the line to list backup/restores.
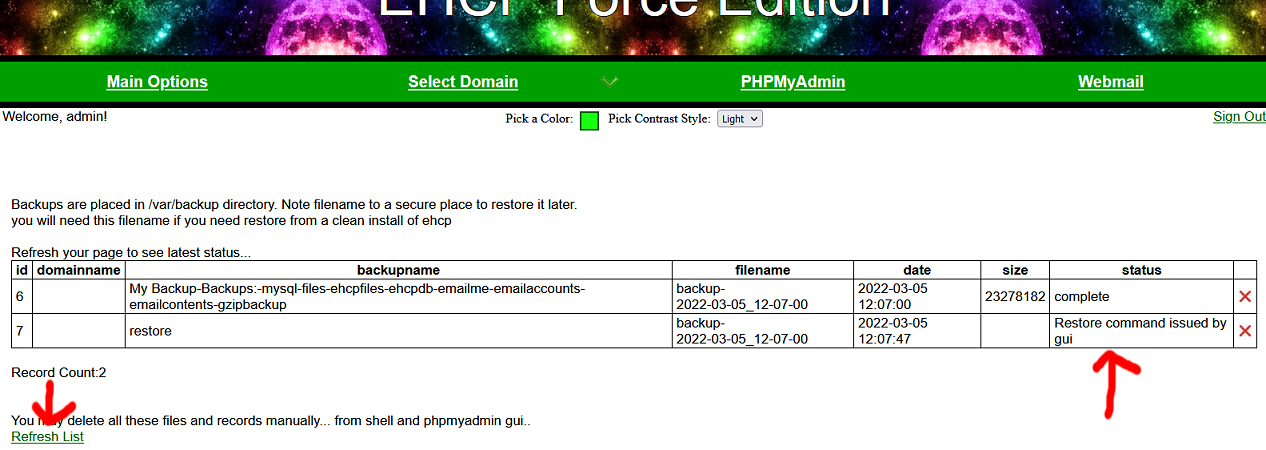
Click on Refresh List a few of times until the restore has completed.
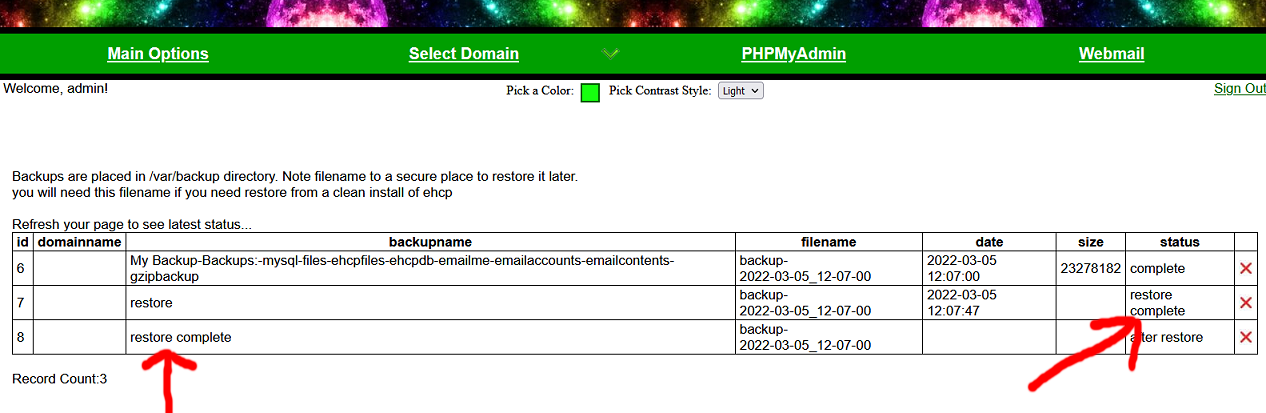
When the restore is complete, we are done.
The other methods I am going to give you are just for information and I would not recommend you use them for data recovery.
When you get onto developing websites to run on your server there may be times when you want to back up one or all of your databases, maybe whilst you test something a then take the data back to before the test for example.
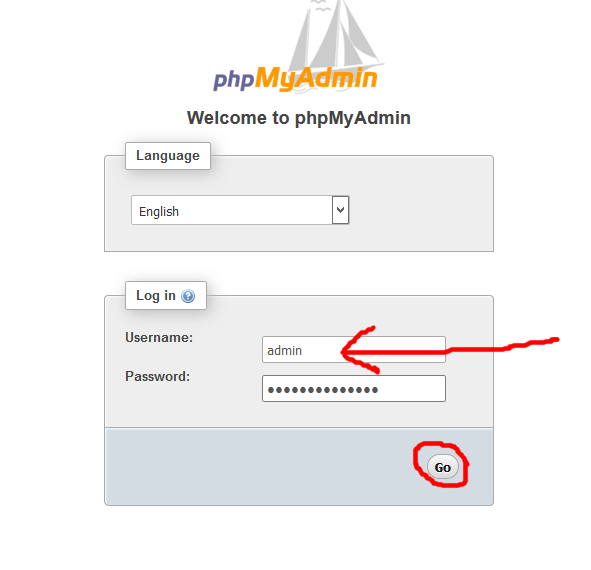
Ok to back up a database on your server logon to PHPMyAdmin using your PC browser with the address.
https://www.YourNewDomain.co.uk/phpmyadmin (Replace YourNewDomain.co.uk with you actual domain name)
Use your MySQL admin user rather than the root user (or what ever username you set up, for remote access)
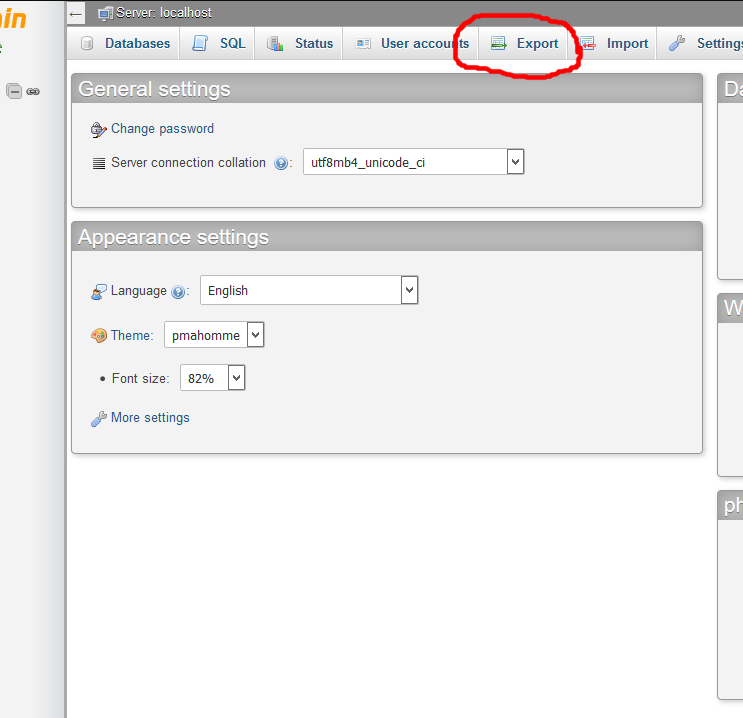
Ok to back all the databseses on the server. Click on Export, and then Go.
When the dialogue appears choose a filename and save it to your local PC in a folder of your choice.
Screen shot are taken using Firefox as a Browser.
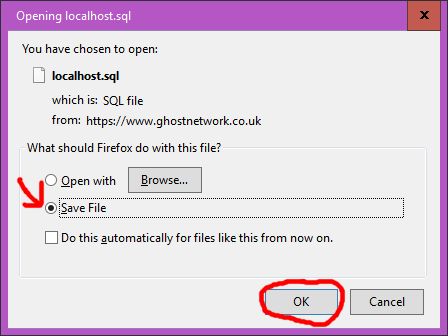
When the download completes, that’s it job done.
In order to take a backup of a specific database first click on the correct database in the left pain, then click export.
In my example I am backing up a Database called Test_DataBase.
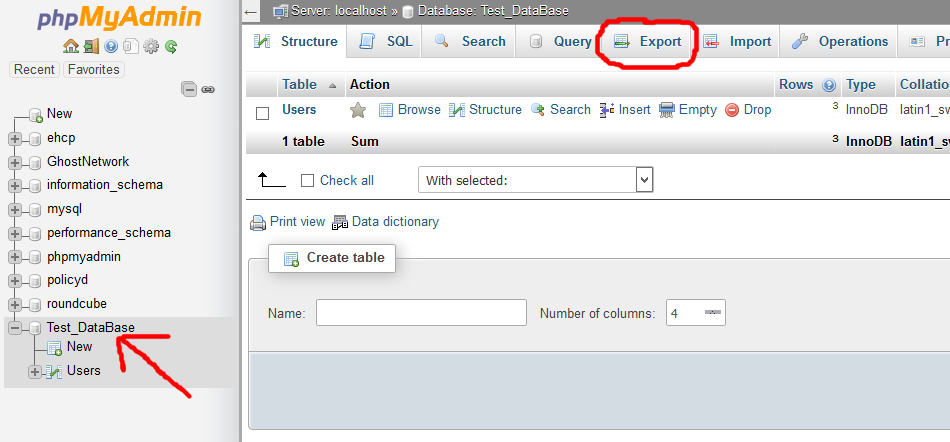
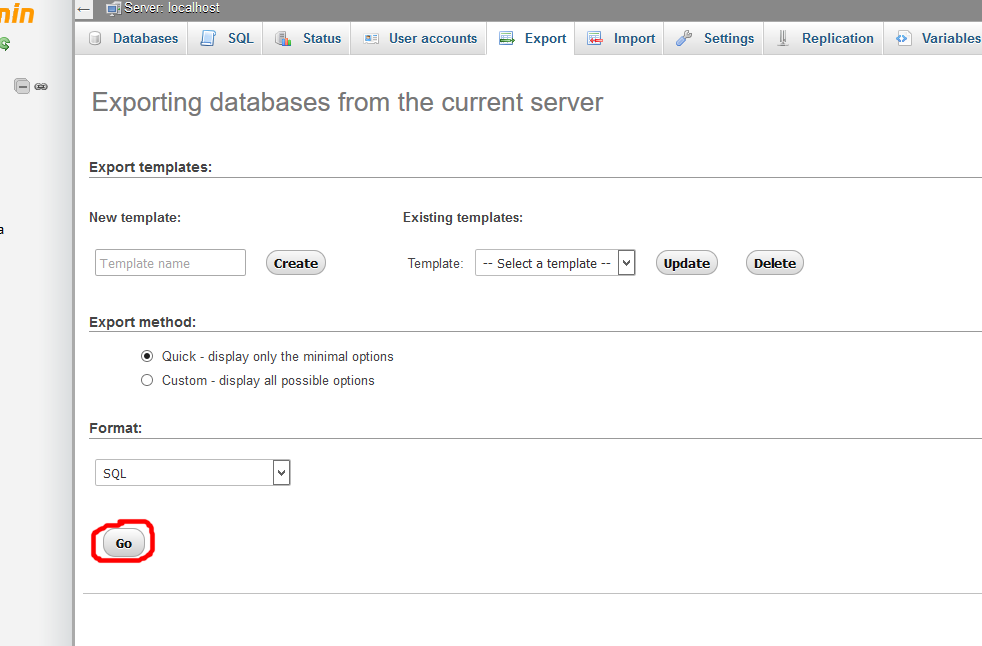
On the export screen as before click Go.
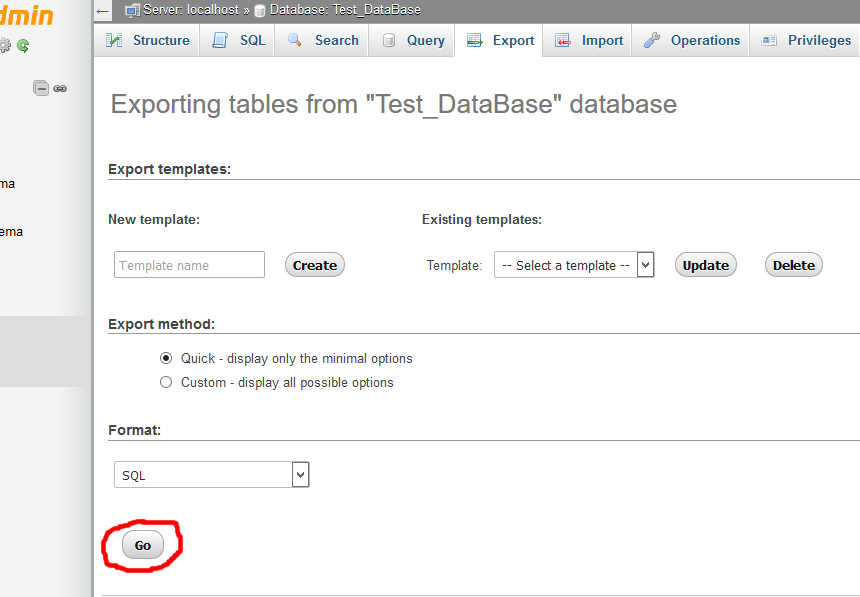
As above choose a filename and save it onto your local PC.
That’s all there is too it!
To restore a backup is a little more complicated, basically you need to first delete all the database tables you want to restore, and this is the same for restoring multiply databases or a single one.
As deleting data a quite a risky business you should think long and hard about doing this before proceeding.
At the end of the day if your backup file is corrupted and you have deleted your data then your data is more than likely lost forever.
This procedure is almost the same for all so I am going to just run you through restoring a single database only.
Ok select the database in the left pain you want to restore into.
In the right hand pain select all the tables in the database, our example has only got a single table so we can just select it but in most cases it is best to click check all.
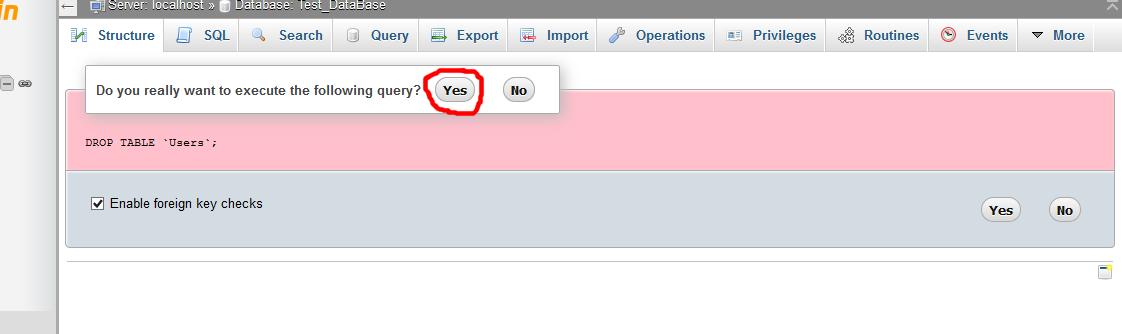
Then select drop from the drop down box.
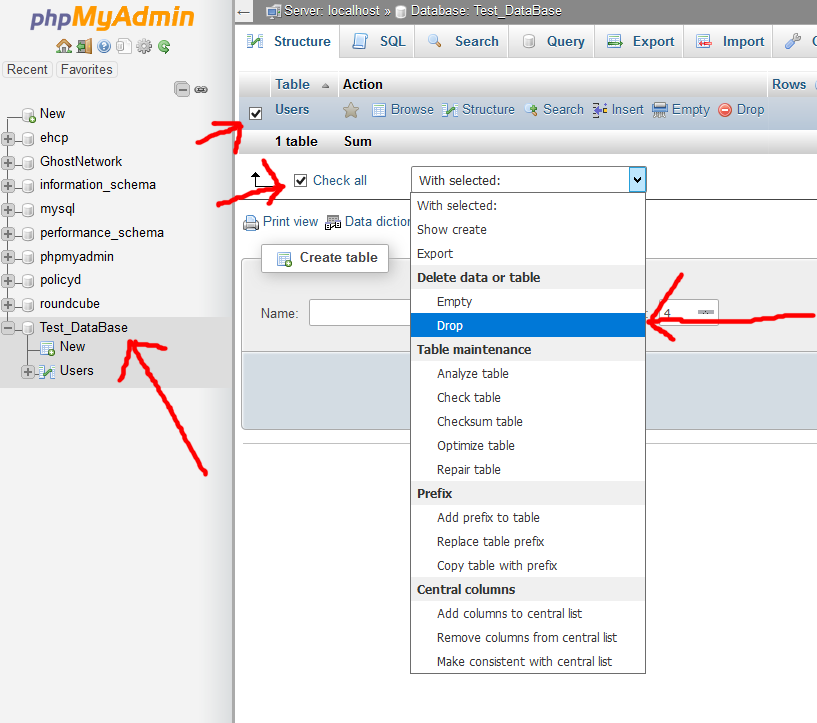
As this is a big step PHPMyAdmin will ask you if you are sure to give you a chance to change your mind, if you are 100% sure this is what you want to do then click yes.
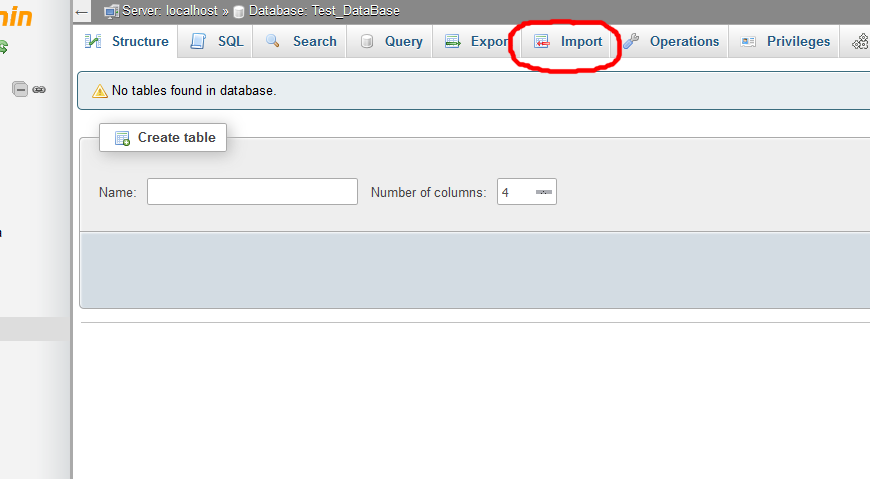
Next Click Import
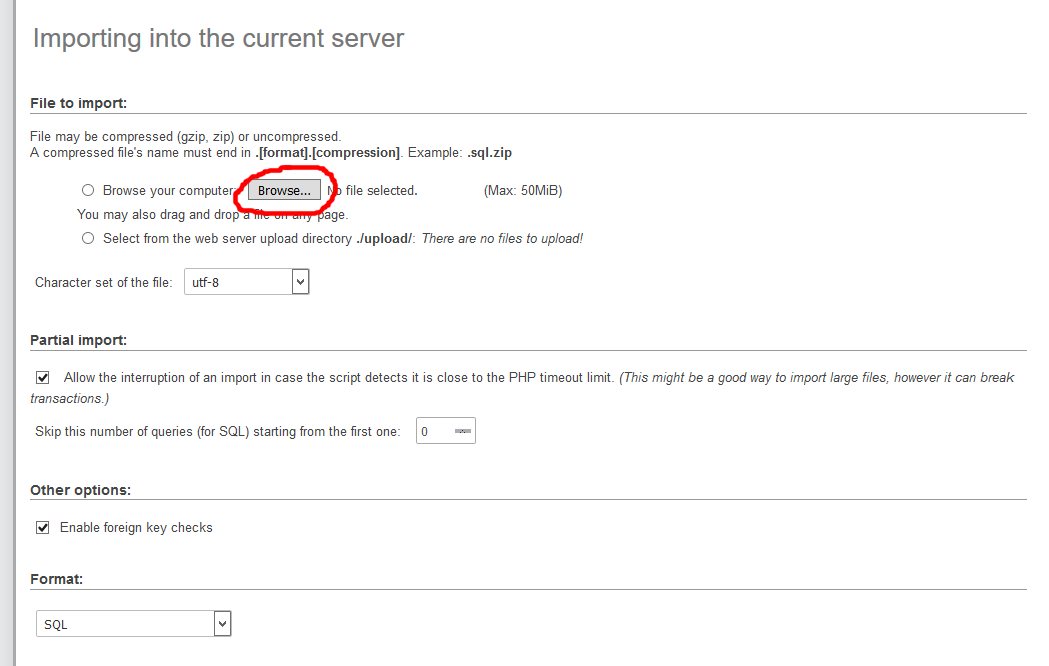
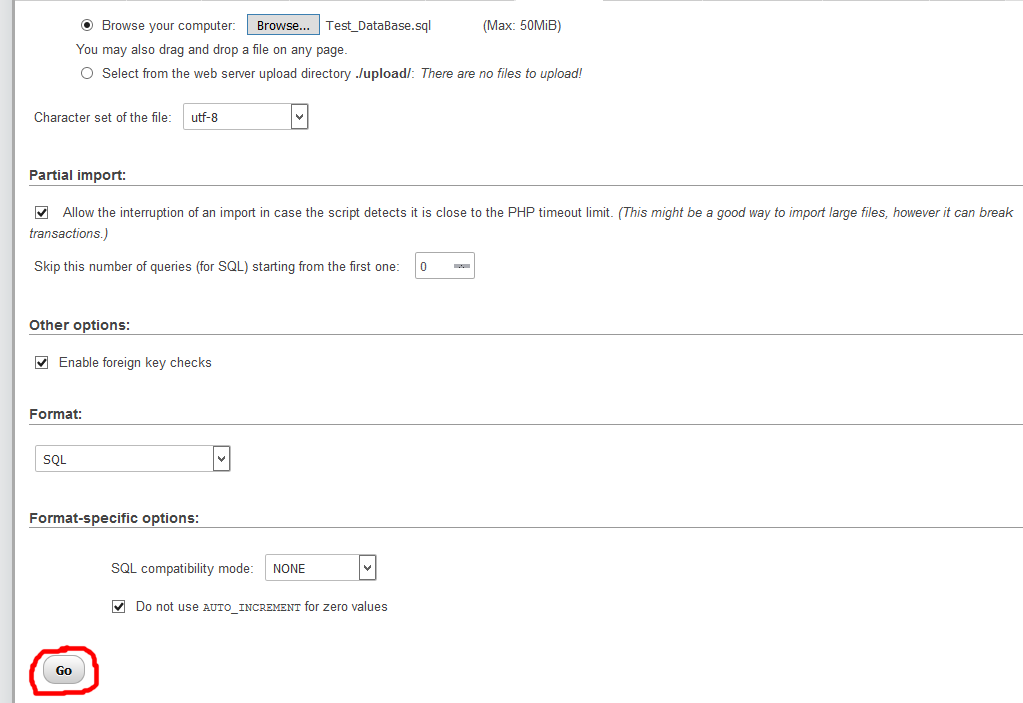
Then click browse.
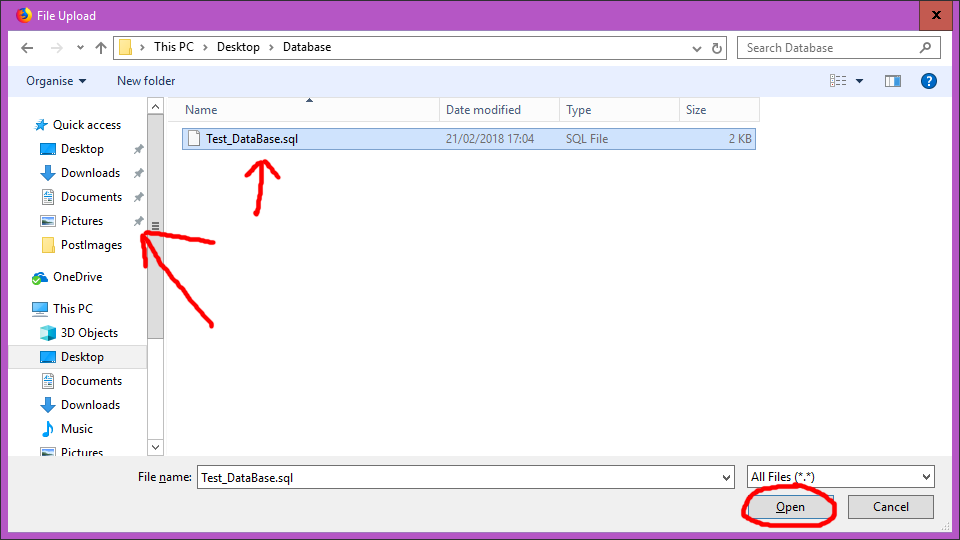
Navigate to you backup file on your PC, and click open.
Screen shot are taken using Firefox as a Browser.
Scroll down slightly and click Go.
When the import has completed you will get an on screen confirmation.
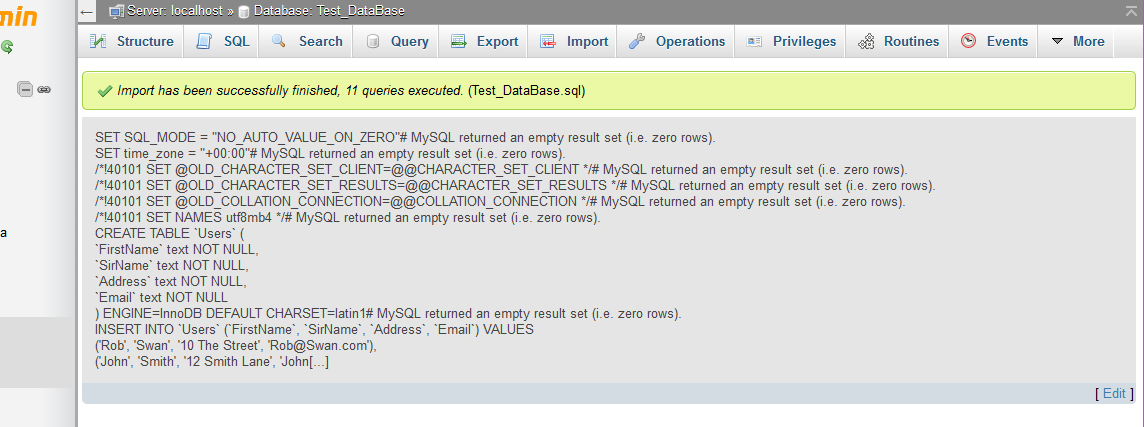
That is it job done, you can log out of PHPMyAdmin.
As I said before unless there is a specific reason why you need to use PHPMyAdmin, I would really recommend that you use the EHCP Force control panel for backup and restore processes.
The above process can be useful also for copying data from one server to another.
The final backup and restore methods I want to take you through is via the command prompt, and it is basically using a command to back up the entire hard drive into an archive (zip file).
In tests, I have found that restoring does not work. If for example, you had to reinstall your server and then you tried putting all the files back in place, however if you have a zipped copy of all the files it should make life easier.
It also means that you have a copy of everything on the server, so should you accidentally delete something, or a file or two gets corrupted, you can just copy them back in.
Again I would not advise using this method to restore, as in the event of a server crash it is best to do a full re-install and then restore from an EHCP Force backup file, but it is still worth keeping it in mind.
Ok Log onto your server using your PC and Putty.
Think of a filename for you backup, in the example I am going to use the word backup followed by the date today, so in this case my backup file will be called backup200322.tar.gz
In the command prompt we are going to use, we say the filename twice, once to tell the system which file to create and use, and then again to tell it not to actually backup the file itself.
Ok issue this command changing the filename (both instances) to whatever you want but remember the filename must end in .tar.gz
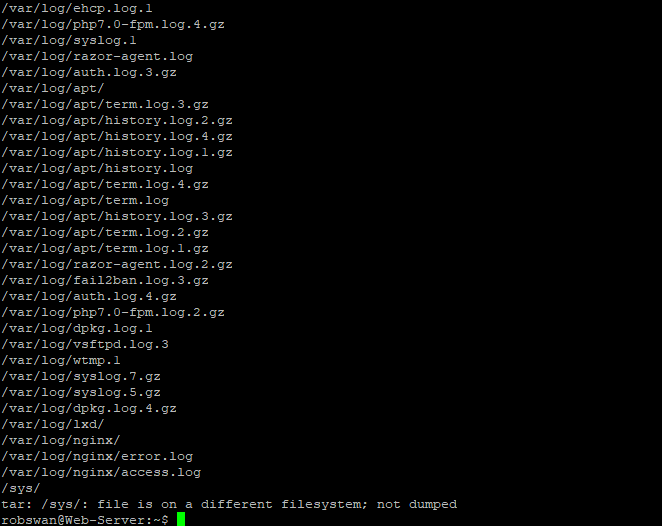
sudo tar -cvpzf backup200322.tar.gz --exclude=backup200322.tar.gz --one-file-system /

Ok after you have re-typed your password the system will start working, it will list everything on the server and add it to the file so it may take some time depending on how much data is on your server.
Finally when you get the normal prompt back it has finished.
Now it is a bit pointless leaving the backup file on the server hard drive as in the event of say a hard drive failure the backup file will be lost also.
Also this file will take up quite a lot of space so if you do this regularly you will run out of space on your server if you don’t transfer the files somewhere else.
As you may have guessed we are going to use WinSCP to copy the file onto your PC.
Ok so log on to your server using WinSCP.
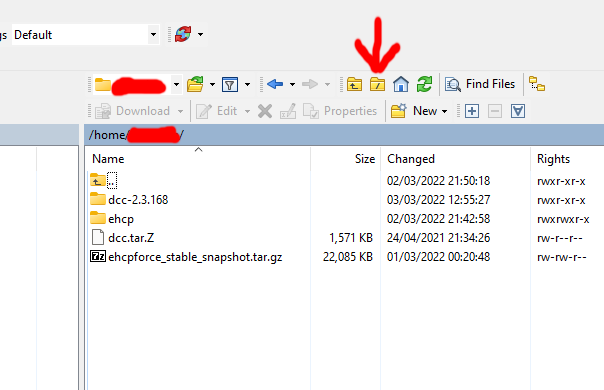
The backup file should be located in the folder /home/UserName (replace UserName with the username you use in PuTTY). Please navigate to that folder. (WinSCP may have opened in that folder anyway).
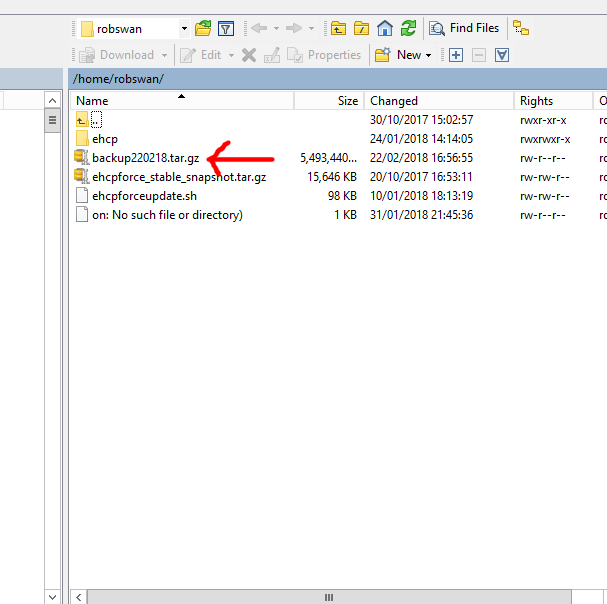
Navigate to the folder on your PC that you wish to save the backup in using the left pane.

Then drag the file from your server to your PC.
Next exercising extreme caution not to get the wrong file, delete the file from the server by selecting the file on the server (right pane) and then clicking on the cross.
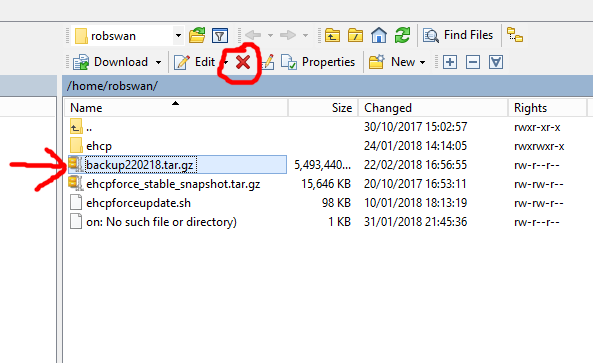
WinSCP may ask you to confirm the file deletion, if this is the case then click Yes.
Close WinSCP.
That is it we have now created a backup using the command prompt of the server.
Important Note:
As I said above restoring the entire server from this file WILL NOT WORK and will cause major corruption so I am not going to tell you how to do this.
Anyway that’s it Job Done!