Don't forget this is the point of no return for your old PC or Laptop as once this is installed recovery of previous software and data is impossible!
Ok, first off in the computer BIOS, you will need to set the boot order, this will make the system boots from the DVD or memory stick. The BIOS setup utility is DIFFERENT for a lot of PC’s and laptops, so this is just an example.
Some PC’s want you to tap the Del key to open the BIOS, where others want you to tap F2. This is done at power on, before the computer boots into its operating system.
Insert the Ubuntu server DVD or USB Stick into your old PC or Laptop that is going to be your server.
With the Ubuntu server DVD or USB Stick inserted, power the machine on and enter the BIOS setup utility.
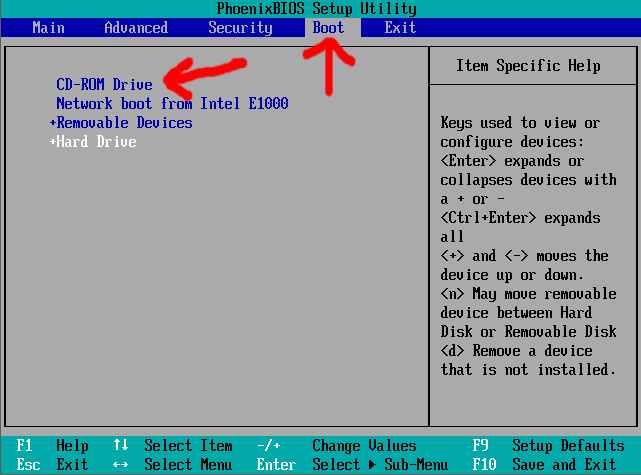
Find the boot menu within the BIOS.
Like it said, it different for most versions of the BIOS. In this example I am using the DVD version of Ubuntu server. The device you want to boot from should be FIRST in the list.
Next locate and select the option in the BIOS to "save and exit".
When it reboots, watch the screen as you may see something along the lines of “Press any key to boot form DVD” (or USB stick). If you do then obviously press any key.
The point is that, your old PC or Laptop must boot into the Ubuntu server setup routine form a DVD or USB memory stick.
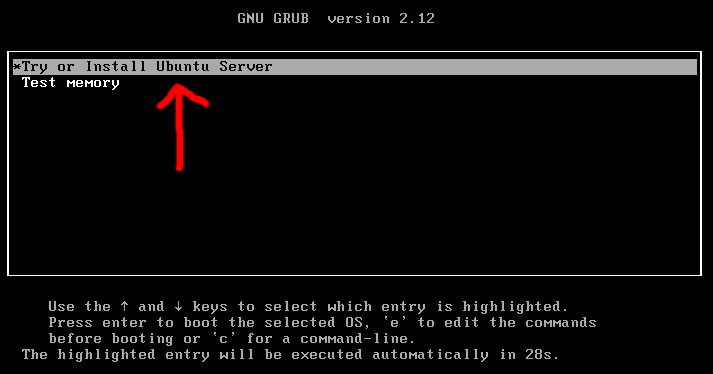
On the first screen of the installer, please make sure the first option is selected (*Try or Install Ubuntu Server).
You can use the Up and Down arrows keys on your keyboard to move the selection, and then press enter.
Next, you need to wait until the setup routine gets a few things ready.
Please ignore any errors you see on screen at this point.
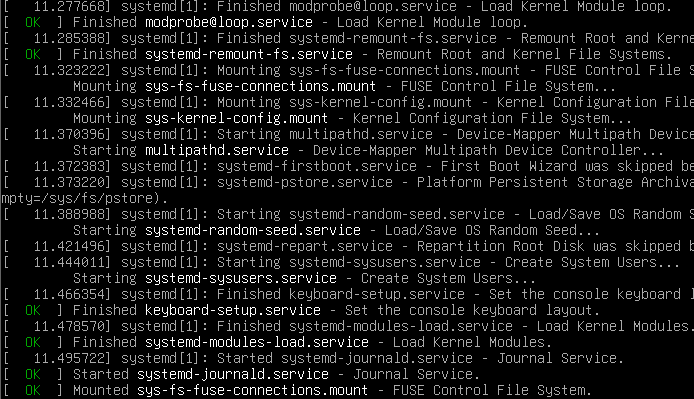
A common error that pops up is related to the CD-ROM unmounting.
You may not get any errors of course.
As I said above, Ignore any error messages.
IMPORTANT:
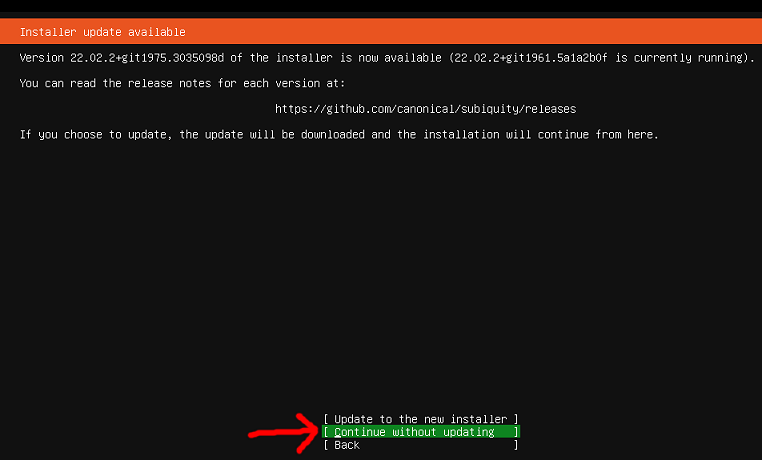
During the install process, you may be offered an installer update (if available), please DO NOT GET THIS UPDATE, select the appropriate option to skip this update if offered.
You, don’t have to worry about skipping any automatically installed updates towards the end of the install process, as these are fine to get.
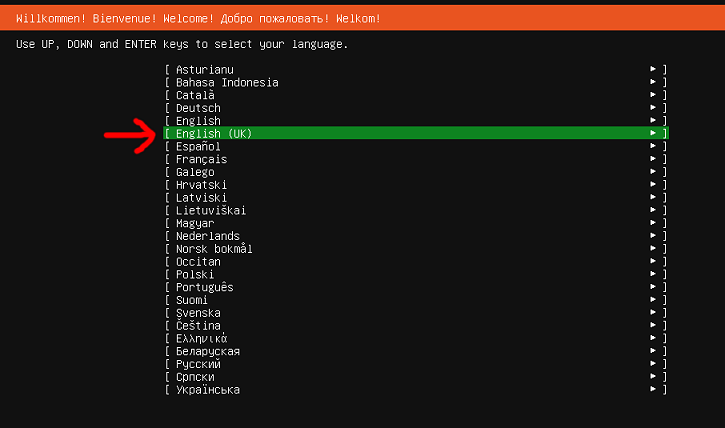
Ok, select your language, and press enter. In my case this is English (UK).
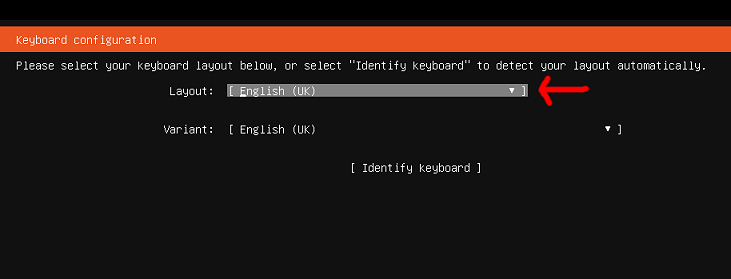
Your keyboard layout and variant should already be correct, however if not, change them using this method.
Press up arrow to highlight "Layout", then press enter.
Use the up / down arrows to select your keyboard layout and then press enter.
DO NOT SELECT "Identify Keyboard".
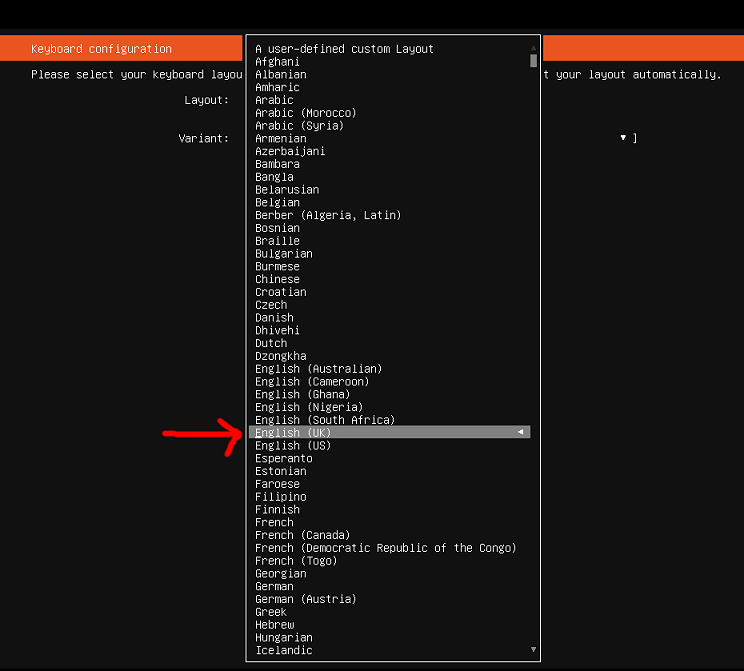
You can change the variant using the same method if required.
When both the keyboard layout and variant look correct, then use the down arrow to highlight "Done".

Press enter.
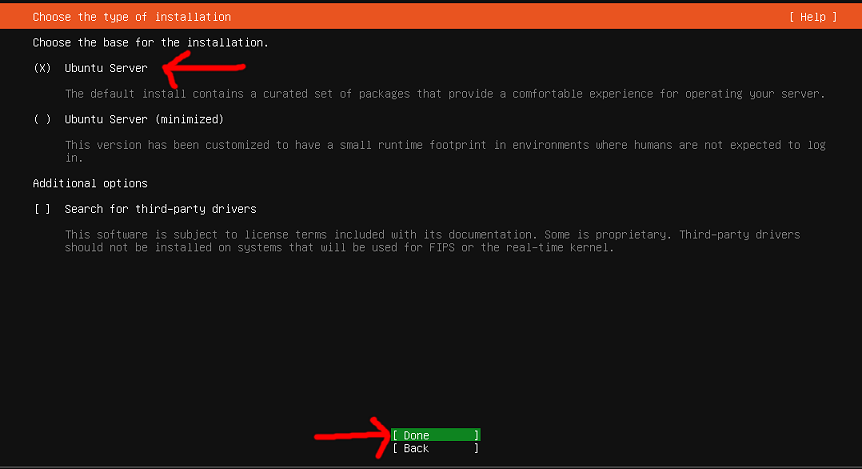
On the next screen, make sure “Ubuntu Server” is selected and not Ubuntu Server (minimised).
Ubuntu Server should be selected by default, however if you need to change the selection use the arrow keys on your keyboard to highlight the option you need and then press space.
When the selection is correct, select done and press enter.
On the Next screen, don’t change any of the network settings, just press enter to continue.
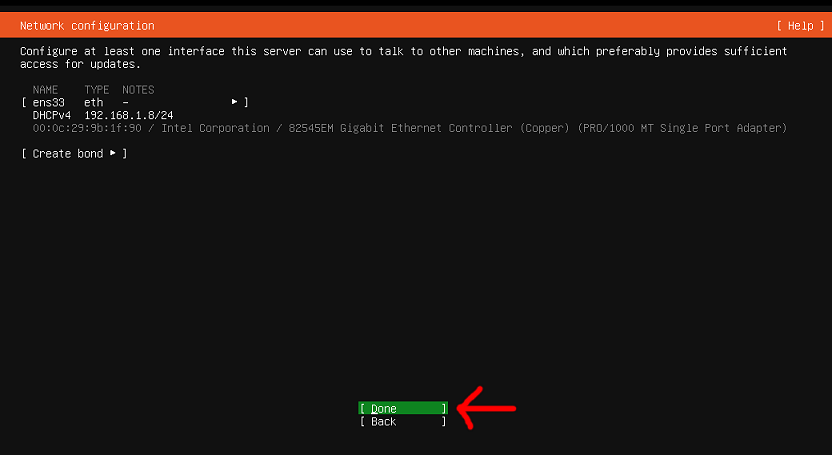
Again, on the next screen do not make any changes, just press enter to continue.

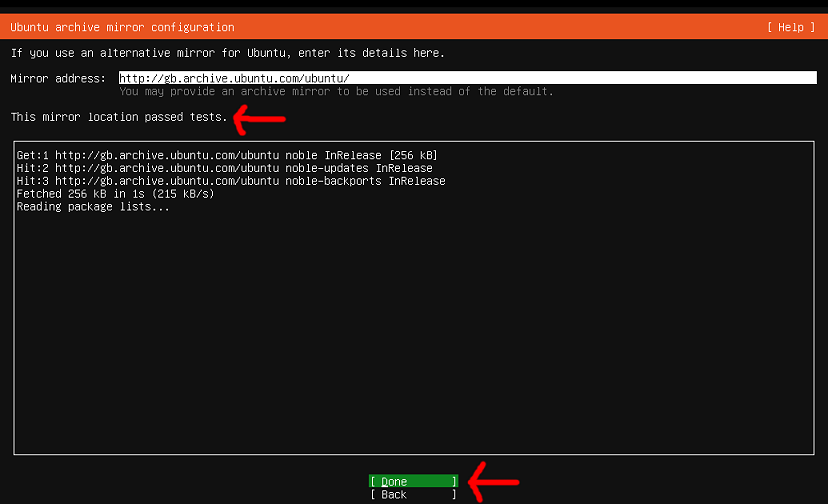
One the next screen wait until you see “This mirror location passed tests” and then press enter to continue.
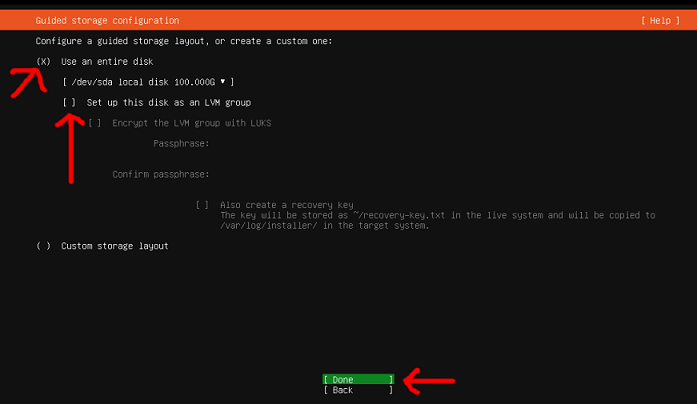
Ok, this is the point of no return, if you continue you will PERMANENTLY ERASE the entire contents of the hard drive on your old PC or Laptop, you have been warned.
Make sure there is an "X" in the box "use an entire disk" if not you need to highlight it with the arrow keys and press space to add one.
Make sure that box for “set up this disk as a LVM group” does not have an “X” in it (to remove the x, select the option with the arrow keys and then press space).
Select "Done" using the arrows keys and then press enter.
On the next screen, just press enter to continue.

Next you will be asked to confirm, as like we said before this is a destructive action that will permanently erase your entire hard drive, so if this is OK then press the down arrow to highlight "Continue" and then press enter.

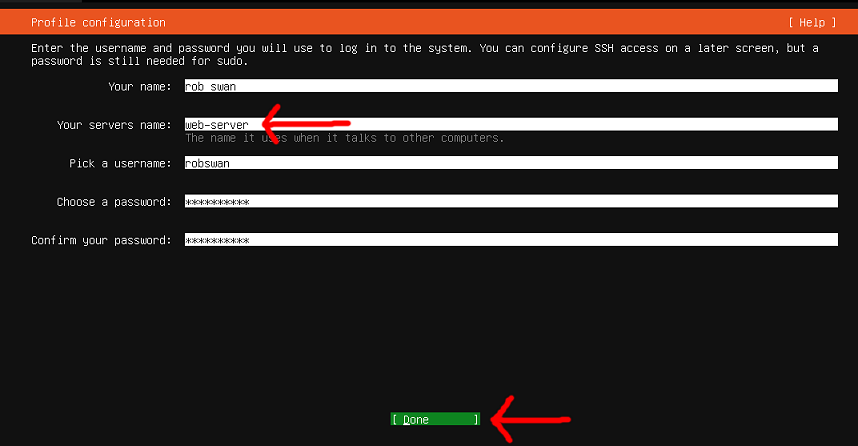
On the next screen you will be asked to fill in some details (all in lower case, except the password which is case sensitive), most things on this screen are personal preference, but for Your server’s name, I highly recommend you put in “web-server”
So, please fill in your details.
It is essential that you use a username and password you won’t forget.
When you are finished highlight "Done" (press enter to continue).
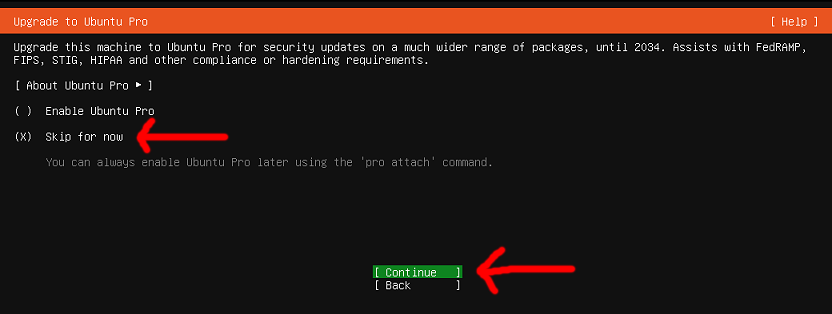
On the next screen you will be asked about Ubuntu Pro.
Making sure Skip for now is selected, just select Continue (press enter).
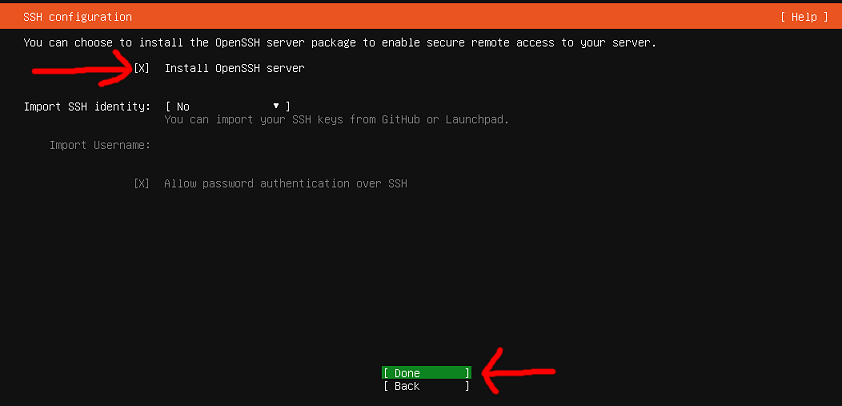
The next screen is VERY IMPORTANT, press the space bar to put an "X" in the box "Install OpenSSH server".
If you don’t put an X in the box, it is possible to install OpenSSH server from the command line after the installer has finished.
THIS POST tells how to install OpenSSH server from the command line.
Go down to "Done", press enter.
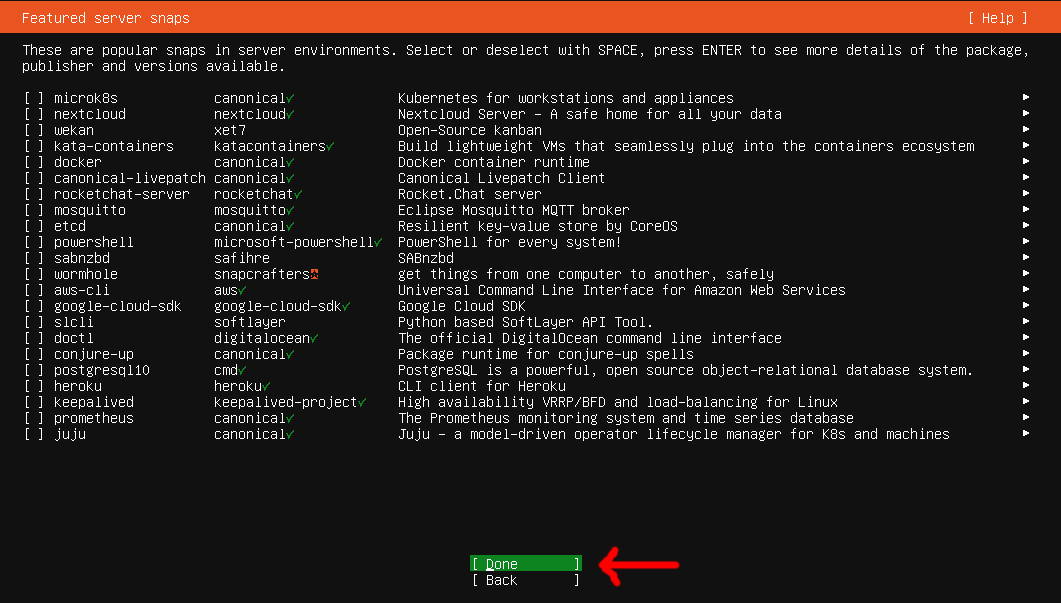
On the next screen just use the down arrow to select "Done", and then press enter.
Ubuntu server will now install, so wait for it to complete, you may have to wait for it to download and install some updates.
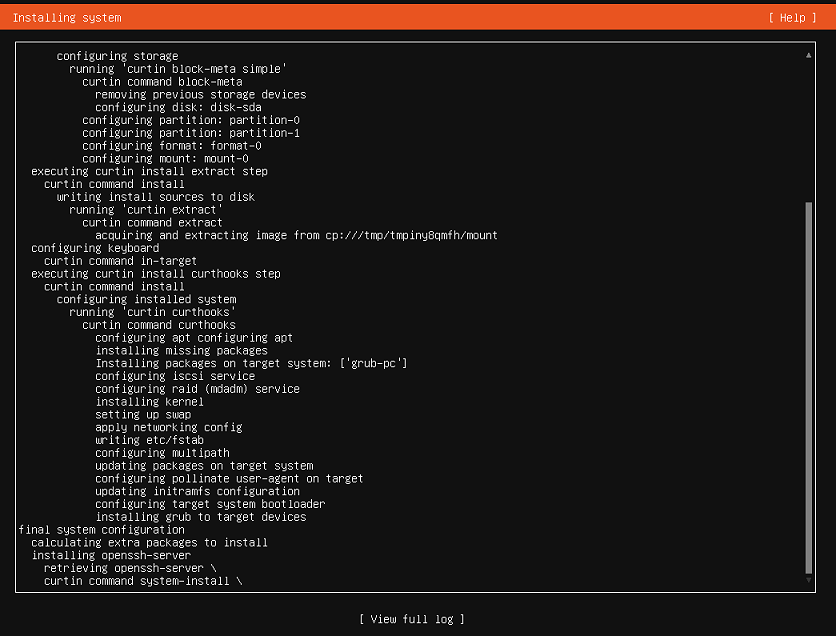
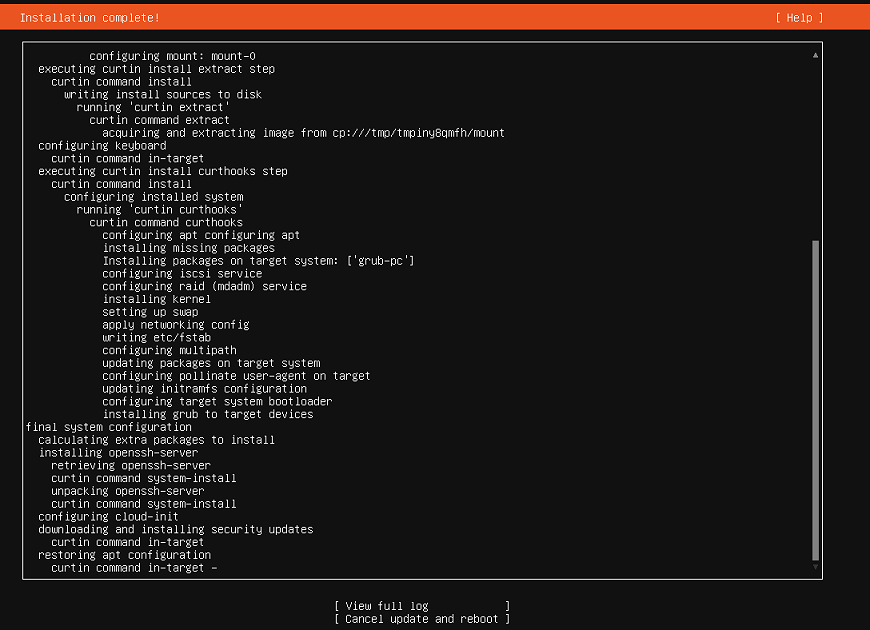
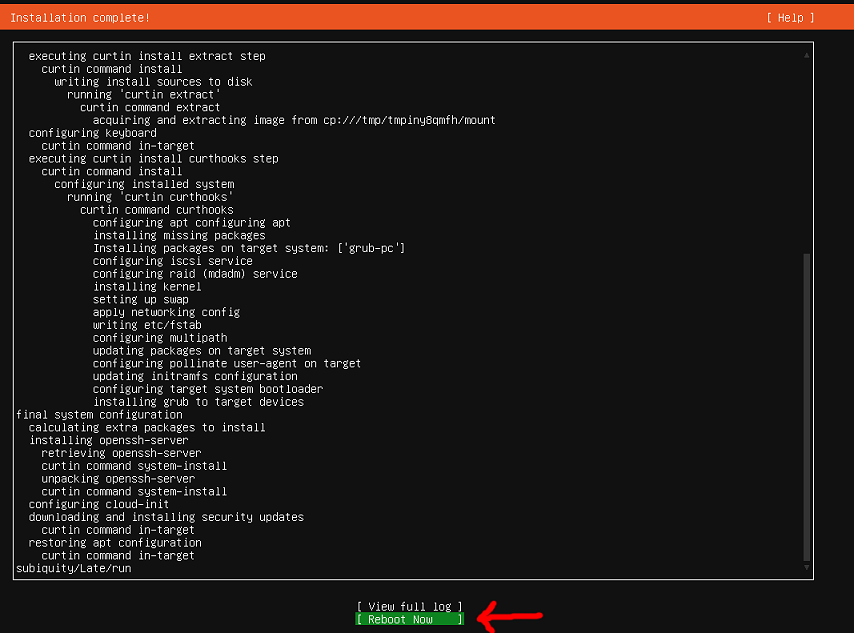
Wait until you see the option appear at the bottom to, "Reboot now".
Press the down arrow to select "Reboot" Now and then press enter.
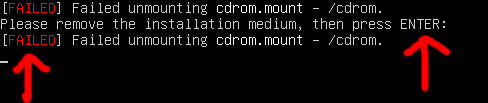
Ignore any error message about the CD-ROM and press enter to reboot.
When prompted, remove your USB stick or DVD rom form the computer (press enter).
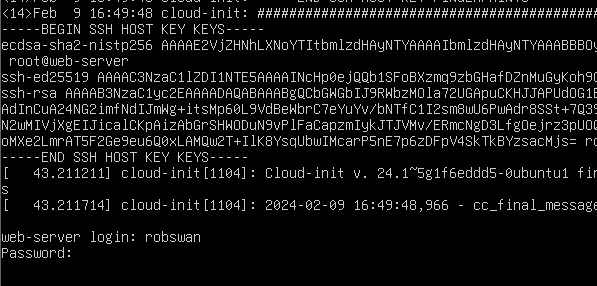
Let the system reboot, please note even if it prompts you for a user name, that does not mean it has fully loaded, so wait a few minutes until all the activity stops.
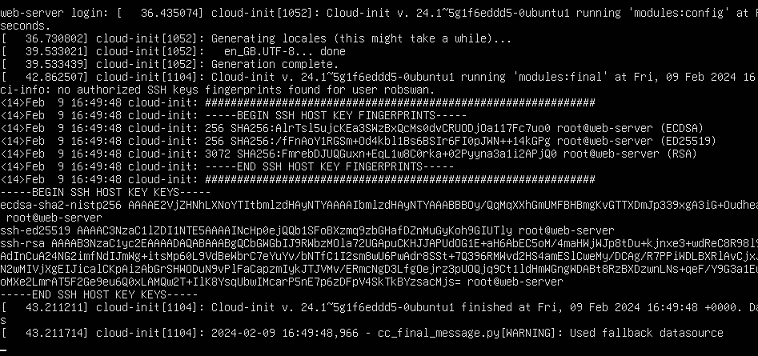
Once it looks like it has done, press enter.
To log on first type your user name, then press enter, finally type your password and press enter bearing in mind that no letters, numbers or symbols will be displayed on screen when typing your password.
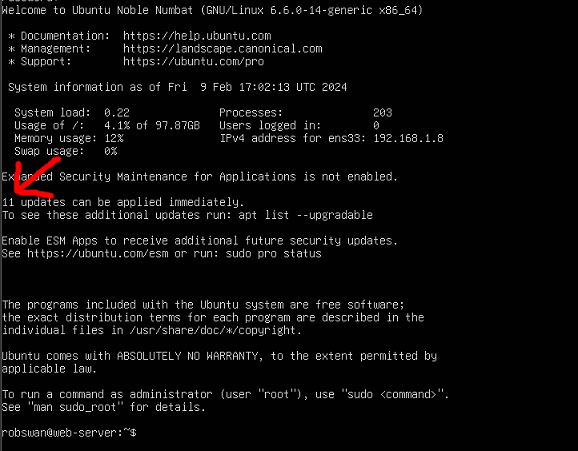
You can ignore any available updates for the time being as they will get installed, when we install EHCP force.
When we are logged in you may either continue to set it up or shut the thing down
To shut it down once logged in type:
sudo shutdown now (all lower case) (press enter).
You will be asked to confirm your password, so please do so and press enter.
your server will now shut down.
As I mentioned earlier in the guide, If there is NO WAY AT ALL you can have your server permanently connected VIA a wire, click HERE to find out how to connect wirelessly.