To fix this we can set up something called SMTP Relay.
SMTP relay means that your outgoing emails we be routed through another email server, thus fixing the problem. SMTP stands for “Simple Mail Transfer Protocol”
Now the best smtp server to use would be your ISP’s
SMTP Relay using BT (UK) (BT must be your ISP for this to work)
In my first example we are going to set this up using BT (UK), I have not tested this one however as I don’t have a BT account, so don’t have a BT user name and password.
Ok so let’s get this done.
Login to your server using your PC and PuTTY.
Enter this command.
sudo vi /etc/postfix/main.cf
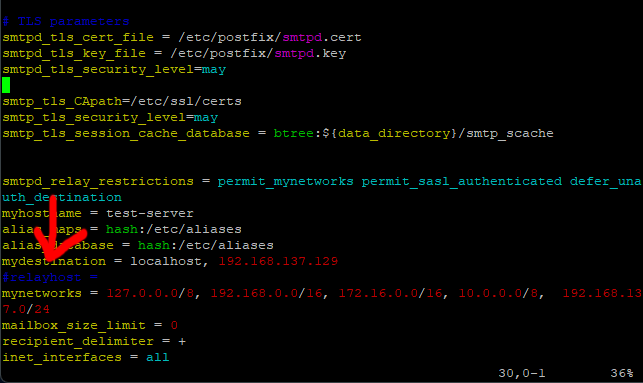
Scroll down to you see the line relayhost =
Press I for insert.
Put a hash sign in front of the line relayhost = to comment it out, so the line should look like this.
#relayhost =
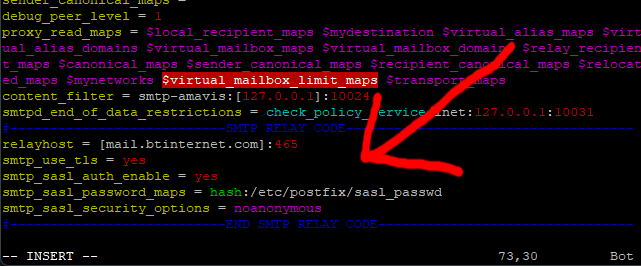
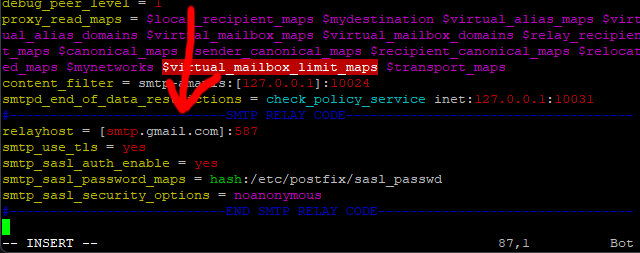
Scroll down to end of the file and paste in this code.
Code: Select all
#---------------------------SMTP RELAY CODE------------------------------------
relayhost = [mail.btinternet.com]:465
smtp_use_tls = yes
smtp_sasl_auth_enable = yes
smtp_sasl_password_maps = hash:/etc/postfix/sasl_passwd
smtp_sasl_security_options = noanonymous
#---------------------------END SMTP RELAY CODE--------------------------------
Press escape, then :w and finally :q to exit the editor.
Next, we need to tell our server the SMTP user name and password.
So enter this command.
sudo vi /etc/postfix/sasl_passwd

Press I for insert and then paste this code in.
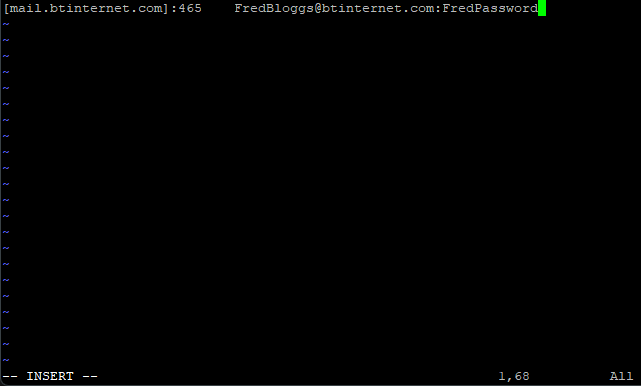
[mail.btinternet.com]:465 MyBTEmailAdress:MyBTPasswod
Replace MyBTEmailAdress with your BT email Address.
Replace MyBTPasswod with your btinternet or btopenworld password.
For example, if my BT email address is FredBloggs@btinternet.com and my BT password is FredPassword, it should look like this.
Press escape, then :w and finally :q to exit the editor.
Next enter this command.
sudo postmap /etc/postfix/sasl_passwd
Finally restart postfix with this command.
sudo service postfix restart
That should be it, all done.
SMTP Relay using KCOM (UK) (KCOM must be your ISP for this to work)
27/08/2023: Not sure how long it has been going on, but users are reporting that the KCOM smtp server has issues, so this may not work.
If your ISP is KCOM (UK), you are very lucky as this is the easiest one to set up by far.
Login to your server using your PC and PuTTY.
Enter this command.
sudo vi /etc/postfix/main.cf
Scroll down to you see the line relayhost =
Press I for insert.
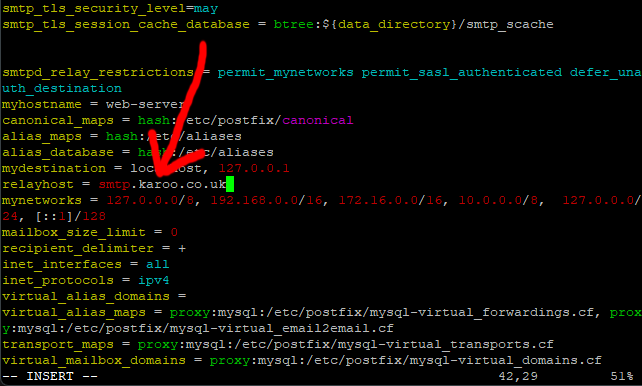
Change the line so it reads: -
relayhost = smtp.karoo.co.uk
Note: There is a space before and after the = sign.
Press escape, then :w and finally :q to exit the editor.
Restart postfix with this command.
sudo service postfix restart
That should be it, all done.
SMTP Relay using Google (GMAIL)
First off then if you don’t already have one, set yourself up a GMAIL account.
Using google as an SMTP relay server can be a bit hit and miss to honest, At best it is very slow to process emails.
Ok so let’s get this done.
Login to your server using your PC and PuTTY.
Enter this command.
sudo vi /etc/postfix/main.cf
Scroll down to you see the line relayhost =
Press I for insert.
Put a hash sign in front of the line relayhost = to comment it out, so the line should look like this.
#relayhost =
Scroll down to end of the file and paste in this code.
Code: Select all
#---------------------------SMTP RELAY CODE------------------------------------
relayhost = [smtp.gmail.com]:587
smtp_use_tls = yes
smtp_sasl_auth_enable = yes
smtp_sasl_password_maps = hash:/etc/postfix/sasl_passwd
smtp_sasl_security_options = noanonymous
#---------------------------END SMTP RELAY CODE--------------------------------
Press escape, then :w and finally :q to exit the editor.
Next, we need to tell our server the SMTP user name and password.
So enter this command.
sudo vi /etc/postfix/sasl_passwd
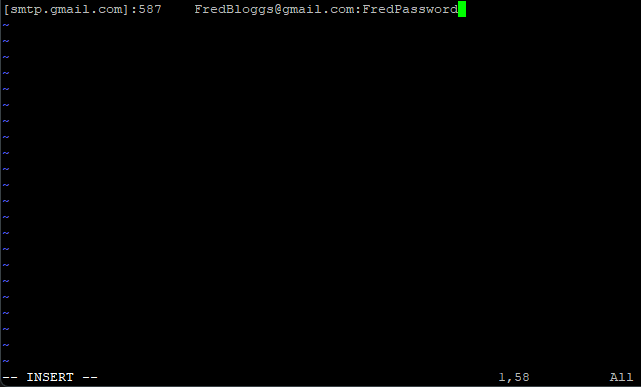
Press I for insert and then paste this code in.
[smtp.gmail.com]:587 MyGmailEmailAdress:MyGMailPasswod
Replace MyGmailEmailAdress with your Gmail email Address.
Replace MyGMailPasswod with your Gmail Password.
For example, if my Gmail email address is FredBloggs@gmail.com and my Gmail password is FredPassword, it should look like this.
Press escape, then :w and finally :q to exit the editor.
Next enter this command.
sudo postmap /etc/postfix/sasl_passwd
Finally restart postfix with this command.
sudo service postfix restart
That should be it, all done.
You may receive a security warning form google the first time you send and email about a login to your account, if you do just tell google “Yes, this was me”
To test you can login in to roundcube webmail and send yourself a test email!!!
Some Final Notes on SMTP Relay.
Most ISP SMTP servers require a password, so that been the case you can set yours up by following the BT section of this post, you just need to change the following.
If the first line of code that we put into the /etc/postfix/main.cf file, you need to change the port number and SMTP server name, this will only work however if it uses port number 587 or 465. Most SMTP servers will work on port 587.
The syntax for that line is this.
relayhost = [SMTP SERVER NAME]:PORT NUMBER
If you do change this line, it needs to match in the file /etc/postfix/sasl_passwd.
For example, if this is the line in the /etc/postfix/main.cf file look like this.
relayhost = [smtp.fredbloggs.co.uk]:587
The file /etc/postfix/sasl_passwd would look like this.
[smtp.fredbloggs.co.uk]:587 FredBlogsUserName:FredBloggsPassword
The syntax for that line is this.
[SMTP SERVER NAME]:PORT USERNAME:PASSWORD
If your ISP’s SMTP server uses port 25, but does require a user name and password, within the code in the /etc/postfix/main.cf file you should also change the line.
smtp_use_tls = yes
To.
smtp_use_tls = no
Also be aware as 25 is the standard non SSL/TLS port number they may not specify a port number at all, if they use port 25.
If like the UK ISP KCOM, your ISP’S smtp server does not need a user name or password and does not specify a port number (they only check done is that you connected to the Internet via them). Then follow the KCOM section of this post.
Just change the name of the smtp server in the line relayhost = smtp.karoo.co.uk, to the name of your ISP’S server.
For example relayhost = smtp.fredbloggs.co.uk (replace smtp.fredbloggs.co.uk with the name of your ISP’S smtp server).