I do not like web based email so how can I download my emails to a local email client like MS Outlook?
Posted: Tue Oct 26, 2021 11:11 pm
I only currently have MS office 2010 therefore I will take you through the settings for MS Outlook 2010, for other version or different mail clients applications the setting are the same but you may need to consult google on how to input them.
NOTE:-
On newer version of MS office (Outlook), you cannot set this up from within Outlook itself.
For these versions, you can access the settings via the windows control panel.
Control Panel >>>>Mail (Microsoft Outlook)>>>>> Email Accounts.
Now there a two different ways to do this either using IMAP or POP access, the web-based email uses IMAP.
I am going to tell you how to set up POP access locally on your PC as this is how I would do it.
The mail server name is mail.MyDomainName.co.uk (replace MyDomainName.co.uk with your actual domain name), the user names and password are the same one you use for RoundCube webmail.
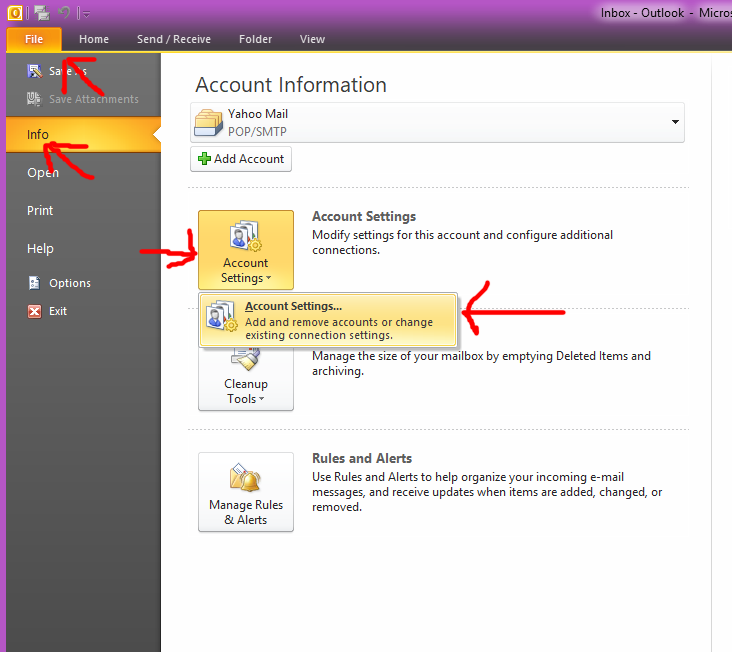
OK assuming that you already have outlook running, go to File >> Info >> Account Settings >> Account Settings….
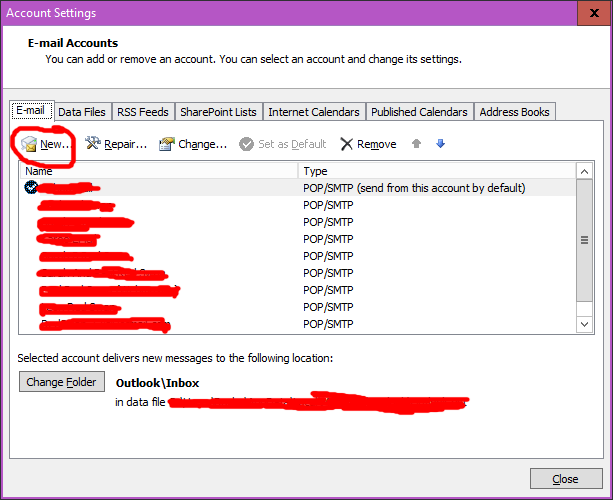
Next Click New
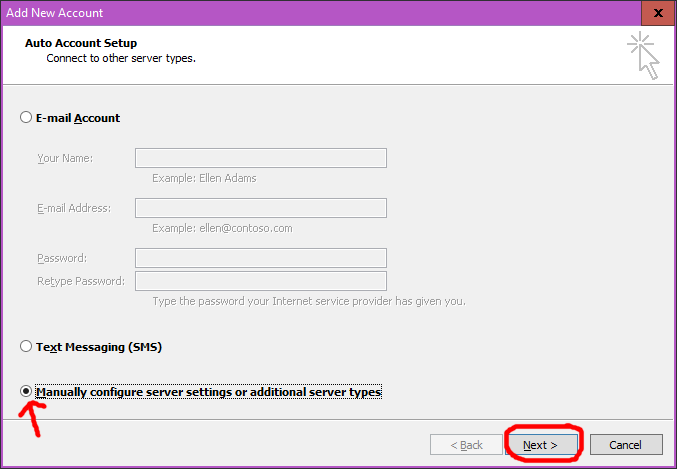
Select Manually configure server settings or additional server types, click next.
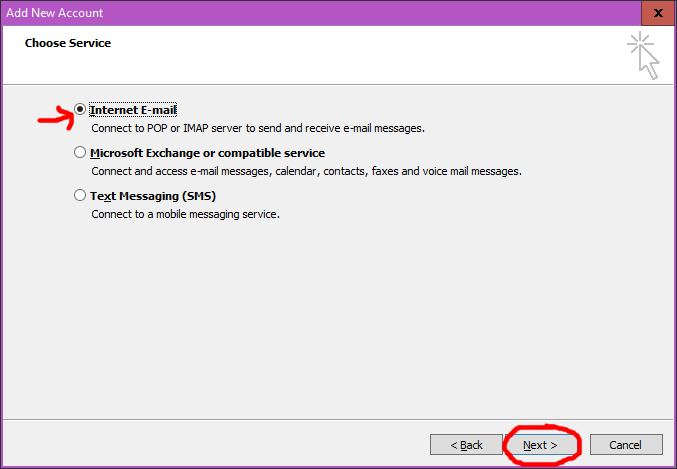
Next its Internet E-mail and then next.
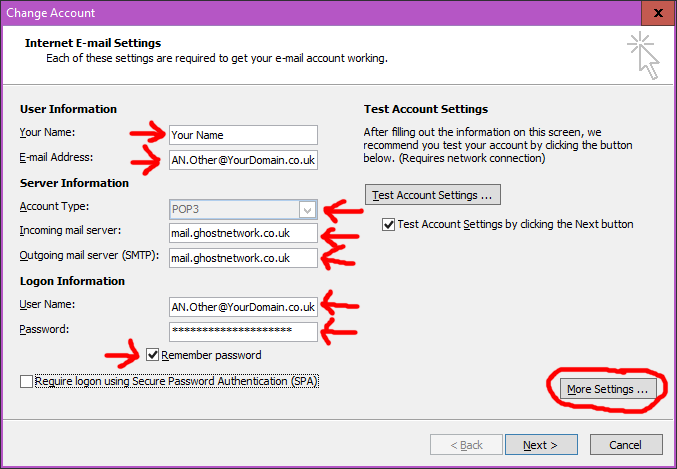
Enter your name, and the email address you are setting up.
The Account Type is POP3 (default)
Both the incoming mail server and outgoing mail servers are mail.MyDomainName.co.uk (replace MyDomainName.co.uk with your actual domain name).
The user name is your email address and the password is your mail password as in RoundCube webmail.
Remember password should be checked.
Then Click More Settings …
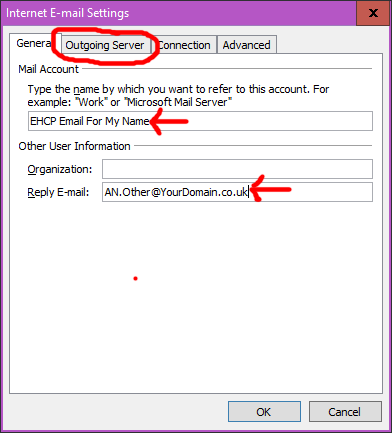
Ok fist on the General Tab, Mail Account is set to your email address by default, you can leave it or change it to a more meaningful name like in my example, Put your email address in Reply Email.
Next click on the Outgoing Server tab.
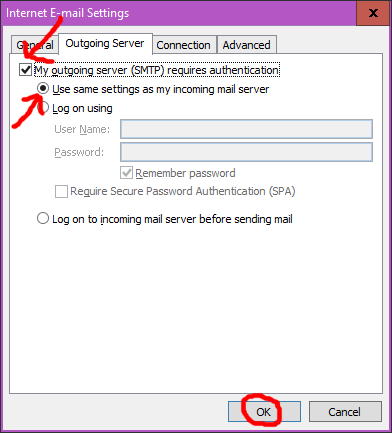
Check the box My outgoing server (SMTP) requires authentication.
And select Use same settings as my incoming server.
Then click OK.
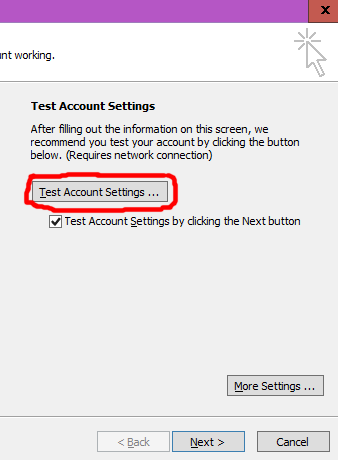
Next click Test Account Settings.
MS Outlook will now test your settings, if you have entered everything correctly this should pass with no problems.
Click Close.
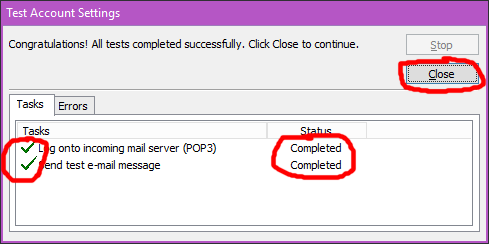
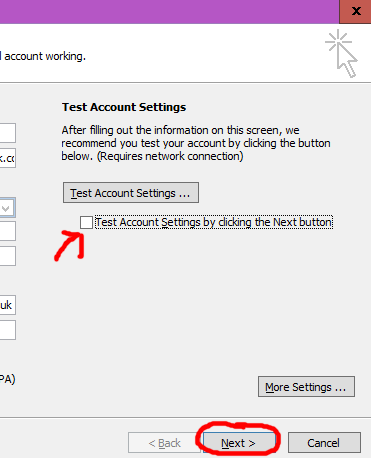
Uncheck Test Account Settings by clicking the Next Button, then click Next.
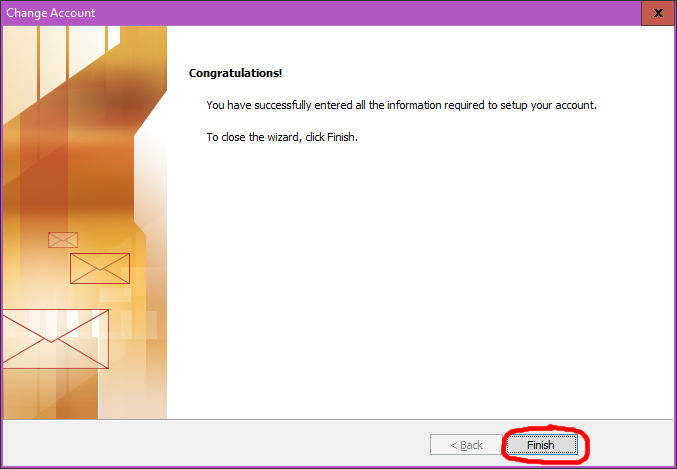
Click Finish.
Finally click close.
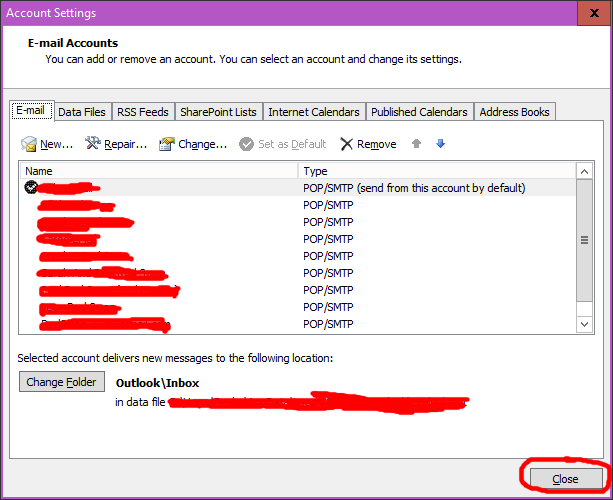
That’s it Job Done!
NOTE:-
On newer version of MS office (Outlook), you cannot set this up from within Outlook itself.
For these versions, you can access the settings via the windows control panel.
Control Panel >>>>Mail (Microsoft Outlook)>>>>> Email Accounts.
Now there a two different ways to do this either using IMAP or POP access, the web-based email uses IMAP.
I am going to tell you how to set up POP access locally on your PC as this is how I would do it.
The mail server name is mail.MyDomainName.co.uk (replace MyDomainName.co.uk with your actual domain name), the user names and password are the same one you use for RoundCube webmail.
OK assuming that you already have outlook running, go to File >> Info >> Account Settings >> Account Settings….

Next Click New

Select Manually configure server settings or additional server types, click next.

Next its Internet E-mail and then next.

Enter your name, and the email address you are setting up.
The Account Type is POP3 (default)
Both the incoming mail server and outgoing mail servers are mail.MyDomainName.co.uk (replace MyDomainName.co.uk with your actual domain name).
The user name is your email address and the password is your mail password as in RoundCube webmail.
Remember password should be checked.
Then Click More Settings …

Ok fist on the General Tab, Mail Account is set to your email address by default, you can leave it or change it to a more meaningful name like in my example, Put your email address in Reply Email.
Next click on the Outgoing Server tab.

Check the box My outgoing server (SMTP) requires authentication.
And select Use same settings as my incoming server.
Then click OK.

Next click Test Account Settings.

MS Outlook will now test your settings, if you have entered everything correctly this should pass with no problems.
Click Close.

Uncheck Test Account Settings by clicking the Next Button, then click Next.

Click Finish.

Finally click close.

That’s it Job Done!